HP Integrity rx2620 Installation Guide, Third Edition - HP Integrity rx2620 (A - Page 43
Installing Additional PCI Cards, Inserting DIMM into Slot
 |
View all HP Integrity rx2620 manuals
Add to My Manuals
Save this manual to your list of manuals |
Page 43 highlights
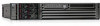
Installing Additional Components Installing Additional PCI Cards Step 3. Hold the memory module by the left and right edges and insert into the socket. The memory modules are keyed and can only be inserted in one direction. When the module is correctly seated, the retainer clips will return to their fully upright position. Snap the clips firmly into place to properly seat the DIMMs. Step 4. Gently and evenly push on each side of the DIMM until it seats in the socket. Ensure the extraction levers are in the closed position. Figure 3-11 shows how to install a DIMM. Figure 3-11 Inserting DIMM into Slot Step 5. Replace the memory airflow guide. See Figure 3-10. Step 6. Install the top metal cover, unless you are installing more components. See "Replacing the Top Metal Cover" on page 36. Installing Additional PCI Cards Accessory cards are installed in a removable PCI cage. This section explains how to access the PCI cage, as well as how to install accessory cards. WARNING Ensure that the system is powered down and all power sources have been disconnected from the server prior to removing or replacing a processor. Voltages are present at various locations within the server whenever an AC power source is connected. This voltage is present even when the main power switch is in the off position. Failure to observe this warning could result in personal injury or damage to equipment. Chapter 3 43
-
 1
1 -
2
-
3
-
4
-
5
-
6
-
7
-
8
-
9
-
10
-
11
-
12
-
13
-
14
-
15
-
16
-
17
-
18
-
19
-
20
-
21
-
22
-
23
-
24
-
25
-
26
-
27
-
28
-
29
-
30
-
31
-
32
-
33
-
34
-
35
-
36
-
37
-
 38
38 -
 39
39 -
 40
40 -
 41
41 -
 42
42 -
 43
43 -
 44
44 -
 45
45 -
 46
46 -
 47
47 -
 48
48 -
49
-
50
-
51
-
52
-
53
-
54
-
55
-
56
-
57
-
58
-
59
-
60
-
61
-
62
-
63
-
64
-
65
-
66
-
67
-
68
-
69
-
70
-
71
-
72
-
73
-
74
-
75
-
76
-
77
-
78
-
79
-
80
-
81
-
82
-
83
-
84
-
85
-
86
-
87
-
88
-
89
-
90
-
91
-
92
-
93
-
94
-
95
-
96
-
97
-
98
-
99
-
100
-
101
-
102
-
103
-
104
-
105
-
106
-
107
-
108
-
109
 |
 |
