IBM JS20 Hardware Maintenance Manual - Page 100
Completing, installation, Installing, blade-server, bezel, assembly
 |
UPC - 000435230263
View all IBM JS20 manuals
Add to My Manuals
Save this manual to your list of manuals |
Page 100 highlights
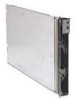
Note: These checkpoint codes are described in Chapter 7, "Diagnostics," on page 37. 17. Reset the system date and time through the operating system that you installed. For additional information, see your operating-system documentation. The system-board assembly replacement procedure is now complete. Continue with "Input/output connectors and devices" on page 92. Completing the installation To complete the installation, perform the following tasks, if you have not already done so. 1. Install the blade-server bezel assembly on the blade server (see "Installing the blade-server bezel assembly"). 2. Close the blade server cover (see "Closing the blade server cover" on page 92). Statement 21: CAUTION: Hazardous energy is present when the blade server is connected to the power source. Always replace the blade cover before installing the blade server. 3. Reinstall the blade server into the BladeCenter unit. 4. Turn on the blade server (see "Turning on the blade server" on page 13). 5. After you replace the battery or the system-board assembly, reset the system date and time through the operating system that you installed. For additional information, see your operating-system documentation. Note: If you have just connected the power cords of the BladeCenter unit to electrical outlets, you will have to wait until the power-on LED on the blade server flashes slowly before pressing the power-control button on a blade server. Installing the blade-server bezel assembly The following illustration shows how to install the bezel assembly on the blade server. 90 BladeCenter JS20 Type 8842: Hardware Maintenance Manual and Troubleshooting Guide
-
 1
1 -
2
-
3
-
4
-
5
-
6
-
7
-
8
-
9
-
10
-
11
-
12
-
13
-
14
-
15
-
16
-
17
-
18
-
19
-
20
-
21
-
22
-
23
-
24
-
25
-
26
-
27
-
28
-
29
-
30
-
31
-
32
-
33
-
34
-
35
-
36
-
37
-
38
-
39
-
40
-
41
-
42
-
43
-
44
-
45
-
46
-
47
-
48
-
49
-
50
-
51
-
52
-
53
-
54
-
55
-
56
-
57
-
58
-
59
-
60
-
61
-
62
-
63
-
64
-
65
-
66
-
67
-
68
-
69
-
70
-
71
-
72
-
73
-
74
-
75
-
76
-
77
-
78
-
79
-
80
-
81
-
82
-
83
-
84
-
85
-
86
-
87
-
88
-
89
-
90
-
91
-
92
-
93
-
94
-
 95
95 -
 96
96 -
 97
97 -
 98
98 -
 99
99 -
 100
100 -
 101
101 -
 102
102 -
 103
103 -
 104
104 -
 105
105 -
106
-
107
-
108
-
109
-
110
-
111
-
112
-
113
-
114
-
115
-
116
-
117
-
118
-
119
-
120
-
121
-
122
-
123
-
124
-
125
-
126
-
127
-
128
-
129
-
130
-
131
-
132
-
133
-
134
-
135
-
136
-
137
-
138
-
139
-
140
-
141
-
142
-
143
-
144
-
145
-
146
-
147
-
148
-
149
-
150
-
151
-
152
-
153
-
154
-
155
-
156
-
157
-
158
-
159
-
160
-
161
-
162
-
163
-
164
-
165
-
166
-
167
-
168
-
169
-
170
-
171
-
172
-
173
-
174
-
175
-
176
-
177
-
178
-
179
-
180
-
181
-
182
-
183
-
184
-
185
-
186
-
187
-
188
-
189
-
190
-
191
-
192
-
193
-
194
-
195
-
196
-
197
-
198
-
199
-
200
-
201
-
202
-
203
-
204
-
205
-
206
-
207
-
208
-
209
-
210
-
211
-
212
-
213
-
214
-
215
-
216
-
217
-
218
 |
 |
