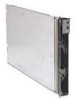
IBM JS20 Hardware Maintenance Manual - Page 95
fingernail
 |
UPC - 000435230263
View all IBM JS20 manuals
Add to My Manuals
Save this manual to your list of manuals |
Page 95 highlights
8. Remove the battery: a. Use your finger to press down on one side of the battery; then, slide the battery out from its socket. The spring mechanism will push the battery out toward you as you slide it from the socket. Note: You might need to lift the battery clip slightly with your fingernail to make it easier to slide the battery. b. Use your thumb and index finger to pull the battery from under the battery clip. Note: After you remove the battery, press gently on the clip to make sure that the battery clip is touching the base of the battery socket. 9. Insert the new battery: a. Tilt the battery so that you can insert it into the socket, under the battery clip. Make sure that the side with the positive (+) symbol is facing up. b. As you slide it under the battery clip, press the battery down into the socket. 10. Close the blade server cover (see "Closing the blade server cover" on page 92). Statement 21: CAUTION: Hazardous energy is present when the blade server is connected to the power source. Always replace the blade cover before installing the blade server. 11. Reinstall the blade server into the BladeCenter unit. 12. n on the blade server (see "Turning on the blade server" on page 13). 13. Reset the system date and time through the operating system that you installed. For additional information, see your operating-system documentation. Chapter 9. Installing options 85
-
 1
1 -
2
-
3
-
4
-
5
-
6
-
7
-
8
-
9
-
10
-
11
-
12
-
13
-
14
-
15
-
16
-
17
-
18
-
19
-
20
-
21
-
22
-
23
-
24
-
25
-
26
-
27
-
28
-
29
-
30
-
31
-
32
-
33
-
34
-
35
-
36
-
37
-
38
-
39
-
40
-
41
-
42
-
43
-
44
-
45
-
46
-
47
-
48
-
49
-
50
-
51
-
52
-
53
-
54
-
55
-
56
-
57
-
58
-
59
-
60
-
61
-
62
-
63
-
64
-
65
-
66
-
67
-
68
-
69
-
70
-
71
-
72
-
73
-
74
-
75
-
76
-
77
-
78
-
79
-
80
-
81
-
82
-
83
-
84
-
85
-
86
-
87
-
88
-
89
-
 90
90 -
 91
91 -
 92
92 -
 93
93 -
 94
94 -
 95
95 -
 96
96 -
 97
97 -
 98
98 -
 99
99 -
 100
100 -
101
-
102
-
103
-
104
-
105
-
106
-
107
-
108
-
109
-
110
-
111
-
112
-
113
-
114
-
115
-
116
-
117
-
118
-
119
-
120
-
121
-
122
-
123
-
124
-
125
-
126
-
127
-
128
-
129
-
130
-
131
-
132
-
133
-
134
-
135
-
136
-
137
-
138
-
139
-
140
-
141
-
142
-
143
-
144
-
145
-
146
-
147
-
148
-
149
-
150
-
151
-
152
-
153
-
154
-
155
-
156
-
157
-
158
-
159
-
160
-
161
-
162
-
163
-
164
-
165
-
166
-
167
-
168
-
169
-
170
-
171
-
172
-
173
-
174
-
175
-
176
-
177
-
178
-
179
-
180
-
181
-
182
-
183
-
184
-
185
-
186
-
187
-
188
-
189
-
190
-
191
-
192
-
193
-
194
-
195
-
196
-
197
-
198
-
199
-
200
-
201
-
202
-
203
-
204
-
205
-
206
-
207
-
208
-
209
-
210
-
211
-
212
-
213
-
214
-
215
-
216
-
217
-
218
 |
 |
