Konica Minolta C83hc High Chroma IC-307 User Guide
Konica Minolta C83hc High Chroma Manual
 |
View all Konica Minolta C83hc High Chroma manuals
Add to My Manuals
Save this manual to your list of manuals |
Konica Minolta C83hc High Chroma manual content summary:
- Konica Minolta C83hc High Chroma | IC-307 User Guide - Page 1
User Guide English IC-307 Print Controller, Powered by Creo Color Server Technology Version 1.1 731-02039A-EN Rev A - Konica Minolta C83hc High Chroma | IC-307 User Guide - Page 2
- Konica Minolta C83hc High Chroma | IC-307 User Guide - Page 3
to take appropriate measures. FCC compliance Creo equipment complies with the requirements in part 15 of the FCC Rules for a Class B digital device. Class B Equipment (For Home Use Broadcasting & Communication Equipment) This equipment is home use (Class B) electromagnetic wave suitability equipment - Konica Minolta C83hc High Chroma | IC-307 User Guide - Page 4
of your products, software or data; (iv) statements or conduct of any third party; (v) any other matter relating to the product, software, or services. The text and drawings herein are for illustration and reference only. The specifications on which they are based are subject to change. Kodak may - Konica Minolta C83hc High Chroma | IC-307 User Guide - Page 5
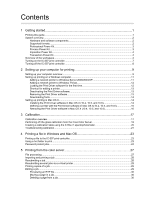
started...1 Printing this guide...1 System overview...2 Hardware and software components 2 Supported formats...2 Professional Power Kit Server 18 Creating a calibration table using the X-Rite i1 spectrophotometer 20 Troubleshooting calibration...21 4 Printing a file in Windows and Mac OS 23 - Konica Minolta C83hc High Chroma | IC-307 User Guide - Page 6
vi IC-307 Print Controller, Powered by Creo Color Server Technology 1.1 User Guide Merging pages into a job...30 Rotating pages 180°...31 Replacing pages...32 Finding the CMYK values of a specific area 32 Verifying the content of the - Konica Minolta C83hc High Chroma | IC-307 User Guide - Page 7
Windows 103 Installing the Remote Scan Application in the Mac OS 104 Creating a scan box...105 Scanning a document on the 80 PPM press and 70/60 PPM press 108 Saving scanned jobs to your computer 108 10 Variable data printing jobs 111 Variable data printing jobs...111 VDP document formats...111 - Konica Minolta C83hc High Chroma | IC-307 User Guide - Page 8
, Powered by Creo Color Server Technology 1.1 User Guide Services tab in the job parameters window 141 12 Setting VDP File Creator tool...167 Selecting an Easy VDP File Creator template 168 Adding records manually to your variable data job 169 Adding records from a database to your variable data - Konica Minolta C83hc High Chroma | IC-307 User Guide - Page 9
182 Collecting IPDS traces...183 IPDS driver parameters...184 Input-tray parameters...184 Output-bin parameters...186 Miscellaneous parameters...187 15 Troubleshooting 189 Job History window...189 Handling alerts and frozen jobs...190 Aborting a job...191 Resume printing...191 Alerts window...191 - Konica Minolta C83hc High Chroma | IC-307 User Guide - Page 10
x IC-307 Print Controller, Powered by Creo Color Server Technology 1.1 User Guide - Konica Minolta C83hc High Chroma | IC-307 User Guide - Page 11
1 Getting started Printing this guide Change the paper size to print this document on any printer. 1. Open the PDF file in Adobe Acrobat. 2. From the File menu, select Print. The - Konica Minolta C83hc High Chroma | IC-307 User Guide - Page 12
prepress technologies to drive the 80 PPM press and 70/60 PPM press. The IC-307 print controller enables you ready-to-print (RTP) format for direct high-quality digital printing. The IC-307 print controller also streamlines XP for Embedded Systems Supported formats The IC-307 print controller - Konica Minolta C83hc High Chroma | IC-307 User Guide - Page 13
Professional Power Kit 3 ● PostScript (composite or pre-separated files) (levels 1, 2, and 3) ● EPS ● Creo VPS (Variable Print Specification) ● PPML (Personalized Print Markup Language) ● PPML.zip ● File formats from various prepress systems-for example, TIFF/IT software ● JPEG ● TIFF ● Pre- - Konica Minolta C83hc High Chroma | IC-307 User Guide - Page 14
exe file. 4. Click Install and follow the onscreen instructions until the installation is complete. 5. When the iKey enabled system or application, and to product highly-optimized Adobe PostScript files. This kit is and natively processes it for efficient digital documents printing. Overview of the - Konica Minolta C83hc High Chroma | IC-307 User Guide - Page 15
Overview of the workspace 5 Workspace area Toolbar The workspace contains different areas that enable you to monitor your job during the process and print stages. In addition, the workspace includes tools and options that enable you to fully customize and manage your server and jobs. Description - Konica Minolta C83hc High Chroma | IC-307 User Guide - Page 16
you can also view the date that the printer was last calibrated. Progress bars display information about incoming and outgoing jobs. If there is a problem with one of the printer components or with the server, a red indicator appears in the printer icon and next to the relevant component-for example - Konica Minolta C83hc High Chroma | IC-307 User Guide - Page 17
opening and editing the job parameters. Turning on the IC-307 print controller If the IC-307 print controller is connected to an 80 PPM press, verify that the 80 PPM press (UK- 103) dongle is connected to the - Konica Minolta C83hc High Chroma | IC-307 User Guide - Page 18
. 4. From the Windows Start menu, select Shut Down, and click OK. 5. After the IC-307 print controller has shut down, you can turn off the press. - Konica Minolta C83hc High Chroma | IC-307 User Guide - Page 19
the default settings of the network printer to use the PPD parameters instead of the Print Driver software. The IC-307 print controller supports printing from the following operating systems: ● Mac OS X 10.4, 10.5, and 10.6 ● Microsoft Windows Server 2008, Microsoft Windows Server 2003, Microsoft - Konica Minolta C83hc High Chroma | IC-307 User Guide - Page 20
automatically installed on a Windows computer when you set up a network printer. Note: On a Mac computer, you must install the Print Driver software manually. In the Print Driver window, you can perform the following actions: ● Define or change job parameters regardless of whether your computer is - Konica Minolta C83hc High Chroma | IC-307 User Guide - Page 21
Setting up printing on a Windows computer 11 Setting up printing on a Windows computer Adding a network printer to Windows Server 2008/2003/XP To print from a Windows computer, you first need to add a IC-307 print controller virtual printer to your client workstation. Tip: Following are some - Konica Minolta C83hc High Chroma | IC-307 User Guide - Page 22
12 Chapter 2-Setting up your computer for printing Adding a network printer to Windows 7/Vista To print from a Windows computer, you first need to add a IC-307 print controller virtual printer to your client workstation. 1. From the Start menu, select Devices and Printers. 2. Select Add a printer. - Konica Minolta C83hc High Chroma | IC-307 User Guide - Page 23
Shortcut for adding a printer 13 Shortcut for adding a printer 1. From the Start menu, select Run. 2. In the Open box, type \\, followed by the host name or IP address of the color server, and click OK. The server window opens. 3. Double-click the icon for the desired network printer. The IC-307 - Konica Minolta C83hc High Chroma | IC-307 User Guide - Page 24
14 Chapter 2-Setting up your computer for printing The Print Driver software is removed. Downloading fonts Use the HF_FontDownLoader hot folder, located in D: \HotFolders, to install new or missing fonts to the IC-307 print controller fonts directory. The HF_FontDownLoader hot folder can be used - Konica Minolta C83hc High Chroma | IC-307 User Guide - Page 25
Defining a printer with the Print Driver software in Mac OS X(10.4, 10.5, and 10.6) 15 10. In the message window, click Continue. 11. In the Software License Agreement window, click Continue. 12. Click Agree to agree to the terms and continue with the installation procedure. 13. In the Select - Konica Minolta C83hc High Chroma | IC-307 User Guide - Page 26
16 Chapter 2-Setting up your computer for printing 5. Click Open. 6. Click Add. The network printer is defined with the PPD file. 7. In the Print & Fax window, double-click the network printer. 8. Click Utility. 9. If you are working in Mac OS X 10.6. click Open Printer Utility. 10. In the Enable - Konica Minolta C83hc High Chroma | IC-307 User Guide - Page 27
Calibration overview Obtaining the most satisfactory print quality on your press depends on a number of issues. One of the most important issues is steady toner density. Toner density is affected by many factors such as heat, humidity, and service settings. Toner density also tends to vary over time - Konica Minolta C83hc High Chroma | IC-307 User Guide - Page 28
18 Chapter 3-Calibration Performing off-the-glass calibration from the Creo Color Server Requirements: ● Make sure that the Calibration is done off-the-glass option is selected in the Preferences window. ● Print at least 25 copies of any file to warm up the printer. Calibrate both the printer and - Konica Minolta C83hc High Chroma | IC-307 User Guide - Page 29
may not be successful. To ensure that the calibration process is successful, select Full Area for the size setting. 12. On the control panel, press Start to start scanning the charts. The charts are scanned and measured and a calibration table is created. In the IC-307 print controller Calibration - Konica Minolta C83hc High Chroma | IC-307 User Guide - Page 30
first, and then the color calibration will start. 7. Click Print. The calibration chart is printed, and step 2 of the Color Calibration wizard appears. 8. Follow the instructions in the wizard. - Konica Minolta C83hc High Chroma | IC-307 User Guide - Page 31
Troubleshooting calibration 21 9. After each color sweep, wait for the check mark to appear next to the appropriate icon, and follow the on-screen instructions table. 13. Click Finish. Troubleshooting calibration Resolve common troubleshooting problems that can occur during the calibration - Konica Minolta C83hc High Chroma | IC-307 User Guide - Page 32
22 Chapter 3-Calibration Message The software cannot identify any calibration device. Check that a device is connected and that you have defined it. Recovery action Make sure that the i1 is connected correctly to the USB port of the IC-307 print controller. When prompted, install the driver. - Konica Minolta C83hc High Chroma | IC-307 User Guide - Page 33
4 Printing a file in Windows and Mac OS Printing a file to the IC-307 print controller Requirements: A network printer must be defined on your Windows and Mac computer. 1. Open a file with its corresponding application-for example, open a PDF file in Adobe Acrobat. 2. From the File menu, select - Konica Minolta C83hc High Chroma | IC-307 User Guide - Page 34
Print Driver window, click the Lock button . The Secure Printing dialog box appears. 6. In the Password box, type a password consisting of four digits -for example, 9999. Note: The password must consist of exactly four numeric characters. 7. Click OK. The job is password-protected, and nobody - Konica Minolta C83hc High Chroma | IC-307 User Guide - Page 35
Password protect jobs 25 10. In the Password box, type the password that was defined for this job. 11. Click OK. The job is unlocked and printed. When the printing is finished, the job is automatically deleted. - Konica Minolta C83hc High Chroma | IC-307 User Guide - Page 36
26 Chapter 4-Printing a file in Windows and Mac OS - Konica Minolta C83hc High Chroma | IC-307 User Guide - Page 37
PDF jobs for printing on different types of output devices and presses. The APPE RIP applies to PDF files only. If you use work with embedded ICC profiles. The IC-307 print controller includes APPE RIP support for both CMYK and RGB embedded ICC profiles. The IC-307 print controller problems). - Konica Minolta C83hc High Chroma | IC-307 User Guide - Page 38
the job to print. For example, you might want to verify that the paper profile that was defined in your job is loaded on the press and is available for printing. Resubmitting a job Resubmit a printed job after editing the job parameters or to print more copies of your job. In the - Konica Minolta C83hc High Chroma | IC-307 User Guide - Page 39
the Copies column in the Storage area. 3. Select the job, and in the Copies field type the number of copies that you want to print. 4. Press Enter. 5. Drag the job to either the Process Queue area or Print Queue area. Editing a job You can preview and edit any PDL and RTP - Konica Minolta C83hc High Chroma | IC-307 User Guide - Page 40
30 Chapter 5-Printing from the color server layout of the pages on each sheet. You can also view the pages' orientation, crop marks, and fold marks. Jobs that you edit in the Job Preview & Editor window cannot be re-RIPed. After a job is saved in the Job Preview & Editor window, it is a new RTP - Konica Minolta C83hc High Chroma | IC-307 User Guide - Page 41
Rotating pages 180° 31 1. In the Job Preview & Editor window, click the Thumbnails tab. 2. In the left pane of the Thumbnails tab, determine a location for the merged page. Click the page preceding this location. A yellow outline appears around the selected page. 3. Click Merge Job. Note: Only - Konica Minolta C83hc High Chroma | IC-307 User Guide - Page 42
32 Chapter 5-Printing from the color server Next: To print the job that includes the rotated pages, in the Storage area, right-click the job, and select Submit. Note: Make sure that you don't open the job parameters window. Replacing pages In some cases, you may have a large job in which you need - Konica Minolta C83hc High Chroma | IC-307 User Guide - Page 43
RIPed and the missing components are identified. The preflight check detects the status of the following key job components: ● High-resolution images or the wrong links to the high-resolution images folder ● Missing fonts ● Spot colors that are not defined in the IC-307 print controller spot color - Konica Minolta C83hc High Chroma | IC-307 User Guide - Page 44
appear stating that the file is encrypted. 1. Open the job parameters window of the job that you want to perform a preflight check. 2. Select Services, and then select Preflight. 3. Select the Run preflight check box. All the check boxes of the key job components are automatically selected. 4. Clear - Konica Minolta C83hc High Chroma | IC-307 User Guide - Page 45
-clicking your job and selecting Preflight report. HiRes Spot Colors Fonts Exceptions Preflight options Lists the missing and found high-resolution images. If wrong links to the high-resolution images folder exist, these are also listed. Lists both the missing spot color names (spot colors that - Konica Minolta C83hc High Chroma | IC-307 User Guide - Page 46
36 Chapter 5-Printing from the color server Not preflighted Found Indicators Appears if you did not select the preflight option for the preflight check. Appears when all of the files are found for the selected option. All Found Only Missing Only Show list Displays both missing and found options - Konica Minolta C83hc High Chroma | IC-307 User Guide - Page 47
Printing and reviewing color sets 37 To select the most appropriate color set for your job using the recommended workflow, you can print a copy of your job with each color set, review the printed sample jobs, and select the best print. Then, in the job parameters window, you need to assign the - Konica Minolta C83hc High Chroma | IC-307 User Guide - Page 48
38 Chapter 5-Printing from the color server Assigning a color set to your job After printing and reviewing the five sample files, you now need to assign the most appropriate color set to your original job. 1. In the Storage area, double-click your job. 2. Under Print, select Color Set. 3. In the - Konica Minolta C83hc High Chroma | IC-307 User Guide - Page 49
Running a rush job 39 Running a rush job When you have a job that's urgent, you can submit it for processing or printing and run it before other jobs. If you submit a job for processing while another job is being processed, the latter job pauses temporarily but retains its running status. When the - Konica Minolta C83hc High Chroma | IC-307 User Guide - Page 50
40 Chapter 5-Printing from the color server - Konica Minolta C83hc High Chroma | IC-307 User Guide - Page 51
the files related to the archived job is created at the selected location. 3. Delete the job from the Storage area. Note: External resources such as high resolution files are not archived. If a job is archived and then retrieved, the external resources must exist in the same location as when the - Konica Minolta C83hc High Chroma | IC-307 User Guide - Page 52
42 Chapter 6-Managing jobs Retrieving a job Requirements: You can only retrieve jobs that have been archived. Note: If you are retrieving a VDP job, then you need to restore the cached elements first. When you retrieve a job, the archived job retains the original job name, and not the name - Konica Minolta C83hc High Chroma | IC-307 User Guide - Page 53
Duplicating jobs 43 4. Select one of the following: ○ Send to Storage-to send the job to the selected server's Storage area. ○ Send to print-to send the job to the selected server's Print Queue. 5. Click Send. Notes: ● You cannot forward an RTP file that was created from a VDP job- for example, a - Konica Minolta C83hc High Chroma | IC-307 User Guide - Page 54
44 Chapter 6-Managing jobs ● The job's size ● The processing time ● The number of pages in the job ● The number of pages that were printed in black and white and in color. This data is based on the job's original input and the parameters that were set in the job parameters window. You can access - Konica Minolta C83hc High Chroma | IC-307 User Guide - Page 55
Show, hide, and move columns in the Accounting Viewer table 45 Show, hide, and move columns in the Accounting Viewer table A quick way to customize the Accounting Viewer table is to show, hide, or move columns. Perform any of the following actions: ○ To move a column to another location in the - Konica Minolta C83hc High Chroma | IC-307 User Guide - Page 56
46 Job report Chapter 6-Managing jobs ● Clear all-Clicking the Clear all button in the Accounting Viewer. ● Clear Accounting Log-This is a quick way to delete all of the accounting records without having to open the Accounting Viewer. Deleting records from the Accounting Viewer table 1. Perform - Konica Minolta C83hc High Chroma | IC-307 User Guide - Page 57
Exporting files 47 Exporting files Exporting a PostScript file Export a PostScript file, and convert it to PDF format. Requirements: A PostScript file must be in the Storage area. 1. Select a PostScript file in the IC-307 print controller Storage area. 2. Right-click the job and select Export PDF. - Konica Minolta C83hc High Chroma | IC-307 User Guide - Page 58
48 Chapter 6-Managing jobs both before and after processing. For an exported RTP job, the PDF file includes the rasterized data of the job. The operation converts the RTP information to raster files that can be encapsulated in a PDF format. This process ensures that the file can be processed and - Konica Minolta C83hc High Chroma | IC-307 User Guide - Page 59
to another. These steps enable you to reproduce the color conceived by a graphic artist or photographer as closely as possible on a monitor, a proof, or the press sheet. The IC-307 print controller enables you to use these tools to adjust and improve the color quality in your jobs: ● Profile Manager - Konica Minolta C83hc High Chroma | IC-307 User Guide - Page 60
space of the output device. Creating a destination profile using an external device Measuring a color chart and creating a profile Requirements: ● Make sure that the press is calibrated. ● If you are using the i1 spectrophotometer, it must be placed on its base and connected to the USB port on the - Konica Minolta C83hc High Chroma | IC-307 User Guide - Page 61
OK. 17. Click Finish to close the Profiling Tool. Creating a profile from existing color chart measurements Requirements: Make sure that the press is calibrated. 1. From the Tools menu, select Profiling Tool. 2. Select Load existing measurements. 3. Click Next. 4. Select the media type for which - Konica Minolta C83hc High Chroma | IC-307 User Guide - Page 62
In the message that appears, click OK. 14. Click Finish to close the Profiling Tool. Troubleshooting profiling Resolve common troubleshooting problems that can occur during the profiling process. Problem Wrong measured strip Recovery action The data received for the measured strip does not match - Konica Minolta C83hc High Chroma | IC-307 User Guide - Page 63
Managing profiles 53 Managing profiles The Profile Manager enables you to import and manage destination, source, and device link profiles on the IC-307 print controller. Importing a destination profile Import a destination profile to emulate an output device. Requirements: If you saved a profile - Konica Minolta C83hc High Chroma | IC-307 User Guide - Page 64
54 Chapter 7-Managing color Importing a source profile Import a source CMYK or RGB profile to emulate other devices or color spaces. 1. From the Tools menu, select Resource Center. The Resource Center window appears. 2. In the Resource list, select Profile Manager. 3. Click the Import button. The - Konica Minolta C83hc High Chroma | IC-307 User Guide - Page 65
Mapping media using the Media and Color Manager tool 55 Mapping media using the Media and Color Manager tool The Media and Color Manager is a tool that automatically maps the media type to a destination profile. You can change the destination profile for each of the different media types listed in - Konica Minolta C83hc High Chroma | IC-307 User Guide - Page 66
56 Chapter 7-Managing color Next: To apply this profile to the media type in your job, in the job parameters window select Color > Color Flow. In the Destination area, select Linked in the Destination Profile list. Managing calibration tables Calibrations window You can edit and view any of the - Konica Minolta C83hc High Chroma | IC-307 User Guide - Page 67
Calibration table Info Data tab 57 Calibration table Info Data tab This tab includes the following: ● Output Density Measured The values that are measured from the printed target. Target The maximum accepted values of the output density. Notes: ○ The target values are set higher than the expected - Konica Minolta C83hc High Chroma | IC-307 User Guide - Page 68
58 Calibration table Info Graph tab Chapter 7-Managing color During printing, the IC-307 print controller automatically replaces the CMYK values in the RTP file with new values that compensate for the printer's current performance level. This tab includes the following: Separations The graph - Konica Minolta C83hc High Chroma | IC-307 User Guide - Page 69
Spot Color Editor overview 59 the results, the Editor tab enables you to adjust the values of the image in the value table. 1. From the Tools menu, select Resource Center. 2. In the Resource list, select Calibrations. 3. Select the calibration table that you want to add an entry, and click the - Konica Minolta C83hc High Chroma | IC-307 User Guide - Page 70
60 Chapter 7-Managing color edited spot color is saved in a custom dictionary. When the IC-307 print controller identifies a spot color in a job, it first looks for the name of the spot color in the custom dictionary and uses the associated CMYK values. If the spot color is not found, it looks in - Konica Minolta C83hc High Chroma | IC-307 User Guide - Page 71
Adding a spot color 61 Adding a spot color 1. From the Tools menu, select Spot Color Editor. 2. In the Spot Color Editor dialog box, click Add. 3. Type the new color name as it is in the original file. Note: The spot color names are case sensitive and should match the names that appear in the - Konica Minolta C83hc High Chroma | IC-307 User Guide - Page 72
62 Chapter 7-Managing color The new color is added to the custom color dictionary. Next: If you created a new spot color for an RTP job, re-RIP the job before printing. Editing a spot color 1. From the Tools menu, select Spot Color Editor. 2. Perform one of the following actions: ○ In the Color - Konica Minolta C83hc High Chroma | IC-307 User Guide - Page 73
Test-printing spot colors 63 Test-printing spot colors Select and print spot colors from a spot color dictionary to check how the spot colors look on the selected paper. 1. From the Tools menu, select Spot Color Editor. 2. Click Test Print. 3. Select one or more spot colors, or click All. 4. - Konica Minolta C83hc High Chroma | IC-307 User Guide - Page 74
menu, select Spot Color Editor. 2. On the Spot colors tab, click Pick color , and wait for the Put device on top of measured spot and press key message to appear. 3. Place the spectrophotometer on the area of the color that you want to measure, and then push and hold the spectrophotometer - Konica Minolta C83hc High Chroma | IC-307 User Guide - Page 75
Selecting a spot color variation 65 Selecting a spot color variation The Spot color variations tool is available only with the Professional Power Kit. 1. From the Tools menu, select Spot Color Editor. 2. In the Color list, type the name of the spot color or browse through the list of spot colors - Konica Minolta C83hc High Chroma | IC-307 User Guide - Page 76
66 Chapter 7-Managing color 7. To select a different brightness setting for the selected color patch, click a color patch under Brightness. The K value of the selected color patch is increased or decreased according to your selection. 8. Click Select. 9. Click Apply. The spot color with the new - Konica Minolta C83hc High Chroma | IC-307 User Guide - Page 77
Protecting specific spot colors 67 1. From the Tools menu, select Spot Color Editor. 2. In the Color list, type the name of the spot color or browse to the spot color, and then select the spot color that you want to change. 3. Click the Variations button. The Variations dialog box appears. The - Konica Minolta C83hc High Chroma | IC-307 User Guide - Page 78
68 Chapter 7-Managing color Protecting an RGB color as a spot color The RGB spot workflow applies to graphic and text elements. 1. From the Tools menu, select Spot Color Editor. 2. In the Spot Color Editor dialog box, click the Protect RGB tab. 3. Click Add. 4. In the Color name box, type a name - Konica Minolta C83hc High Chroma | IC-307 User Guide - Page 79
Protecting a gray color as a spot color 69 8. If necessary, in the Corrected column, adjust the CMYK values. 9. Click Apply. 10. To apply this to your job, in the job parameters window, in the Color tab, select Protected Colors, and then select the Use protected RGB values check box. Protecting a - Konica Minolta C83hc High Chroma | IC-307 User Guide - Page 80
70 Chapter 7-Managing color 2. In the Spot Color Editor dialog box, click the Protect Gray tab. 3. Click Add. 4. In the Color name box, type a name for your color. 5. In the Gray source value column and the CMYK target values column, type the desired values, or select a spot color from Entire - Konica Minolta C83hc High Chroma | IC-307 User Guide - Page 81
Protecting a CMYK color as a spot color 71 10. To apply this to your job, in the job parameters window, in the Color tab, select Protected Colors, and then select the Use protected gray values check box. Protecting a CMYK color as a spot color The CMYK spot workflow applies to graphic and text - Konica Minolta C83hc High Chroma | IC-307 User Guide - Page 82
also includes these predefined gradation tables: ● Cool: Displays blue tones more clearly ● Lively: Increases the color saturation ● Saturated: Increases the strength (chroma or purity) ● Sharp: Increases the contrast ● Warm: Sets the hues in the low densities to a bright reddish color Creating and - Konica Minolta C83hc High Chroma | IC-307 User Guide - Page 83
Color adjustment with the Gradation Tool 73 4. Select the separations that you want to edit by performing one of the following actions: ○ Click the All Colors button to edit all the separations simultaneously. ○ Click the individual separation buttons for the separations that you want to edit-for - Konica Minolta C83hc High Chroma | IC-307 User Guide - Page 84
the selected options as follows: ● Exposure and color cast: Correct underexposure, overexposure, and minor color-cast problems in photos. ● Image noise: Reduce noise (such as granularity caused by high ISO settings) in a photo. ● Shadows and highlights: Bring out details in the dark and light areas - Konica Minolta C83hc High Chroma | IC-307 User Guide - Page 85
Printing a job that contains grayscale RGB elements using black toner 75 Printing a job that contains grayscale RGB elements using black toner 1. In the IC-307 print controller, open the job parameters window and select Color > Ink Saving, and select Print grays using black toner. 2. Click Submit. - Konica Minolta C83hc High Chroma | IC-307 User Guide - Page 86
76 Chapter 7-Managing color - Konica Minolta C83hc High Chroma | IC-307 User Guide - Page 87
images on a sheet of paper so that when a printer or digital printing press prints the sheet, the page images will be in the right individual page but rather affects only the placement of the page images on the press sheet. Imposition is a combination of content and layout. The content consists of - Konica Minolta C83hc High Chroma | IC-307 User Guide - Page 88
piled one on top of the other, the entire job ends up in the desired order. The cut-and-stack method is useful primarily for high-volume variable information jobs. This method prints pages in a manner that is suited for saddlestitch binding. With this binding method, sheets are folded, inserted one - Konica Minolta C83hc High Chroma | IC-307 User Guide - Page 89
card job 79 Printing a business card job Use the step-and-repeat imposition method to print multiple copies of the same business card on one press sheet. Requirements: This example assumes that your job contains one-sided business cards that are 50 mm × 90 mm (1.96 in. × 3.54 in.), imposed on - Konica Minolta C83hc High Chroma | IC-307 User Guide - Page 90
80 Chapter 8-Production workflows 9. Select the Templates parameter, and set the values as follows: a. In the Layout list, select Best Fit. The IC-307 print controller determines how many business cards can fit on each sheet and calculates the best fit. b. For Print method, make sure that Simplex - Konica Minolta C83hc High Chroma | IC-307 User Guide - Page 91
Printing using imposition 81 11. Leave the Preview window open, and, if necessary, drag it to the right. 12. Select the Spacing & Marks parameter. 13. In the Marks list, select Crop marks. The crop marks automatically appear in the Preview window and the Margins setting is automatically increased - Konica Minolta C83hc High Chroma | IC-307 User Guide - Page 92
tab. 3. In the Method list, select Saddle stitch. 4. In the Sets per sheet list, select 2 to print two sets of your imposed job on one press sheet. 5. Click Spacing & Marks. 6. In the Marks list, select Crop marks. 7. In the Custom bleed size box, type 0.118 inches or 3 mm. 8. Click the Preview - Konica Minolta C83hc High Chroma | IC-307 User Guide - Page 93
Tools menu, select Imposition Template Builder. 2. From the Method list, select an imposition method. 3. Click New. 4. Type the name of the new template, and press Enter. 5. In the Layout area, type the number of columns and number of rows that you need. Note: The imposition method that you select - Konica Minolta C83hc High Chroma | IC-307 User Guide - Page 94
84 Chapter 8-Production workflows 8. From the Binding list, select the appropriate binding method. Note: Binding is available only when Saddle Stitch and Perfect Bound imposition methods are selected. 9. Click Save. Imposition template viewer window The Imposition Template Builder is available - Konica Minolta C83hc High Chroma | IC-307 User Guide - Page 95
box is clear. 2. Select the desired page. Note: To select multiple consecutive pages, click the first page, press and hold Shift, and then click the last page. Select multiple nonconsecutive pages by pressing and holding Ctrl as you click each page. The gray arrow on each page indicates the top of - Konica Minolta C83hc High Chroma | IC-307 User Guide - Page 96
2. Select the Apply changes to front and back check box. 3. Click the Rotate 180 button. Changing the position of a specific page on the press sheet The Imposition Template Builder is available only with the Professional Power Kit. Changing the location of a page is often necessary when the stepand - Konica Minolta C83hc High Chroma | IC-307 User Guide - Page 97
Printing with exceptions 87 Note: The page that was previously in the target location is not automatically moved to another location. To retain this page, manually move this page to a new location. If you have a duplex template and the Apply changes to front and back check box is selected, the - Konica Minolta C83hc High Chroma | IC-307 User Guide - Page 98
88 Chapter 8-Production workflows 4. Depending on the option you selected in the Type list, perform one of the following steps: ○ For Page range, type the page range in the box. ○ For Front cover or Back cover, select Duplex to print the first two (or last two) pages of the job as the cover page ( - Konica Minolta C83hc High Chroma | IC-307 User Guide - Page 99
for the job. Page exceptions and inserts that include setpagedevice commands are called dynamic page exceptions. The IC-307 print controller supports dynamic page exceptions for the following file formats: ● PostScript ● VPS ● PDF Printing dynamic page exceptions Dynamic page exceptions is available - Konica Minolta C83hc High Chroma | IC-307 User Guide - Page 100
. Do not print other types of jobs via that virtual printer. ● You can perform a preflight check on SPD commands. Make sure the virtual printer has support dynamic page exceptions selected. Printing tabs using the Creo Color Server Tabs plug-in for Acrobat Tabs plug-in overview The Tabs plug-in is - Konica Minolta C83hc High Chroma | IC-307 User Guide - Page 101
Tabs plug-in window 91 Tabs plug-in window Text attributes - tabs Tabs Size The size of the tabbed sheet. By default, the tab size for letter jobs is set at 9 × 11, and for A4 jobs to A4+. Notes: ● After a job that includes tabs is printed on 9 in. x 11 in. size paper, you can use an index - Konica Minolta C83hc High Chroma | IC-307 User Guide - Page 102
92 Chapter 8-Production workflows Text attributes - tabs Note: The units in the Tabs plug-in are set in the Acrobat Preferences dialog box. Bottom Offset The value for the distance between the lower edge of the paper and the lower edge of the lowest tab. Length The length of the tab. Width The - Konica Minolta C83hc High Chroma | IC-307 User Guide - Page 103
Printing tabs using the Creo Color Server Tabs plug-in for Acrobat 93 Text attributes - text Bold Bolds the tab text. Italic Makes the tab text italic. Underline Underlines the tab text. Alignment The alignment of the tab, according to the orientation of the tab. The orientation that you select - Konica Minolta C83hc High Chroma | IC-307 User Guide - Page 104
94 Chapter 8-Production workflows Text attributes - text Text on both sides The same text appears on both sides of the tab. Direction Direction of the text. ● Vertical ● Counter-clockwise ● Clockwise Note: The Direction options are available only for portrait jobs. Content # The tab - Konica Minolta C83hc High Chroma | IC-307 User Guide - Page 105
Creating and printing tabs 95 Before Page Text Thumbnails area Remove Content The page number that the tab precedes. The text that appears on the tab. A thumbnail view of the job with page numbers and tabs indicated. Removes the selected page or tab. Settings Saved Settings Save Delete Lists - Konica Minolta C83hc High Chroma | IC-307 User Guide - Page 106
96 Chapter 8-Production workflows 1. In the Storage area, right-click your unprocessed job, and select Job Preview & Editor. The job opens in Acrobat software. 2. From the Plug-Ins menu, select Tabs Printing. The Tabs Printing window opens, displaying the Text Attributes tab. 3. In the Tabs area, - Konica Minolta C83hc High Chroma | IC-307 User Guide - Page 107
Printing tabs using the Creo Color Server Tabs plug-in for Acrobat 97 5. Click the Content tab. 6. In the Before Page column, click the first cell and type the number of the page that you want the tab to precede. 7. In the Text column, type the text for the tab. The tab appears in the thumbnail - Konica Minolta C83hc High Chroma | IC-307 User Guide - Page 108
98 Chapter 8-Production workflows Managing tabs 11. In the IC-307 print controller software, right-click the job that contains the tabs, and select Job Parameters. 12. Under Print, select Paper Stock. 13. Under Print, select Mixed page size. 14. Select the Mixed page size document check box. 15. - Konica Minolta C83hc High Chroma | IC-307 User Guide - Page 109
Inserting a tab before or after a specific page 99 Inserting a tab before or after a specific page 1. In the Storage area, right-click your unprocessed job, and select Job Preview & Editor. The job opens in Acrobat software. 2. From the Plug-Ins menu, select Tabs Printing. The Tabs Printing window - Konica Minolta C83hc High Chroma | IC-307 User Guide - Page 110
list, select the desired saved settings. 4. Click Delete. Working with near-line finishers Near-line finisher overview The IC-307 print controller supports two near-line finishers, Duplo DC-645 and DSF-2000. Using the IC-307 print controller, you can perform the following actions: ● Generate - Konica Minolta C83hc High Chroma | IC-307 User Guide - Page 111
Generating a corner mark, barcode, and end mark 101 on every page and are automatically created based on the following settings in your job: ○ Number of sets ○ Sheet ID ○ Number of sheets in one set Generating a corner mark, barcode, and end mark Generate a barcode, registration mark, end mark, or - Konica Minolta C83hc High Chroma | IC-307 User Guide - Page 112
102 Chapter 8-Production workflows Next: After your job finishes printing, place the pages in the near-line finisher. - Konica Minolta C83hc High Chroma | IC-307 User Guide - Page 113
save them on any remote computer on the network. After you create a scan box, you can scan your document on the 80 PPM press and 70/60 PPM press. The predefined scan boxes are as follows: ● Scan To Print. Jobs scanned to this box are automatically submitted for printing. ● Calibration. This box - Konica Minolta C83hc High Chroma | IC-307 User Guide - Page 114
104 Chapter 9-Scanning documents Installing the Remote Scan Application in the Mac OS 1. From the Go menu, select Connect to Server. 2. In the Server Address box, type the name of the IC-307 print controller, and then click Connect. 3. In the Connect to Server dialog box, select Guest, and click - Konica Minolta C83hc High Chroma | IC-307 User Guide - Page 115
Creating a scan box 105 Creating a scan box From your computer, create a scan box in the IC-307 print controller storage. Requirements: The exact name of the IC-307 print controller to which you want to connect Scanned jobs are saved to a scan box in the IC-307 print controller storage. You can - Konica Minolta C83hc High Chroma | IC-307 User Guide - Page 116
106 Chapter 9-Scanning documents 4. Click ScanBox Manager. 5. Click Add. 6. In the Scan Box Name box, type a name for the scan box. 7. In the Network Path box, perform one of the following actions to specify where you want to save copies of the scanned jobs. Note: The Automatic Copy check box, - Konica Minolta C83hc High Chroma | IC-307 User Guide - Page 117
send your scanned jobs as an e-mail attachment, perform these actions: Note: Before you can send an e-mail message, make sure that the mail service settings are defined correctly in the Preferences window. a. Select Send to Email. b. Select the Send to Email check box. c. Compose your e-mail message - Konica Minolta C83hc High Chroma | IC-307 User Guide - Page 118
want to save the scanned jobs. 7. Position the original printout on the platen glass of the 80 PPM press and 70/60 PPM press. 8. Press the Start button. The 80 PPM press and 70/60 PPM press scans the document. It is automatically saved on the IC-307 print controller in the folder D:\Output\Scan - Konica Minolta C83hc High Chroma | IC-307 User Guide - Page 119
Saving scanned jobs to your computer 109 5. Select the desired scanned job, and click Save as. 6. Select a location on your computer, and click Save. You can now open a copy of the scanned job on your computer. - Konica Minolta C83hc High Chroma | IC-307 User Guide - Page 120
110 Chapter 9-Scanning documents - Konica Minolta C83hc High Chroma | IC-307 User Guide - Page 121
Variable data printing (VDP) is a form of on-demand digital printing that produces customized or personalized documents targeted to a specific printing (VDP) jobs are created using VDP authoring programs that support Variable Print Specification formats. Most VDP authoring programs can convert VDP - Konica Minolta C83hc High Chroma | IC-307 User Guide - Page 122
when appropriate. Reusable elements include clipping and scaling instructions as well as the image data. ● Inline manufacturers of print technology for the high-speed reproduction of reusable page content. PPML files. The IC-307 print controller supports PPML formats and enables you to process PPML - Konica Minolta C83hc High Chroma | IC-307 User Guide - Page 123
Managing VDP elements 113 PPML has a hierarchical structure. Document components are separated from their submission file and can be organized and stored at different levels of the hierarchical structure. Managing VDP elements Caching global VDP elements Caching global VDP elements enables you to - Konica Minolta C83hc High Chroma | IC-307 User Guide - Page 124
114 Chapter 10-Variable data printing jobs 3. Select the VDP folder in which to archive, and then click Archive. 4. In the Archive dialog box, select the location where you want to archive your VDP elements. 5. Click Save. The VDP elements are saved as cabinet files with the .Cab extension. Next: - Konica Minolta C83hc High Chroma | IC-307 User Guide - Page 125
Deleting VDP elements 115 2. Locate the folder in which your VDP elements are archived. 3. Select the desired file and then click Add (+) . Note: Use SHIFT or CTRL to select several files or CTRL +A to select all the files. 4. Click Retrieve. The IC-307 print controller retrieves the archived VDP - Konica Minolta C83hc High Chroma | IC-307 User Guide - Page 126
116 Chapter 10-Variable data printing jobs 3. Select the element that you want to delete, and then click Delete. Note: Select Delete All, in order to delete all the cached elements. - Konica Minolta C83hc High Chroma | IC-307 User Guide - Page 127
to sheets. The available paper profiles that are defined on the press. Clicking the browse button opens the Paper profile window from the press, the custom paper size range is 100 mm × 148 mm to 330 mm × 1200 mm. For paper sizes that range from 330 mm and are larger than 487 mm, contact a service - Konica Minolta C83hc High Chroma | IC-307 User Guide - Page 128
-punched paper Enables you to print your job on colored paper Enables you to activate the gloss option on the press Note: This option is only supported in the 70/60 PPM press. Enables you to select the sub-tray in which to send unused tabs Provides the following options: ● Simplex-Single-sided - Konica Minolta C83hc High Chroma | IC-307 User Guide - Page 129
set in the original file. If your job is printed with the wrong orientation, then select Portrait or Landscape. Provides the following options: ● Manual-Increases or decreases the image size according to the percentage that you enter. Note: Prints the original image size when 100% (default). ○ Do - Konica Minolta C83hc High Chroma | IC-307 User Guide - Page 130
you to print two or more different booklets on the same sheet. The booklets are arranged in the Cut & Stack method. This option does not support variable booklet length. ○ Variable Booklet Length-For VDP jobs only. This opton enables you to print booklets of variable length. The missing pages are - Konica Minolta C83hc High Chroma | IC-307 User Guide - Page 131
Imposition tab in the job parameters window 121 Parameter Size Templates Option Description Paper size Trim size Trim orientation Layout The size of the actual piece of paper on which your job pages are imposed and then printed. Note: For custom paper sizes, you need to specify the required - Konica Minolta C83hc High Chroma | IC-307 User Guide - Page 132
122 Parameter Spacing & marks Option Marks Margins Gutter Spine Chapter 11-Job parameters Description Provides the following options: ● None-Does not apply any marks on the imposition layout for the printed job. ● Crop marks-Prints the lines that indicate where the sheet should be cropped to the - Konica Minolta C83hc High Chroma | IC-307 User Guide - Page 133
your job. Option Description Image quality Provides the following options: ● High-Improves the quality of low resolution images in a job. ● Normal the image in the job according to the standard resolution of the press. Improve text/line in Image Image quality is the ability to maintain - Konica Minolta C83hc High Chroma | IC-307 User Guide - Page 134
in natural images. Applies trapping to your job. Trapping is a solution that solves misregistration between color separations in both offset and digital printing. Misregistration can occur regardless of a printing device's accuracy and results in white lines around objects on top of a background (in - Konica Minolta C83hc High Chroma | IC-307 User Guide - Page 135
dot. To print an image on a digital printer or press, the color server needs to digitally approximate the grayscale values with different distributions of Stochastic-Stochastic screening differs from conventional halftone screening in that high ink density results in more dots, not bigger dots. Low - Konica Minolta C83hc High Chroma | IC-307 User Guide - Page 136
line-type screen ● Line 2-Applies a medium line-type screen ● Stochastic-Stochastic screening differs from conventional halftone screening in that high ink density results in more dots, not bigger dots. Low ink density produces fewer dots, not smaller dots. As stochastic screening involves millions - Konica Minolta C83hc High Chroma | IC-307 User Guide - Page 137
Color tab in the job parameters window 127 Color tab in the job parameters window Parameter Color mode Apply various color settings and options to improve the color quality of your job. Option Description Color mode Provides the following options: ● CMYK-Prints the job in color using cyan, - Konica Minolta C83hc High Chroma | IC-307 User Guide - Page 138
clearer. ● Lively-Increases the color saturation. ● Saturated-Increases the strength (chroma or purity). ● Sharp-Increases the contrast. ● Warm-Sets the hues usage. You can select from the following: ● Normal ● High ● Very High GCR-Gray component replacement (GCR) conserves toner by replacing the - Konica Minolta C83hc High Chroma | IC-307 User Guide - Page 139
or approximated to some other color that exists within the gamut. Rendering intent compresses out-of-gamut colors into the color capability of the press you are using. When working with ICC profiles, it is important that you select the rendering intent that best preserves the important aspects of - Konica Minolta C83hc High Chroma | IC-307 User Guide - Page 140
Profile Provides the following options: ● Linked-Uses the destination profile that was linked using the Media and Color Manager in the Resource Center ● 80 PPM Press or 70_60 PPM Press -Uses the predefined destination profile that is most suitable for the - Konica Minolta C83hc High Chroma | IC-307 User Guide - Page 141
are defined in the spot color dictionaries. You can edit these values using the Spot Color Editor tool. The spot color dictionaries supported are: HKS, DIC Color Guide, Pantone, Pantone GOE, Pantone Plus, and TOYO. Refer to the Spot Color Editor window for the complete list. ● Original file values - Konica Minolta C83hc High Chroma | IC-307 User Guide - Page 142
apply the photo touch-up options: ● Exposure and color cast-Corrects underexposure, overexposure, and minor color-cast problems in photos. ● Image noise-Reduces noise (such as granularity caused by high ISO settings) in a photo. ● Shadows and highlights-Brings out details in the dark and light areas - Konica Minolta C83hc High Chroma | IC-307 User Guide - Page 143
Finishing tab in the job parameters window 133 Tray Multi fold sub tray Option ● Fold type ○ Tri-fold-in ○ Tri-fold-out ○ Double parallel fold ○ Gate fold ● Punch-The values vary according to the type of punch unit connected. The number of holes is 2, 3, or 4. - Konica Minolta C83hc High Chroma | IC-307 User Guide - Page 144
134 Tray Multi fold main tray Option ● Fold type ○ Half fold Chapter 11-Job parameters ○ Z fold ○ Tri-fold-in ○ Tri-fold-out ○ Double parallel fold ○ Gate fold - Konica Minolta C83hc High Chroma | IC-307 User Guide - Page 145
Finishing tab in the job parameters window 135 Tray Option Multi Tri-fold-in ● Punch-The values vary according to the type of punch unit connected. The number of holes is 2, 3, or 4. Saddle stitch sub tray Saddle stitch main tray Stacker1 Sub Tray Stacker1 Main Tray Booklet sub tray Multi - Konica Minolta C83hc High Chroma | IC-307 User Guide - Page 146
136 Tray Booklet main tray Booklet fold tray Perfect binder sub tray Chapter 11-Job parameters Option ● Offset ● Staples ○ None ○ Rear ○ Front ○ Dual ● Punch-The values vary according to the type of punch unit connected. The number of holes is 2, 3, or 4. ● Fold type ○ Multi half fold ○ Multi tri- - Konica Minolta C83hc High Chroma | IC-307 User Guide - Page 147
Finishing tab in the job parameters window Tray Perfect binder main tray 137 Option The perfect binder provides the following options: ● Pull Cover from-Enables you to select the tray that contains the paper on which the cover will be printed ● Cover content ○ Blank/Preprinted-Cover is not printed - Konica Minolta C83hc High Chroma | IC-307 User Guide - Page 148
stacker + stacker finisher must be installed on the press. ● When the stacker + stacker finisher is the printer touch panel for further instructions. Parameter Option Near-Line finisher use a preset job number. Otherwise, you can select it manually on the Duplo DC-645. ● DSF-2000 finisher is - Konica Minolta C83hc High Chroma | IC-307 User Guide - Page 149
Exceptions tab in the job parameters window 139 Parameter Slip sheet Image position Option Slip sheets between copies Same on both sides Rear Lead Center Description Prints slip sheets with your job. If a job is collated, the slip sheets are printed between sets. If a job is not collated, the - Konica Minolta C83hc High Chroma | IC-307 User Guide - Page 150
-Shifts the image on the second side of the sheet according to the image shift on the first side of the sheet. ○ You can also manually define the shift for odd and even pages, and center the pages on the sheet. - Konica Minolta C83hc High Chroma | IC-307 User Guide - Page 151
in the job parameters window 141 Services tab in the job parameters window Parameter Admin page Job flow Set parameters that will facilitate your job workflow. For example, you can set workflow - Konica Minolta C83hc High Chroma | IC-307 User Guide - Page 152
can't be used with the native PDF workflow. ● Native PDF workflow options are not available via the Print Driver software. ● Native PDF workflow supports the CMYK color mode only. Delete printed jobs Removes jobs from the Storage area after printing is from storage completed. Delete failed jobs - Konica Minolta C83hc High Chroma | IC-307 User Guide - Page 153
Services tab in the job parameters window 143 Parameter Font substitution Optimizations Split to Booklets Preflight APR/OPI Option Use Font Substitution PostScript optimization PDF optimization Split to Booklets Number of pages per booklet Run preflight High (fonts, high resolution images, - Konica Minolta C83hc High Chroma | IC-307 User Guide - Page 154
at this bar, you can tell the state of the press and whether the quality is consistent. You might need to calibrate the press or perform color proofing. Note: Job slug is available only the name of the customer. Job comments Displays special instructions that you want to include in your job. - Konica Minolta C83hc High Chroma | IC-307 User Guide - Page 155
Services tab in the job parameters window 145 Parameter Option Job link Description Displays the relevant URL for the linked elements of a JDF job. - Konica Minolta C83hc High Chroma | IC-307 User Guide - Page 156
146 Chapter 11-Job parameters - Konica Minolta C83hc High Chroma | IC-307 User Guide - Page 157
12 Setting up your color server Preferences window Manage your system and resources. The Preferences window is available from the File menu. Most of these settings are configured when the system is set up for the first time. You should consult with the site administrator before changing any of the - Konica Minolta C83hc High Chroma | IC-307 User Guide - Page 158
network drive and then to restore the configuration. Enables you to configure the mail service options to receive and send scanned jobs directly to one or more e-mail addresses and text message notifications about the press' status. Enables you to specify whether calibration is done off-theglass or - Konica Minolta C83hc High Chroma | IC-307 User Guide - Page 159
days or hours, you want jobs to be deleted from the Storage area. The default setting holds the jobs in the Storage area until you manually delete them. Provides the following options: ● PostScript preview-Enables you to select the file format to retain after previewing a job in Adobe Acrobat. ● VDP - Konica Minolta C83hc High Chroma | IC-307 User Guide - Page 160
150 Option Queues Manager Messages JDF Outputs Paper Size Switch Chapter 12-Setting up your color server Description Provides the following options: Job batching policy: ● Enable job batching-Prints jobs that have similar attributes one after another, without pausing between jobs. ● Disable job - Konica Minolta C83hc High Chroma | IC-307 User Guide - Page 161
determine the page size of the imported job. ● OPI-Determines how an external high-resolution image is placed in a file as it goes to RIP. ● Default the status of the press. Requirements: To be able to receive text messages, contact an SMS provider that offers services for SMS transit and register - Konica Minolta C83hc High Chroma | IC-307 User Guide - Page 162
each user who should receive notifications. 8. Click Save. Note: If you want to deactivate the services for a short period of time- for example, to perform maintenance procedures-clear the Enable Services check box in the Preferences window. All of your settings will be saved. Setting up a virtual - Konica Minolta C83hc High Chroma | IC-307 User Guide - Page 163
virtual printer settings to override the parameters set in the PPD file. 8. (Optional) Select the Support dynamic page exceptions check box if you would like the virtual printer to support files with embedded setpagedevice commands. 9. (Optional) In the Comments box, type any comment regarding the - Konica Minolta C83hc High Chroma | IC-307 User Guide - Page 164
154 Chapter 12-Setting up your color server Restoring the settings for a default virtual printer Restore a default virtual printer's parameters to the factory settings. 1. From the Tools menu, select Resource Center. 2. In the Resource list, make sure that Virtual Printers is selected. 3. Select - Konica Minolta C83hc High Chroma | IC-307 User Guide - Page 165
Maintaining your settings 155 Note: It is recommended that you backup your configuration to external media or to a network drive before reinstalling the operating system and software. 1. From the File menu, select Preferences. The Preferences window appears. 2. In the Preferences window, under - Konica Minolta C83hc High Chroma | IC-307 User Guide - Page 166
156 Chapter 12-Setting up your color server Restoring the configuration Requirements: Make sure that you have previously backed up your configuration. The configuration file extension is .cnf. Note: Restore can only be implemented for the same software version. 1. From the File menu, select - Konica Minolta C83hc High Chroma | IC-307 User Guide - Page 167
, by permanently removing data left by files that you have deleted. ● Auto update tool: Enables you to install software updates. These updates include the latest service packs, Windows hot fixes, and related patches for your IC-307 print controller. - Konica Minolta C83hc High Chroma | IC-307 User Guide - Page 168
158 Chapter 12-Setting up your color server - Konica Minolta C83hc High Chroma | IC-307 User Guide - Page 169
13 Working with color server tools Remote Site Manager overview The Remote Site Manager enables a site manager to monitor the status of the IC-307 print controller and other Creo color servers connected to printers on a network. It also enables you, the site manager, to operate these servers from a - Konica Minolta C83hc High Chroma | IC-307 User Guide - Page 170
160 Chapter 13-Working with color server tools 2. Under Administrator, select Remote Tools Setup. 3. In the WebViewer setup area, select Enable Webviewer. 4. In the Remote workspace setup, select Enable Remote Connection. Tip: In this area, you can view Connection Status and how many clients are - Konica Minolta C83hc High Chroma | IC-307 User Guide - Page 171
Installing the Remote Site Manager 161 Installing the Remote Site Manager Install the Remote Site Manager so that you can add servers, monitor their status, and obtain information about the printer, all from your computer. 1. On your desktop, click Start > Run. 2. In the Run dialog box, type the - Konica Minolta C83hc High Chroma | IC-307 User Guide - Page 172
is connected to the selected server. Remote Workspace overview You can connect remotely to the IC-307 print controller workspace only in servers that support the remote workspace option. The Remote Workspace tool opens an actual workspace for the selected server and enables you to import jobs, print - Konica Minolta C83hc High Chroma | IC-307 User Guide - Page 173
Installing the Remote Workspace tool in Mac OS X (10.4, 10.5, and 10.6) 163 1. On the taskbar, right-click the Remote Site Manager icon. 2. In the menu that appears, select one of the servers. The Remote Workspace window of that server appears. Installing the Remote Workspace tool in Mac OS X (10 - Konica Minolta C83hc High Chroma | IC-307 User Guide - Page 174
164 Chapter 13-Working with color server tools Removing the Remote Workspace tool in Mac OS X (10.4, 10.5, and 10.6) Delete the Color_Server_Client_Tools/ Remote_Workspace_ folder from the Applications folder. Overview of the Web Center The Web Center is a web page that provides - Konica Minolta C83hc High Chroma | IC-307 User Guide - Page 175
files to a hot folder and then submit the files for printing on the Creo color server. The following Microsoft Office versions are supported: ● Microsoft Office XP ● Microsoft Office 2003 ● Microsoft Office 2007 Installing the Office Hot Folder tool Requirements: Microsoft Office must be installed - Konica Minolta C83hc High Chroma | IC-307 User Guide - Page 176
166 Chapter 13-Working with color server tools 1. On the IC-307 print controller, locate the D:\Utilities\PC Utilities folder. 2. Double-click the Office_HF.exe file. The Office Hot Folder tool is installed on your computer, the Office HF icon appears on your taskbar, and the Office Hot Folder - Konica Minolta C83hc High Chroma | IC-307 User Guide - Page 177
for birthdays ● Invitations There are three main steps involved in using the Easy VDP File Creator tool: 1. Select a template. 2. Assign data. Enter the data manually or import an existing database. 3. Create the job and print it to one of the IC-307 print controller virtual printers. You can access - Konica Minolta C83hc High Chroma | IC-307 User Guide - Page 178
168 Chapter 13-Working with color server tools Selecting an Easy VDP File Creator template The first step in creating a variable data job is to select the type of job and template that will be printed. 1. Open the IC-307 print controller Web Center, select Links, and then select Easy VDP File - Konica Minolta C83hc High Chroma | IC-307 User Guide - Page 179
your variable data job 169 Adding records manually to your variable data job The next step in variable data directly in the Easy VDP File Creator tool. 1. In the Easy VDP File Creator tool, select Manually. 2. In the Variable Data area, type in the data for each field. If you want a particular - Konica Minolta C83hc High Chroma | IC-307 User Guide - Page 180
170 Chapter 13-Working with color server tools Note: The Excel file must include the same fields as defined in the properties of the template that you selected. 1. In the Easy VDP File Creator tool, select Database. 2. Click Browse to upload your Excel database file, or click Create Database File. - Konica Minolta C83hc High Chroma | IC-307 User Guide - Page 181
on a remote computer, you don't need to be connected to a color server to create a job ticket. You can assign a job ticket to of the supported file types. With the Creo Color Server Job Ticket software you can: ● Create a job ticket ● Open a job ticket ● Load job parameters from a selected server - Konica Minolta C83hc High Chroma | IC-307 User Guide - Page 182
172 Chapter 13-Working with color server tools Creating and managing job tickets Creating a job ticket in Windows 1. From the Start menu, select Programs > Creo Color Server Job Ticket > Creo Color Server JT > Creo Color Server Job Ticket V1_0. The Creo Color Server JT window opens. 2. To add a - Konica Minolta C83hc High Chroma | IC-307 User Guide - Page 183
Creating a job ticket in Mac OS 173 Creating a job ticket in Mac OS 1. On your desktop, double-click the JTcreator.app icon. The Creo Color Server JT window opens. 2. To add a server, perform the following actions: a. From the Tools menu, select Use JT Settings From > Setup. b. In the Setup window - Konica Minolta C83hc High Chroma | IC-307 User Guide - Page 184
the Input Files or Pages area, and then select Send to Digital Direct. The Process Info window appears and then the Submit to Digital Print window opens. 4. Set the Order Quantity. 5. Select the Press Settings tab. 6. Select the digital press that you want to print the file to. 7. Click Choose and - Konica Minolta C83hc High Chroma | IC-307 User Guide - Page 185
template. 2. In the Start Process dialog box, select Edit Process Template. 3. In the Loose Page Proof template dialog box, click the Include JDF for Digital Print tab. 4. In the Device Selection list, select Creo Color Server. 5. In the PDF Path box, type \\\ - Konica Minolta C83hc High Chroma | IC-307 User Guide - Page 186
176 Chapter 13-Working with color server tools 5. Click Add. 6. Click OK. The new server appears in the list. Removing a server Requirements: The Remove button is available only if the list of servers contains more than one server. 1. From the Tools menu, select Use JT Settings From > Other - Konica Minolta C83hc High Chroma | IC-307 User Guide - Page 187
Settings From > Other Devices. Updates 2. Under Device Name, double-click the server that you want to rename. 3. Type a new name for the server, and press Enter. Note: The name of a server must be unique. 4. If a server with the same name already exists, you are prompted with a message. To replace - Konica Minolta C83hc High Chroma | IC-307 User Guide - Page 188
178 Chapter 13-Working with color server tools job parameters settings of the server selected on the Creo Color Server Job Ticket changed. The following types of resources are examples of information that may be updated: ● Paper stocks ● Gradation tables ● Imposition templates ● Destination - Konica Minolta C83hc High Chroma | IC-307 User Guide - Page 189
then sent to the Creo color server and printed. The Transaction IPDS service receives the IPDS print stream via port 5001 and transmits the converted data chunked, with a maximum of 2000 pages per chunk. The Transaction IPDS service is configured to use an IPDS driver and emulates an IPDS printer-for - Konica Minolta C83hc High Chroma | IC-307 User Guide - Page 190
window, click Finish. 14. Restart the IC-307 print controller. The IC-307 print controller recognizes the dongle and starts the Transaction IPDS service. 15. To check whether the Transaction Power Kit is installed, from the Help menu, click About. The phrase Transaction IPDS should appear in - Konica Minolta C83hc High Chroma | IC-307 User Guide - Page 191
Modifying an IPDS driver 181 9. In the Master Template list, select the template to base the driver on. The Transaction Power Kit has predefined driver templates. It is recommended that you use these driver templates when adding an IPDS driver. 10. Click Input Trays, and configure the parameters - Konica Minolta C83hc High Chroma | IC-307 User Guide - Page 192
Actions > Login. 3. In the Account Name list, select admin. 4. In the Password box, type admin. 5. Click Login. 6. Select Actions > Halt IPDS Service to stop the Transaction IPDS service. 7. Select Configuration > Services. 8. In the Driver list, select the driver that you want to use for the IPDS - Konica Minolta C83hc High Chroma | IC-307 User Guide - Page 193
admin. 5. Click Login. 6. Select Configuration > Services. 7. Click Emulator Setup. 8. Modify the settings as . Collecting IPDS traces When there is a problem, use the IPDS Capture Tool to collect Copy IPDSCapture.exe from D:\Utilities \Transaction IPDS\Support Tool to the desktop, and double-click - Konica Minolta C83hc High Chroma | IC-307 User Guide - Page 194
The written trace file is ready to send to IPDS support for analysis. IPDS driver parameters Input-tray parameters The Input Trays page -The printer is capable of both types of duplex. Input Trays Rotation Name Manual Feed Tray Max Paper Size Enables you to rotate the print image clock-wise - Konica Minolta C83hc High Chroma | IC-307 User Guide - Page 195
a Selection String, Before string, or After string, you can use either the current language or PJL. Enables you to select the maximum paper size for a manual-feed tray. Enables you to define front, back, X, and Y offsets Enables you to edit the list of mappings between IPDS Tray IDs and the tray - Konica Minolta C83hc High Chroma | IC-307 User Guide - Page 196
186 Chapter 14-Power Kits Output-bin parameters The Output Bins page enables you to change the parameters for the output bin, output-bin mapping to IPDS bin numbers, and finishing operations. Parameter Option Description Output Bins Output Bin Mappings Finishing Operations Name Selection - Konica Minolta C83hc High Chroma | IC-307 User Guide - Page 197
● Perforation cut ● Z-fold ● Center fold in ● Punch ● Saddle stitch in Position Enables you to define the finishing position. The following options are supported: ● Default, unused. This is for use when none of these positions are applicable to the operation type being configured, or when you want - Konica Minolta C83hc High Chroma | IC-307 User Guide - Page 198
Carriage Return Line Feed) Enables you to define how simplex and duplex are controlled within a staple group. Enables you to select the resolutions supported. What you select depends partly on the printer language used, and partly on the specific target printer configured for the driver. Enables you - Konica Minolta C83hc High Chroma | IC-307 User Guide - Page 199
15 Troubleshooting Job History window The Job History window lists all of the messages that were generated during the workflow of the selected job. You can view - Konica Minolta C83hc High Chroma | IC-307 User Guide - Page 200
190 Chapter 15-Troubleshooting Date & Time Stage Message Job Information The date and time on which the message was emitted (the time stamp). The stage in the workflow-for - Konica Minolta C83hc High Chroma | IC-307 User Guide - Page 201
Aborting a job 191 2. Close the alerts information. 3. If a job was frozen, follow the directions in the alert message to correct the situation (incorrect or missing paper stock or finisher). Aborting a job Requirements: A job that is processing or printing. Right-click the running job in one of - Konica Minolta C83hc High Chroma | IC-307 User Guide - Page 202
192 Chapter 15-Troubleshooting Show Selected Show All Clear All Alert window options Displays the alert for the selected job in the queues or Storage area. Displays the system - Konica Minolta C83hc High Chroma | IC-307 User Guide - Page 203
file and a low-resolution file called PSImage. You use the latter file for positioning and manipulating images in DTP software. The high-resolution file automatically replaces the lowresolution version during the RIP process. bitmap file format A file format in which graphics are represented by - Konica Minolta C83hc High Chroma | IC-307 User Guide - Page 204
194 Chapter 16-Glossary brightness The amount of light reflected from a surface, regardless of the hue or saturation of color. In print reproduction, the reflectance of the paper affects brightness. cache To store data after it has been accessed so that future access will be faster. calibration - Konica Minolta C83hc High Chroma | IC-307 User Guide - Page 205
195 color correction The process of improving or altering the color components of an image to compensate for deficiencies in printing inks, to solve problems in the color separation itself, or to fulfill a customer's request for modification. color gamut The range of possible colors that can be - Konica Minolta C83hc High Chroma | IC-307 User Guide - Page 206
196 Chapter 16-Glossary composite file A single file-for example, a composite PostScript file or a PDF file -that contains all the color information and is not divided into color separations. That is, the color information is not divided into cyan, magenta, yellow, black, or spot colors. composite - Konica Minolta C83hc High Chroma | IC-307 User Guide - Page 207
or reflective media. A transmission densitometer is used to measure films while a reflection densitometer is used to measure photographs and ink laydown on press sheets. density A measurement of the ability of light to be absorbed by an ink and paper combination. A darker tone has a higher density - Konica Minolta C83hc High Chroma | IC-307 User Guide - Page 208
198 Chapter 16-Glossary device-independent color space A color space based on human perception of color, measured using a colorimeter or spectrophotometer. The color space is independent of the color capabilities of any specific device. An example is CIELAB. A device-independent color space may be - Konica Minolta C83hc High Chroma | IC-307 User Guide - Page 209
. gravure printing A printing method in which the image is engraved through a screen below the surface of a cylinder. The ink is transferred to paper when pressed to the cylinder. Gravure is used for very long print runs and on many substrates. gray balance The values for yellow, magenta, and cyan - Konica Minolta C83hc High Chroma | IC-307 User Guide - Page 210
file with a particular template. The job ticket contains all the instructions for processing the input file. L*a*b* A device-independent color measurement outputdevice-specific information, including fonts, line screens, offset margins, supported page sizes, and so on. pre-separated file A PDF, - Konica Minolta C83hc High Chroma | IC-307 User Guide - Page 211
. If you edit a PSImage file (for example, you add a mask or a clipping path), the workflow software applies your changes to the high-resolution file and automatically replaces the PSImage file during the RIP process. relative colorimetric A method of color matching. When translating colors from one - Konica Minolta C83hc High Chroma | IC-307 User Guide - Page 212
black area to which layers of other inks, referred to as support screens or booster colors, have been added to make the color dot areas between 80 percent and 100 percent. sheet Both surfaces of one printed press sheet. short-edge first (SEF) A printer page orientation where pages are delivered - Konica Minolta C83hc High Chroma | IC-307 User Guide - Page 213
procedure of copying the same image by stepping it in position both horizontally and vertically according to a predetermined layout. stochastic screening A digital screening process that converts images into very small dots of equal size and variable spacing. Also referred to as frequency-modulated - Konica Minolta C83hc High Chroma | IC-307 User Guide - Page 214
and exchange bitmap images. TIFF is crossplatform, highly flexible, and capable of saving a wide illustrations. Most page makeup and image editing software supports TIFF. TIFF/IT-P1 Acronym for Tagged Image values on final output such as a proof, press sheet, or plate. trapping A printing technique - Konica Minolta C83hc High Chroma | IC-307 User Guide - Page 215
of accounting records 45 show, hide, and move columns 45 activate IPDS service 182 adding an IPDS driver 180 AFP 179 Alerts window 191 APPE RIP calibration table using i1 20 printing off-the-glass calibration chart 18 troubleshooting 21 collect IPDS traces 183 color sets 36-38 assigning to your - Konica Minolta C83hc High Chroma | IC-307 User Guide - Page 216
307 Print Controller, Powered by Creo Color Server Technology User Guide IPDS 179 IPDS input trays 184 IPDS miscellaneous parameters 187 54 measuring a color chart and creating a profile 50 overview 49 troubleshooting 52 Q Quality tab Image/Graphics Quality 123 Overprint 123 Resolution 123 - Konica Minolta C83hc High Chroma | IC-307 User Guide - Page 217
installing Remote Scan Application on a Mac 104 Remote Scan Application 103 Services tab Optimizations 141 Admin page 141 APR/OPI 141 Font substitution 141 messages 192 system overview 2 hardware and software components 2 supported formats 2 V Variable data printing (VDP) archiving elements 113 - Konica Minolta C83hc High Chroma | IC-307 User Guide - Page 218
-
 1
1 -
 2
2 -
 3
3 -
 4
4 -
 5
5 -
 6
6 -
 7
7 -
8
-
9
-
10
-
11
-
12
-
13
-
14
-
15
-
16
-
17
-
18
-
19
-
20
-
21
-
22
-
23
-
24
-
25
-
26
-
27
-
28
-
29
-
30
-
31
-
32
-
33
-
34
-
35
-
36
-
37
-
38
-
39
-
40
-
41
-
42
-
43
-
44
-
45
-
46
-
47
-
48
-
49
-
50
-
51
-
52
-
53
-
54
-
55
-
56
-
57
-
58
-
59
-
60
-
61
-
62
-
63
-
64
-
65
-
66
-
67
-
68
-
69
-
70
-
71
-
72
-
73
-
74
-
75
-
76
-
77
-
78
-
79
-
80
-
81
-
82
-
83
-
84
-
85
-
86
-
87
-
88
-
89
-
90
-
91
-
92
-
93
-
94
-
95
-
96
-
97
-
98
-
99
-
100
-
101
-
102
-
103
-
104
-
105
-
106
-
107
-
108
-
109
-
110
-
111
-
112
-
113
-
114
-
115
-
116
-
117
-
118
-
119
-
120
-
121
-
122
-
123
-
124
-
125
-
126
-
127
-
128
-
129
-
130
-
131
-
132
-
133
-
134
-
135
-
136
-
137
-
138
-
139
-
140
-
141
-
142
-
143
-
144
-
145
-
146
-
147
-
148
-
149
-
150
-
151
-
152
-
153
-
154
-
155
-
156
-
157
-
158
-
159
-
160
-
161
-
162
-
163
-
164
-
165
-
166
-
167
-
168
-
169
-
170
-
171
-
172
-
173
-
174
-
175
-
176
-
177
-
178
-
179
-
180
-
181
-
182
-
183
-
184
-
185
-
186
-
187
-
188
-
189
-
190
-
191
-
192
-
193
-
194
-
195
-
196
-
197
-
198
-
199
-
200
-
201
-
202
-
203
-
204
-
205
-
206
-
207
-
208
-
209
-
210
-
211
-
212
-
213
-
214
-
215
-
216
-
217
-
218
 |
 |

User Guide
English
IC-307 Print Controller, Powered by Creo
Color Server Technology
Version 1.1
731-02039A-EN Rev A