Konica Minolta C83hc High Chroma IC-307 User Guide - Page 25
Defining a printer with the Print Driver software in Mac OS X(10.4
 |
View all Konica Minolta C83hc High Chroma manuals
Add to My Manuals
Save this manual to your list of manuals |
Page 25 highlights
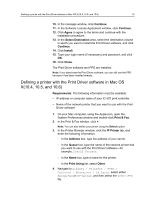
Defining a printer with the Print Driver software in Mac OS X(10.4, 10.5, and 10.6) 15 10. In the message window, click Continue. 11. In the Software License Agreement window, click Continue. 12. Click Agree to agree to the terms and continue with the installation procedure. 13. In the Select Destination area, select the destination volume in which you want to install the Print Driver software, and click Continue. 14. Click Install. 15. Type your login name (if necessary) and password, and click OK. 16. Click Close. The Print Driver software and PPD are installed. Note: If you deactivate the Print Driver software, you can still use the PPD because it has been installed already. Defining a printer with the Print Driver software in Mac OS X(10.4, 10.5, and 10.6) Requirements: The following information must be available: ● IP address or computer name of your IC-307 print controller ● Name of the network printer that you want to use with the Print Driver software 1. On your Mac computer, using the Apple icon, open the System Preferences window and double-click Print & Fax. 2. In the Print & Fax window, click +. Note: You can also define your printer using the Default option. 3. In the Printer Browser window, click the IP Printer tab, and enter the following information: ○ In the Address box, type the address of your server. ○ In the Queue box, type the name of the network printer that you want to use with the Print Driver software-for example, CreoCS_Process. ○ In the Name box, type a name for the printer. ○ In the Print Using list, select Other. 4. Navigate to Library / Printers / PPDs / Contents / Resources / en.lproj, select either Europe-A4 or US-Letter, and then select the IC307.PPD file.
-
 1
1 -
2
-
3
-
4
-
5
-
6
-
7
-
8
-
9
-
10
-
11
-
12
-
13
-
14
-
15
-
16
-
17
-
18
-
19
-
 20
20 -
 21
21 -
 22
22 -
 23
23 -
 24
24 -
 25
25 -
 26
26 -
 27
27 -
 28
28 -
 29
29 -
 30
30 -
31
-
32
-
33
-
34
-
35
-
36
-
37
-
38
-
39
-
40
-
41
-
42
-
43
-
44
-
45
-
46
-
47
-
48
-
49
-
50
-
51
-
52
-
53
-
54
-
55
-
56
-
57
-
58
-
59
-
60
-
61
-
62
-
63
-
64
-
65
-
66
-
67
-
68
-
69
-
70
-
71
-
72
-
73
-
74
-
75
-
76
-
77
-
78
-
79
-
80
-
81
-
82
-
83
-
84
-
85
-
86
-
87
-
88
-
89
-
90
-
91
-
92
-
93
-
94
-
95
-
96
-
97
-
98
-
99
-
100
-
101
-
102
-
103
-
104
-
105
-
106
-
107
-
108
-
109
-
110
-
111
-
112
-
113
-
114
-
115
-
116
-
117
-
118
-
119
-
120
-
121
-
122
-
123
-
124
-
125
-
126
-
127
-
128
-
129
-
130
-
131
-
132
-
133
-
134
-
135
-
136
-
137
-
138
-
139
-
140
-
141
-
142
-
143
-
144
-
145
-
146
-
147
-
148
-
149
-
150
-
151
-
152
-
153
-
154
-
155
-
156
-
157
-
158
-
159
-
160
-
161
-
162
-
163
-
164
-
165
-
166
-
167
-
168
-
169
-
170
-
171
-
172
-
173
-
174
-
175
-
176
-
177
-
178
-
179
-
180
-
181
-
182
-
183
-
184
-
185
-
186
-
187
-
188
-
189
-
190
-
191
-
192
-
193
-
194
-
195
-
196
-
197
-
198
-
199
-
200
-
201
-
202
-
203
-
204
-
205
-
206
-
207
-
208
-
209
-
210
-
211
-
212
-
213
-
214
-
215
-
216
-
217
-
218
 |
 |