Konica Minolta C83hc High Chroma IC-307 User Guide - Page 185
Adding a server, Use JT Settings
 |
View all Konica Minolta C83hc High Chroma manuals
Add to My Manuals
Save this manual to your list of manuals |
Page 185 highlights
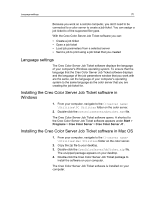
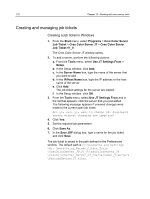
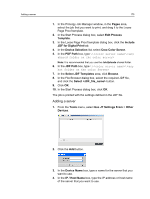
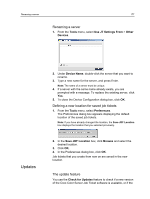
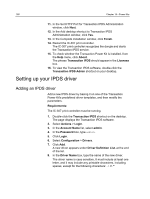
Adding a server 175 1. In the Prinergy Job Manager window, in the Pages area, select the job that you want to print, and drag it to the Loose Page Proof template. 2. In the Start Process dialog box, select Edit Process Template. 3. In the Loose Page Proof template dialog box, click the Include JDF for Digital Print tab. 4. In the Device Selection list, select Creo Color Server. 5. In the PDF Path box, type \\\ Note: It is recommended that you use the JobUploads shared folder. 6. In the JDF Path box, type \\\ 7. In the Select JDF Templates area, click Browse. 8. In the File Browser dialog box, select the required JDF file, and click the Select button. 9. Click OK. 10. In the Start Process dialog box, click OK. The job is printed with the settings defined in the JDF file. Adding a server 1. From the Tools menu, select Use JT Settings From > Other Devices. 2. Click the Add button. 3. In the Device Name box, type a name for the server that you want to use. 4. In the IP / Host Name box, type the IP address or host name of the server that you want to use.
-
 1
1 -
2
-
3
-
4
-
5
-
6
-
7
-
8
-
9
-
10
-
11
-
12
-
13
-
14
-
15
-
16
-
17
-
18
-
19
-
20
-
21
-
22
-
23
-
24
-
25
-
26
-
27
-
28
-
29
-
30
-
31
-
32
-
33
-
34
-
35
-
36
-
37
-
38
-
39
-
40
-
41
-
42
-
43
-
44
-
45
-
46
-
47
-
48
-
49
-
50
-
51
-
52
-
53
-
54
-
55
-
56
-
57
-
58
-
59
-
60
-
61
-
62
-
63
-
64
-
65
-
66
-
67
-
68
-
69
-
70
-
71
-
72
-
73
-
74
-
75
-
76
-
77
-
78
-
79
-
80
-
81
-
82
-
83
-
84
-
85
-
86
-
87
-
88
-
89
-
90
-
91
-
92
-
93
-
94
-
95
-
96
-
97
-
98
-
99
-
100
-
101
-
102
-
103
-
104
-
105
-
106
-
107
-
108
-
109
-
110
-
111
-
112
-
113
-
114
-
115
-
116
-
117
-
118
-
119
-
120
-
121
-
122
-
123
-
124
-
125
-
126
-
127
-
128
-
129
-
130
-
131
-
132
-
133
-
134
-
135
-
136
-
137
-
138
-
139
-
140
-
141
-
142
-
143
-
144
-
145
-
146
-
147
-
148
-
149
-
150
-
151
-
152
-
153
-
154
-
155
-
156
-
157
-
158
-
159
-
160
-
161
-
162
-
163
-
164
-
165
-
166
-
167
-
168
-
169
-
170
-
171
-
172
-
173
-
174
-
175
-
176
-
177
-
178
-
179
-
 180
180 -
 181
181 -
 182
182 -
 183
183 -
 184
184 -
 185
185 -
 186
186 -
 187
187 -
 188
188 -
 189
189 -
 190
190 -
191
-
192
-
193
-
194
-
195
-
196
-
197
-
198
-
199
-
200
-
201
-
202
-
203
-
204
-
205
-
206
-
207
-
208
-
209
-
210
-
211
-
212
-
213
-
214
-
215
-
216
-
217
-
218
 |
 |