Konica Minolta C83hc High Chroma IC-307 User Guide - Page 193
Collecting IPDS traces, Enable IPDS Data Capture
 |
View all Konica Minolta C83hc High Chroma manuals
Add to My Manuals
Save this manual to your list of manuals |
Page 193 highlights
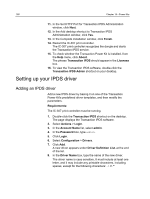
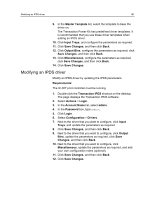
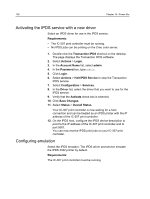
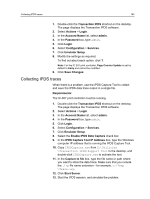
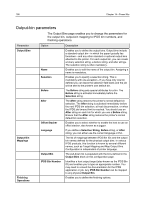
Collecting IPDS traces 183 1. Double-click the Transaction IPDS shortcut on the desktop. The page displays the Transaction IPDS software. 2. Select Actions > Login. 3. In the Account Name list, select admin. 4. In the Password box, type admin. 5. Click Login. 6. Select Configuration > Services. 7. Click Emulator Setup. 8. Modify the settings as required. To find out about each option, click ?. Note: For the IC-307 print controller, Page Counter Update is set by default to Early and cannot be modified. 9. Click Save Changes. Collecting IPDS traces When there is a problem, use the IPDS Capture Tool to collect and save the IPDS data trace output in a single file. Requirements: The IC-307 print controller must be running. 1. Double-click the Transaction IPDS shortcut on the desktop. The page displays the Transaction IPDS software. 2. Select Actions > Login. 3. In the Account Name list, select admin. 4. In the Password box, type admin. 5. Click Login. 6. Select Configuration > Services. 7. Click Emulator Setup. 8. Select the Enable IPDS Data Capture check box. 9. In the IPDS Capture Tool IP Address box, type the Windows computer IP address that is running the IPDS Capture Tool. 10. Copy IPDSCapture.exe from D:\Utilities \Transaction IPDS\Support Tool to the desktop, and double-click IPDSCapture.exe to activate the tool. 11. In the Capture to file box, type the file name or path where you want to store the data trace. Make sure that you include the .irp file name extension-for example, c:\Temp \Trace.irp. 12. Click Start Server. 13. Start the IPDS session, and simulate the problem.
-
 1
1 -
2
-
3
-
4
-
5
-
6
-
7
-
8
-
9
-
10
-
11
-
12
-
13
-
14
-
15
-
16
-
17
-
18
-
19
-
20
-
21
-
22
-
23
-
24
-
25
-
26
-
27
-
28
-
29
-
30
-
31
-
32
-
33
-
34
-
35
-
36
-
37
-
38
-
39
-
40
-
41
-
42
-
43
-
44
-
45
-
46
-
47
-
48
-
49
-
50
-
51
-
52
-
53
-
54
-
55
-
56
-
57
-
58
-
59
-
60
-
61
-
62
-
63
-
64
-
65
-
66
-
67
-
68
-
69
-
70
-
71
-
72
-
73
-
74
-
75
-
76
-
77
-
78
-
79
-
80
-
81
-
82
-
83
-
84
-
85
-
86
-
87
-
88
-
89
-
90
-
91
-
92
-
93
-
94
-
95
-
96
-
97
-
98
-
99
-
100
-
101
-
102
-
103
-
104
-
105
-
106
-
107
-
108
-
109
-
110
-
111
-
112
-
113
-
114
-
115
-
116
-
117
-
118
-
119
-
120
-
121
-
122
-
123
-
124
-
125
-
126
-
127
-
128
-
129
-
130
-
131
-
132
-
133
-
134
-
135
-
136
-
137
-
138
-
139
-
140
-
141
-
142
-
143
-
144
-
145
-
146
-
147
-
148
-
149
-
150
-
151
-
152
-
153
-
154
-
155
-
156
-
157
-
158
-
159
-
160
-
161
-
162
-
163
-
164
-
165
-
166
-
167
-
168
-
169
-
170
-
171
-
172
-
173
-
174
-
175
-
176
-
177
-
178
-
179
-
180
-
181
-
182
-
183
-
184
-
185
-
186
-
187
-
 188
188 -
 189
189 -
 190
190 -
 191
191 -
 192
192 -
 193
193 -
 194
194 -
 195
195 -
 196
196 -
 197
197 -
 198
198 -
199
-
200
-
201
-
202
-
203
-
204
-
205
-
206
-
207
-
208
-
209
-
210
-
211
-
212
-
213
-
214
-
215
-
216
-
217
-
218
 |
 |