Lenovo ThinkPad X1 (English) User Guide - Page 101
Installing and replacing the PCI Express Mini Card for wireless
 |
View all Lenovo ThinkPad X1 manuals
Add to My Manuals
Save this manual to your list of manuals |
Page 101 highlights
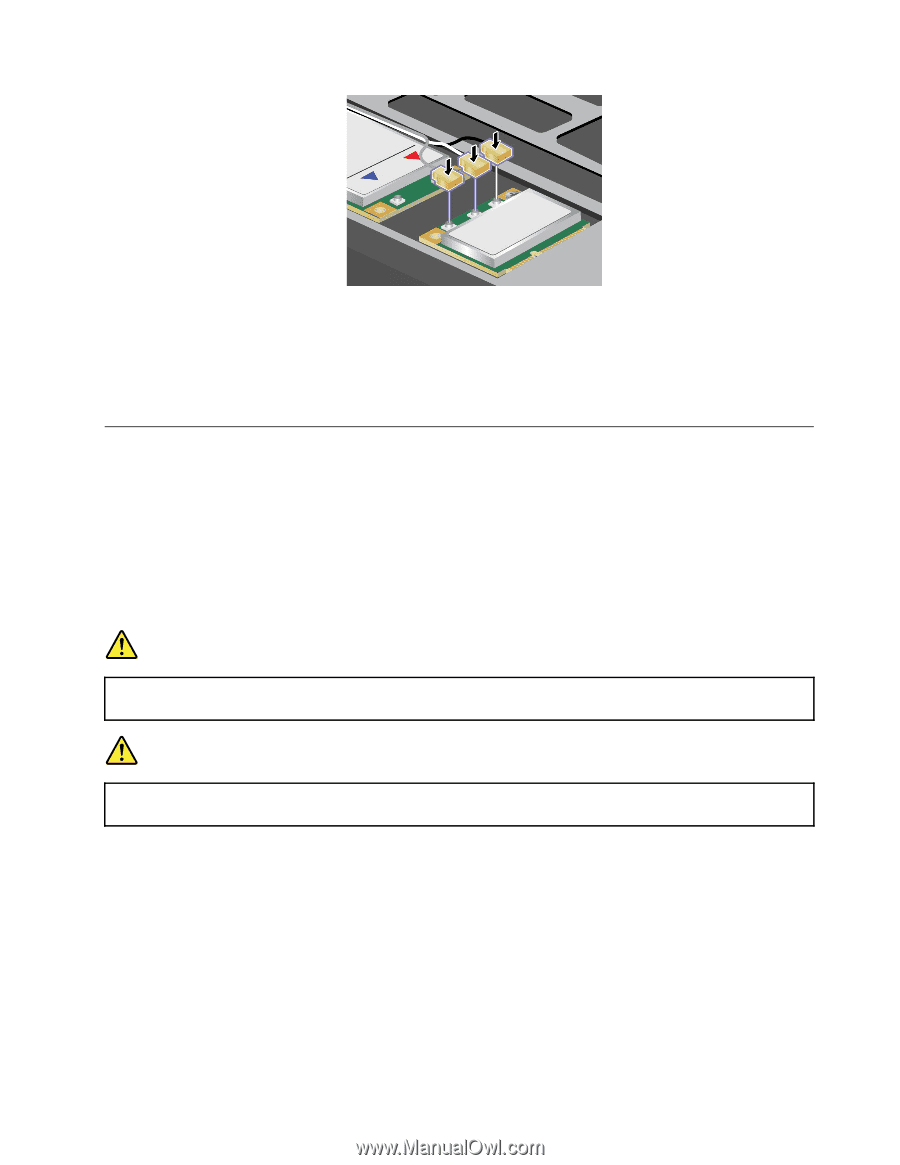
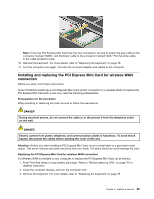
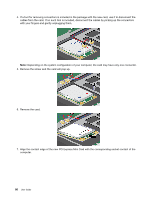
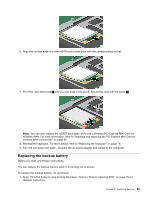
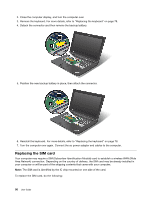
Note: If the new PCI Express Mini Card has only two connectors, be sure to attach the gray cable to the connector marked "MAIN," and the black cable to the connector marked "AUX." Put the white cable in the cable protection tube. 10. Reinstall the keyboard. For more details, refer to "Replacing the keyboard" on page 78. 11. Turn the computer over again. Connect the ac power adapter and cables to the computer. Installing and replacing the PCI Express Mini Card for wireless WAN connection Before you start, print these instructions. Some ThinkPad models have a PCI Express Mini Card slot for connection to a wireless WAN. To replace the PCI Express Mini Card with a new one, read the following prerequisites. Prerequisites for the procedure When installing or replacing the card, be sure to follow the precautions. DANGER During electrical storms, do not connect the cable to or disconnect it from the telephone outlet on the wall. DANGER Electric current from power, telephone, and communication cables is hazardous. To avoid shock hazard, disconnect the cables before opening the cover of this slot. Attention: Before you start installing a PCI Express Mini Card, touch a metal table or a grounded metal object. This action reduces any static electricity from your body. The static electricity could damage the card. Replacing the PCI Express Mini Card for wireless WAN connection If a Wireless WAN is available in your computer, to replace the PCI Express Mini Card, do as follows: 1. Enter ThinkPad Setup to stop battery discharge. Refer to "Before replacing CRU" on page 75 for detailed instruction. 2. Close the computer display, and turn the computer over. 3. Remove the keyboard. For more details, refer to "Replacing the keyboard" on page 78. Chapter 6. Replacing devices 85
-
 1
1 -
2
-
3
-
4
-
5
-
6
-
7
-
8
-
9
-
10
-
11
-
12
-
13
-
14
-
15
-
16
-
17
-
18
-
19
-
20
-
21
-
22
-
23
-
24
-
25
-
26
-
27
-
28
-
29
-
30
-
31
-
32
-
33
-
34
-
35
-
36
-
37
-
38
-
39
-
40
-
41
-
42
-
43
-
44
-
45
-
46
-
47
-
48
-
49
-
50
-
51
-
52
-
53
-
54
-
55
-
56
-
57
-
58
-
59
-
60
-
61
-
62
-
63
-
64
-
65
-
66
-
67
-
68
-
69
-
70
-
71
-
72
-
73
-
74
-
75
-
76
-
77
-
78
-
79
-
80
-
81
-
82
-
83
-
84
-
85
-
86
-
87
-
88
-
89
-
90
-
91
-
92
-
93
-
94
-
95
-
 96
96 -
 97
97 -
 98
98 -
 99
99 -
 100
100 -
 101
101 -
 102
102 -
 103
103 -
 104
104 -
 105
105 -
 106
106 -
107
-
108
-
109
-
110
-
111
-
112
-
113
-
114
-
115
-
116
-
117
-
118
-
119
-
120
-
121
-
122
-
123
-
124
-
125
-
126
-
127
-
128
-
129
-
130
-
131
-
132
-
133
-
134
-
135
-
136
-
137
-
138
-
139
-
140
-
141
-
142
-
143
-
144
-
145
-
146
-
147
-
148
-
149
-
150
-
151
-
152
-
153
-
154
-
155
-
156
-
157
-
158
-
159
-
160
-
161
-
162
-
163
-
164
-
165
-
166
-
167
-
168
-
169
-
170
-
171
-
172
-
173
-
174
-
175
-
176
-
177
-
178
-
179
-
180
-
181
 |
 |