Lenovo ThinkPad X1 (English) User Guide - Page 94
Replacing the keyboard, do the following
 |
View all Lenovo ThinkPad X1 manuals
Add to My Manuals
Save this manual to your list of manuals |
Page 94 highlights
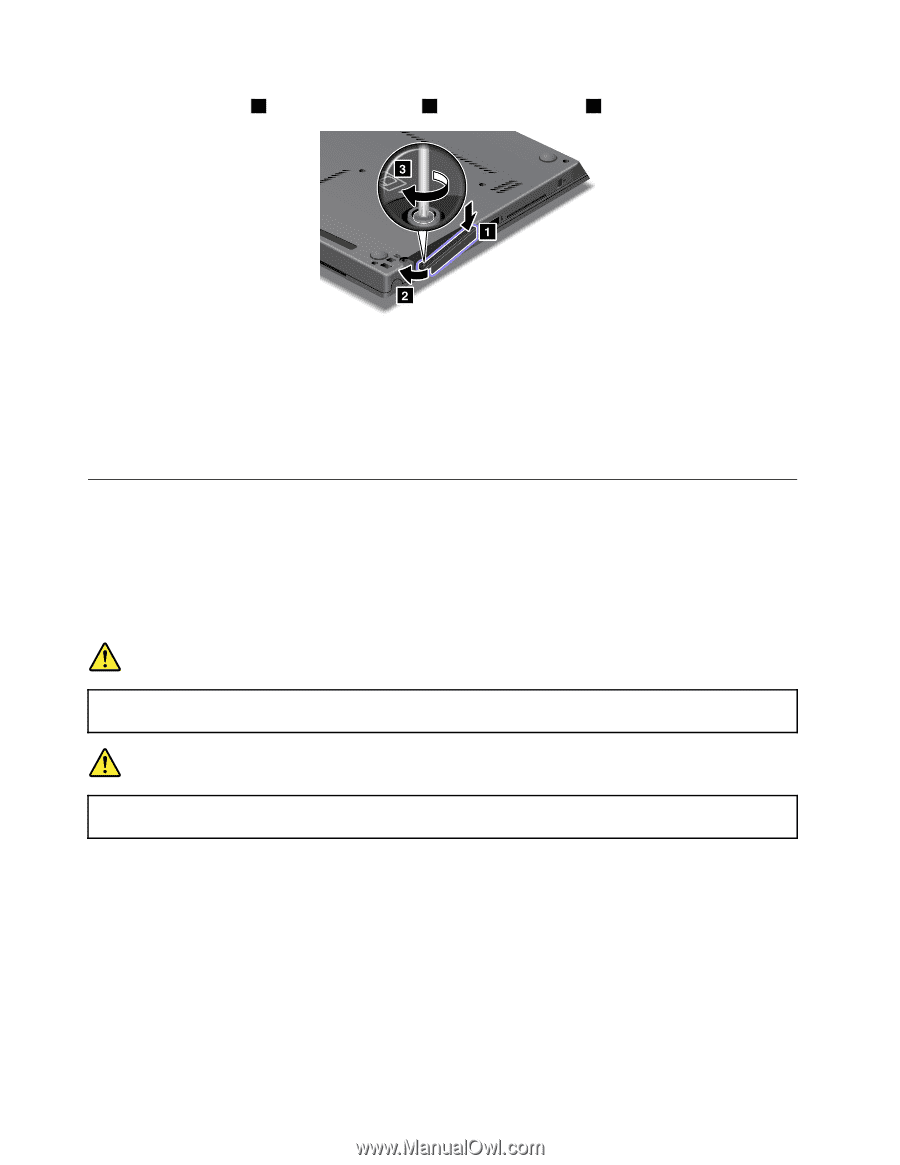
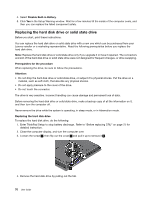
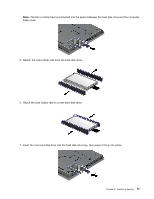
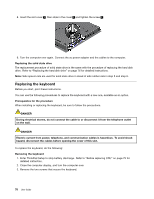
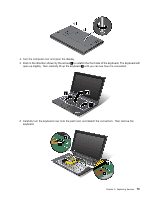
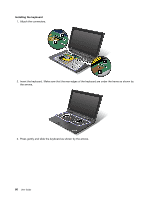
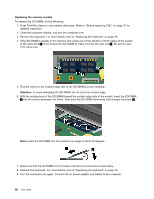
8. Insert the slot cover 1 , then slide in the cover 2 and tighten the screw 3 . 9. Turn the computer over again. Connect the ac power adapter and the cables to the computer. Replacing the solid state drive The replacement procedure of solid state drive is the same with the procedure of replacing the hard disk drive. Refer to "Replacing the hard disk drive" on page 76 for detailed instructions. Note: Side spacer rails are used for solid state drive in stead of side rubber rails in step 5 and step 6. Replacing the keyboard Before you start, print these instructions. You can use the following procedures to replace the keyboard with a new one, available as an option. Prerequisites for the procedure When installing or replacing the keyboard, be sure to follow the precautions. DANGER During electrical storms, do not connect the cable to or disconnect it from the telephone outlet on the wall. DANGER Electric current from power, telephone, and communication cables is hazardous. To avoid shock hazard, disconnect the cables before opening the cover of this slot. To replace the keyboard, do the following: Removing the keyboard 1. Enter ThinkPad Setup to stop battery discharge. Refer to "Before replacing CRU" on page 75 for detailed instruction. 2. Close the computer display, and turn the computer over. 3. Remove the two screws that secure the keyboard. 78 User Guide
-
 1
1 -
2
-
3
-
4
-
5
-
6
-
7
-
8
-
9
-
10
-
11
-
12
-
13
-
14
-
15
-
16
-
17
-
18
-
19
-
20
-
21
-
22
-
23
-
24
-
25
-
26
-
27
-
28
-
29
-
30
-
31
-
32
-
33
-
34
-
35
-
36
-
37
-
38
-
39
-
40
-
41
-
42
-
43
-
44
-
45
-
46
-
47
-
48
-
49
-
50
-
51
-
52
-
53
-
54
-
55
-
56
-
57
-
58
-
59
-
60
-
61
-
62
-
63
-
64
-
65
-
66
-
67
-
68
-
69
-
70
-
71
-
72
-
73
-
74
-
75
-
76
-
77
-
78
-
79
-
80
-
81
-
82
-
83
-
84
-
85
-
86
-
87
-
88
-
 89
89 -
 90
90 -
 91
91 -
 92
92 -
 93
93 -
 94
94 -
 95
95 -
 96
96 -
 97
97 -
 98
98 -
 99
99 -
100
-
101
-
102
-
103
-
104
-
105
-
106
-
107
-
108
-
109
-
110
-
111
-
112
-
113
-
114
-
115
-
116
-
117
-
118
-
119
-
120
-
121
-
122
-
123
-
124
-
125
-
126
-
127
-
128
-
129
-
130
-
131
-
132
-
133
-
134
-
135
-
136
-
137
-
138
-
139
-
140
-
141
-
142
-
143
-
144
-
145
-
146
-
147
-
148
-
149
-
150
-
151
-
152
-
153
-
154
-
155
-
156
-
157
-
158
-
159
-
160
-
161
-
162
-
163
-
164
-
165
-
166
-
167
-
168
-
169
-
170
-
171
-
172
-
173
-
174
-
175
-
176
-
177
-
178
-
179
-
180
-
181
 |
 |