Mackie DL806 Reference Guide - Page 44
Mixer View : Master Fader, Introduction, Output Selector / Output Channels
 |
View all Mackie DL806 manuals
Add to My Manuals
Save this manual to your list of manuals |
Page 44 highlights
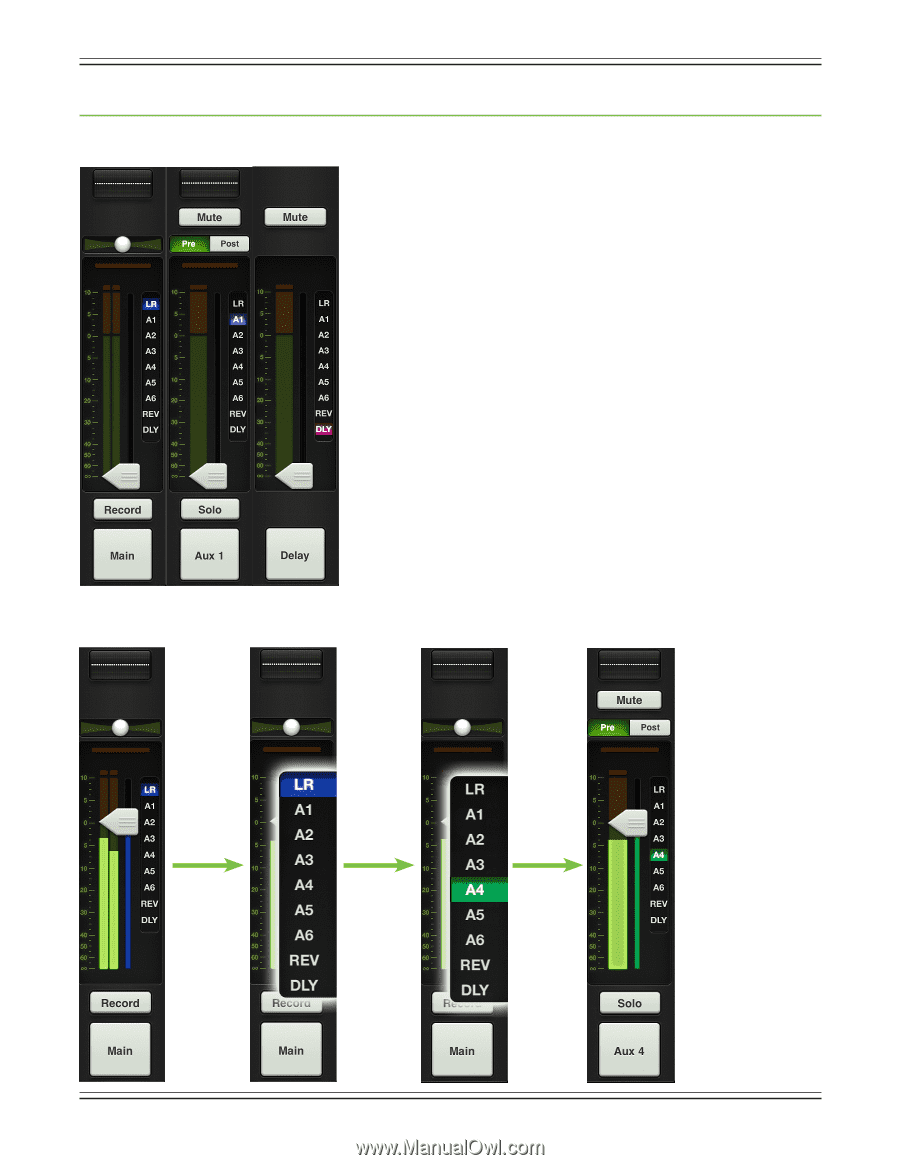
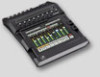
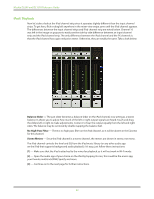
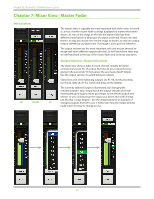
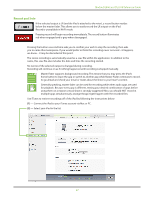
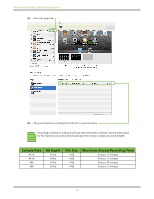
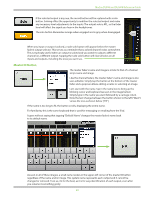
Mackie DL806 and DL1608 Reference Guide Chapter 7: Mixer View : Master Fader Introduction LR AUXES The master fader is arguably the most important tool of the mixer. So much so, in fact, that the master fader is always displayed no matter what view is shown. As seen in the image on the left, the master fader has three different views based on what type of output is selected. Please note that there is no way you would ever see the image as shown, as only one output may be selected at any given time. The image is just a point of reference. The output selector has the most important role (and we just showed an image with three different outputs selected), so we'll start there. After that, we will head back to the top of the master fader and work our way down. Output Selector / Output Channels The mixer view shows a fader for each channel. Initially, this fader controls the level to the LR output. But how do you control the level going to the aux sends? Or how about the aux master level? Simple. Use the output selector to switch between outputs. Select from one of the following outputs: LR, A1-A6, reverb and delay [on the DL1608; LR, A1-A4, reverb and delay on the DL806]. The currently selected output is illuminated, but changing the selected output is easy. Simply touch the output selector and it will immediately grow & glow. Move your finger to the desired output and release. Or you could just tap the output you desire and it will change just like that . See the image below for an example of FX changing outputs from LR to aux 4. Notice also how the output selector really "pops" for easy-to-change access. 44
-
 1
1 -
2
-
3
-
4
-
5
-
6
-
7
-
8
-
9
-
10
-
11
-
12
-
13
-
14
-
15
-
16
-
17
-
18
-
19
-
20
-
21
-
22
-
23
-
24
-
25
-
26
-
27
-
28
-
29
-
30
-
31
-
32
-
33
-
34
-
35
-
36
-
37
-
38
-
 39
39 -
 40
40 -
 41
41 -
 42
42 -
 43
43 -
 44
44 -
 45
45 -
 46
46 -
 47
47 -
 48
48 -
 49
49 -
50
-
51
-
52
-
53
-
54
-
55
-
56
-
57
-
58
-
59
-
60
-
61
-
62
-
63
-
64
-
65
-
66
-
67
-
68
-
69
-
70
-
71
-
72
-
73
-
74
-
75
-
76
-
77
-
78
-
79
-
80
-
81
-
82
-
83
-
84
-
85
-
86
-
87
-
88
-
89
-
90
-
91
-
92
-
93
-
94
-
95
-
96
-
97
-
98
-
99
-
100
-
101
-
102
-
103
-
104
-
105
-
106
-
107
-
108
-
109
-
110
-
111
-
112
-
113
-
114
-
115
-
116
-
117
-
118
-
119
-
120
-
121
-
122
-
123
-
124
-
125
-
126
-
127
-
128
-
129
-
130
-
131
-
132
-
133
-
134
-
135
-
136
-
137
-
138
-
139
-
140
-
141
-
142
-
143
-
144
-
145
-
146
-
147
-
148
-
149
-
150
-
151
-
152
-
153
-
154
-
155
-
156
-
157
-
158
-
159
-
160
 |
 |