Netgear GS724AT GS724AT Reference Manual - Page 193
Port Mirroring, Rising Event
 |
UPC - 606449056907
View all Netgear GS724AT manuals
Add to My Manuals
Save this manual to your list of manuals |
Page 193 highlights
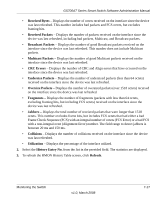
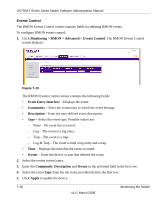
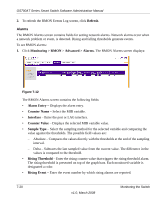
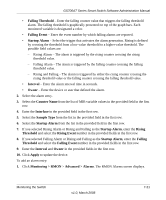
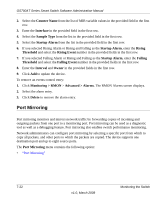
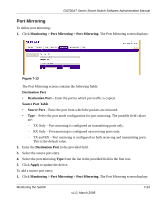
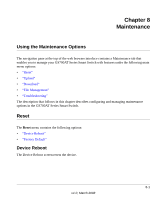
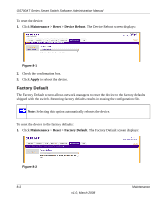
GS700AT Series Smart Switch Software Administration Manual 2. Select the Counter Name from the list of MIB variable values in the provided field in the first row. 3. Enter the Interface in the provided field in the first row. 4. Select the Sample Type from the list in the provided field in the first row. 5. Select the Startup Alarm from the list in the provided field in the first row. 6. If you selected Rising Alarm or Rising and Falling as the Startup Alarm, enter the Rising Threshold and select the Rising Event number in the provided fields in the first row. 7. If you selected Falling Alarm or Rising and Falling as the Startup Alarm, enter the Falling Threshold and select the Falling Event number in the provided fields in the first row. 8. Enter the Interval and Owner in the provided fields in the first row. 9. Click Add to update the device. To remove an events control entry: 1. Click Monitoring > RMON > Advanced > Alarms. The RMON Alarms screen displays. 2. Select the alarm entry. 3. Click Delete to remove the alarm entry. Port Mirroring Port mirroring monitors and mirrors network traffic by forwarding copies of incoming and outgoing packets from one port to a monitoring port. Port mirroring can be used as a diagnostic tool as well as a debugging feature. Port mirroring also enables switch performance monitoring. Network administrators can configure port mirroring by selecting a specific port from which to copy all packets, and other ports to which the packets are copied. The device supports one destination port and up to eight source ports. The Port Mirroring menu contains the following option: • "Port Mirroring" 7-22 v1.0, March 2008 Monitoring the Switch
-
 1
1 -
2
-
3
-
4
-
5
-
6
-
7
-
8
-
9
-
10
-
11
-
12
-
13
-
14
-
15
-
16
-
17
-
18
-
19
-
20
-
21
-
22
-
23
-
24
-
25
-
26
-
27
-
28
-
29
-
30
-
31
-
32
-
33
-
34
-
35
-
36
-
37
-
38
-
39
-
40
-
41
-
42
-
43
-
44
-
45
-
46
-
47
-
48
-
49
-
50
-
51
-
52
-
53
-
54
-
55
-
56
-
57
-
58
-
59
-
60
-
61
-
62
-
63
-
64
-
65
-
66
-
67
-
68
-
69
-
70
-
71
-
72
-
73
-
74
-
75
-
76
-
77
-
78
-
79
-
80
-
81
-
82
-
83
-
84
-
85
-
86
-
87
-
88
-
89
-
90
-
91
-
92
-
93
-
94
-
95
-
96
-
97
-
98
-
99
-
100
-
101
-
102
-
103
-
104
-
105
-
106
-
107
-
108
-
109
-
110
-
111
-
112
-
113
-
114
-
115
-
116
-
117
-
118
-
119
-
120
-
121
-
122
-
123
-
124
-
125
-
126
-
127
-
128
-
129
-
130
-
131
-
132
-
133
-
134
-
135
-
136
-
137
-
138
-
139
-
140
-
141
-
142
-
143
-
144
-
145
-
146
-
147
-
148
-
149
-
150
-
151
-
152
-
153
-
154
-
155
-
156
-
157
-
158
-
159
-
160
-
161
-
162
-
163
-
164
-
165
-
166
-
167
-
168
-
169
-
170
-
171
-
172
-
173
-
174
-
175
-
176
-
177
-
178
-
179
-
180
-
181
-
182
-
183
-
184
-
185
-
186
-
187
-
 188
188 -
 189
189 -
 190
190 -
 191
191 -
 192
192 -
 193
193 -
 194
194 -
 195
195 -
 196
196 -
 197
197 -
 198
198 -
199
-
200
-
201
-
202
-
203
-
204
-
205
-
206
-
207
-
208
-
209
 |
 |