Nokia 3650 User Guide - Page 47
Viewing a contact card, Assigning default numbers and addresses
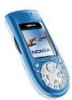 |
View all Nokia 3650 manuals
Add to My Manuals
Save this manual to your list of manuals |
Page 47 highlights
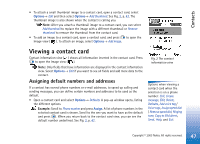
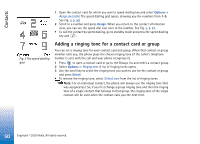
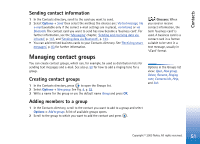
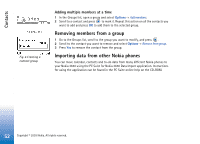
Contacts • To attach a small thumbnail image to a contact card, open a contact card, select Options→ Edit and then select Options→ Add thumbnail. See Fig. 2, p. 47. The thumbnail image is also shown when the contact is calling you. Note: After you attach a thumbnail image to a contact card, you can select Add thumbnail to replace the image with a different thumbnail or Remove thumbnail to remove the thumbnail from the contact card. • To add an image to a contact card, open a contact card, and press to open the Image view ( ). To attach an image, select Options→ Add image. Viewing a contact card Contact information view ( ) shows all information inserted in the contact card. Press to open the Image view ( ). Note: Only fields that have information are displayed in the contact information view. Select Options→ Edit if you want to see all fields and add more data to the contact. Assigning default numbers and addresses If a contact has several phone numbers or e-mail addresses, to speed up calling and sending messages, you can define certain numbers and addresses to be used as the default. • Open a contact card and select Options→ Defaults. A pop-up window opens, listing the different options. Example: Scroll to Phone number and press Assign. A list of phone numbers in the selected contact card is shown. Scroll to the one you want to have as the default and press . When you return back to the contact card view, you can see the default number underlined. See Fig. 2, p. 47. Fig. 2 The contact information view Options when viewing a contact card when the selection is on a phone number: Call, Create message, Edit, Delete, Defaults, Add voice tag / Voice tags, Assign speed dial / Remove speed dial, Ringing tone, Copy to SIM direct., Send , Help, and Exit. Copyright © 2003 Nokia. All rights reserved. 47
-
 1
1 -
2
-
3
-
4
-
5
-
6
-
7
-
8
-
9
-
10
-
11
-
12
-
13
-
14
-
15
-
16
-
17
-
18
-
19
-
20
-
21
-
22
-
23
-
24
-
25
-
26
-
27
-
28
-
29
-
30
-
31
-
32
-
33
-
34
-
35
-
36
-
37
-
38
-
39
-
40
-
41
-
 42
42 -
 43
43 -
 44
44 -
 45
45 -
 46
46 -
 47
47 -
 48
48 -
 49
49 -
 50
50 -
 51
51 -
 52
52 -
53
-
54
-
55
-
56
-
57
-
58
-
59
-
60
-
61
-
62
-
63
-
64
-
65
-
66
-
67
-
68
-
69
-
70
-
71
-
72
-
73
-
74
-
75
-
76
-
77
-
78
-
79
-
80
-
81
-
82
-
83
-
84
-
85
-
86
-
87
-
88
-
89
-
90
-
91
-
92
-
93
-
94
-
95
-
96
-
97
-
98
-
99
-
100
-
101
-
102
-
103
-
104
-
105
-
106
-
107
-
108
-
109
-
110
-
111
-
112
-
113
-
114
-
115
-
116
-
117
-
118
-
119
-
120
-
121
-
122
-
123
-
124
-
125
-
126
-
127
-
128
-
129
-
130
-
131
-
132
-
133
-
134
-
135
-
136
-
137
-
138
-
139
-
140
-
141
-
142
-
143
-
144
-
145
-
146
-
147
-
148
-
149
-
150
-
151
-
152
-
153
-
154
-
155
-
156
-
157
 |
 |
