Nokia 6600 Nokia 6600 User Guide in English - Page 63
 |
UPC - 738642184368
View all Nokia 6600 manuals
Add to My Manuals
Save this manual to your list of manuals |
Page 63 highlights
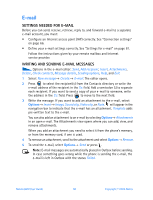
E-mail SETTINGS NEEDED FOR E-MAIL Before you can send, receive, retrieve, reply to, and forward e-mail to a separate e-mail account, you must: • Configure an Internet access point (IAP) correctly. See "Connection settings" on page 66. • Define your e-mail settings correctly. See "Settings for e-mail" on page 61. Follow the instructions given by your remote mailbox and Internet service provider. WRITING AND SENDING E-MAIL MESSAGES Options in the e-mail editor: Send, Add recipient, Insert, Attachments, Delete, Check contacts, Message details, Sending options, Help, and Exit. 1 Select New message→ Create:→ E-mail. The editor opens. 2 Press to select the recipient(s) from the Contacts directory or write the e-mail address of the recipient in the To: field. Add a semicolon (;) to separate each recipient. If you want to send a copy of your e-mail to someone, write the address in the Cc: field. Press to move to the next field. 3 Write the message. If you want to add an attachment to the e-mail, select Options→ Insert→ Image, Sound clip, Video clip, or Note. will appear in the navigation bar to indicate that the e-mail has an attachment. Template adds pre-written text to the e-mail. You can also add an attachment to an e-mail by selecting Options→ Attachments in an open e-mail. The Attachments view opens where you can add, view, and remove attachments. When you add an attachment you need to select it from the phone's memory, or from the memory card, if one is used. 4 To remove an attachment, scroll to the attachment and select Options→ Remove. 5 To send the e-mail, select Options→ Send or press . Note: E-mail messages are automatically placed in Outbox before sending. In case something goes wrong while the phone is sending the e-mail, the e-mail is left in Outbox with the status Failed. Nokia 6600 User Guide 50 Copyright © 2004 Nokia
-
 1
1 -
2
-
3
-
4
-
5
-
6
-
7
-
8
-
9
-
10
-
11
-
12
-
13
-
14
-
15
-
16
-
17
-
18
-
19
-
20
-
21
-
22
-
23
-
24
-
25
-
26
-
27
-
28
-
29
-
30
-
31
-
32
-
33
-
34
-
35
-
36
-
37
-
38
-
39
-
40
-
41
-
42
-
43
-
44
-
45
-
46
-
47
-
48
-
49
-
50
-
51
-
52
-
53
-
54
-
55
-
56
-
57
-
 58
58 -
 59
59 -
 60
60 -
 61
61 -
 62
62 -
 63
63 -
 64
64 -
 65
65 -
 66
66 -
 67
67 -
 68
68 -
69
-
70
-
71
-
72
-
73
-
74
-
75
-
76
-
77
-
78
-
79
-
80
-
81
-
82
-
83
-
84
-
85
-
86
-
87
-
88
-
89
-
90
-
91
-
92
-
93
-
94
-
95
-
96
-
97
-
98
-
99
-
100
-
101
-
102
-
103
-
104
-
105
-
106
-
107
-
108
-
109
-
110
-
111
-
112
-
113
-
114
-
115
-
116
-
117
-
118
-
119
-
120
-
121
-
122
-
123
-
124
-
125
-
126
-
127
-
128
-
129
-
130
-
131
-
132
-
133
-
134
-
135
-
136
-
137
-
138
-
139
-
140
-
141
-
142
-
143
-
144
-
145
-
146
-
147
-
148
-
149
-
150
-
151
-
152
-
153
-
154
-
155
-
156
-
157
-
158
-
159
-
160
-
161
 |
 |
