Xerox 6500V_N User Guide - Page 136
Color Registration, Enabling/Disabling Automatic Color Registration, Performing an Automatic Color
 |
View all Xerox 6500V_N manuals
Add to My Manuals
Save this manual to your list of manuals |
Page 136 highlights
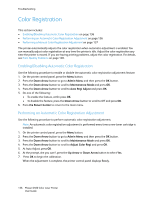
Troubleshooting Color Registration This section includes: • Enabling/Disabling Automatic Color Registration on page 136 • Performing an Automatic Color Registration Adjustment on page 136 • Performing a Manual Color Registration Adjustment on page 137 The printer automatically adjusts the color registration when automatic adjustment is enabled. You can manually adjust color registration at any time the printer is idle. Adjust the color registration any time the printer is moved. If you are having printing problems, adjust the color registration. For details, see Print-Quality Problems on page 128. Enabling/Disabling Automatic Color Registration Use the following procedure to enable or disable the automatic color registration adjustment feature. 1. On the printer control panel, press the Menu button. 2. Press the Down Arrow button to go to Admin Menu and then press the OK button. 3. Press the Down Arrow button to scroll to Maintenance Mode and press OK. 4. Press the Down Arrow button to scroll to Auto Regi Adjust and press OK. 5. Do one of the following: • To enable the feature, at On press OK. • To disable the feature, press the Down Arrow button to scroll to Off and press OK. 6. Press the Return button to return to the main menu. Performing an Automatic Color Registration Adjustment Use the following procedure to perform automatic color registration adjustment. Note: An automatic color registration adjustment is performed every time a new toner cartridge is installed. 1. On the printer control panel, press the Menu button. 2. Press the Down Arrow button to go to Admin Menu and then press the OK button. 3. Press the Down Arrow button to scroll to Maintenance Mode and press OK. 4. Press the Down Arrow button to scroll to Adjust Color Regi and press OK. 5. At Auto Adjust, press OK. 6. At the prompt, Are you sure?, press the Up Arrow or Down Arrow button to select Yes. 7. Press OK to begin the calibration. When the adjustment is complete, the printer control panel displays Ready. 136 Phaser 6500 Color Laser Printer User Guide
-
 1
1 -
2
-
3
-
4
-
5
-
6
-
7
-
8
-
9
-
10
-
11
-
12
-
13
-
14
-
15
-
16
-
17
-
18
-
19
-
20
-
21
-
22
-
23
-
24
-
25
-
26
-
27
-
28
-
29
-
30
-
31
-
32
-
33
-
34
-
35
-
36
-
37
-
38
-
39
-
40
-
41
-
42
-
43
-
44
-
45
-
46
-
47
-
48
-
49
-
50
-
51
-
52
-
53
-
54
-
55
-
56
-
57
-
58
-
59
-
60
-
61
-
62
-
63
-
64
-
65
-
66
-
67
-
68
-
69
-
70
-
71
-
72
-
73
-
74
-
75
-
76
-
77
-
78
-
79
-
80
-
81
-
82
-
83
-
84
-
85
-
86
-
87
-
88
-
89
-
90
-
91
-
92
-
93
-
94
-
95
-
96
-
97
-
98
-
99
-
100
-
101
-
102
-
103
-
104
-
105
-
106
-
107
-
108
-
109
-
110
-
111
-
112
-
113
-
114
-
115
-
116
-
117
-
118
-
119
-
120
-
121
-
122
-
123
-
124
-
125
-
126
-
127
-
128
-
129
-
130
-
 131
131 -
 132
132 -
 133
133 -
 134
134 -
 135
135 -
 136
136 -
 137
137 -
 138
138 -
 139
139 -
 140
140 -
 141
141 -
142
-
143
-
144
-
145
-
146
-
147
-
148
-
149
-
150
-
151
-
152
-
153
-
154
-
155
-
156
-
157
-
158
-
159
-
160
-
161
-
162
 |
 |
