Xerox 6500V_N User Guide - Page 72
Printing Labels from Tray 1, Printing Labels from the Manual Feed Slot, Print, Properties, Preferences
 |
View all Xerox 6500V_N manuals
Add to My Manuals
Save this manual to your list of manuals |
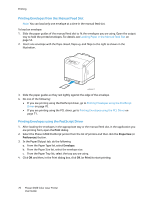
Page 72 highlights
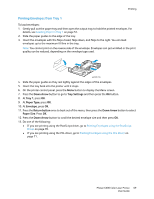
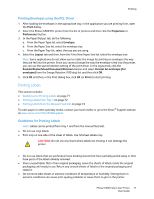
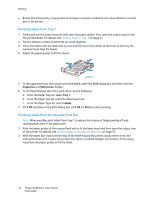
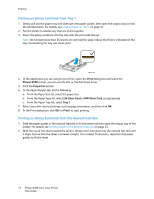
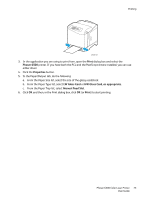
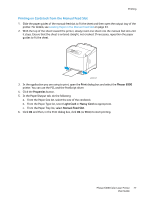
Printing • Rotate stock frequently. Long periods of storage in extreme conditions can cause labels to curl and jam in the printer. Printing Labels from Tray 1 1. Gently pull out the paper tray and slide open the paper guides, then open the output tray to hold the printed labels. For details, see Loading Paper in Tray 1 on page 51. 2. Fan the labels to release sheets that are stuck together. 3. Insert the labels with the label side up and with the top of the sheets at the front of the tray. Do not load more than 25 sheets. 4. Adjust the paper guides to fit the sheets. p6500-018 5. In the application you are using to print the labels, open the Print dialog box and then click the Properties (or Preferences) button. 6. In the Paper/Output tab of the print driver, do the following: a. From the Paper Tray list, select Tray 1. b. From the Paper Size list, select the label sheet size. c. From the Paper Type list, select Labels. 7. Click OK and then, in the Print dialog box, click OK (or Print) to start printing. Printing Labels from the Manual Feed Slot Note: When possible, print labels from Tray 1 to reduce the chance of labels peeling off and causing paper jams in the paper path. 1. Slide the paper guides of the manual feed slot to fit the label sheet and then open the output tray of the printer. For details, see Loading Paper in the Manual Feed Slot on page 53. 2. With the labels face down and the top of the sheet toward the printer, slowly insert it into the manual feel slot until it stops. Ensure that the sheet is entered straight, not crooked. If necessary, reposition the paper guides to fit the sheet. 72 Phaser 6500 Color Laser Printer User Guide
-
 1
1 -
2
-
3
-
4
-
5
-
6
-
7
-
8
-
9
-
10
-
11
-
12
-
13
-
14
-
15
-
16
-
17
-
18
-
19
-
20
-
21
-
22
-
23
-
24
-
25
-
26
-
27
-
28
-
29
-
30
-
31
-
32
-
33
-
34
-
35
-
36
-
37
-
38
-
39
-
40
-
41
-
42
-
43
-
44
-
45
-
46
-
47
-
48
-
49
-
50
-
51
-
52
-
53
-
54
-
55
-
56
-
57
-
58
-
59
-
60
-
61
-
62
-
63
-
64
-
65
-
66
-
 67
67 -
 68
68 -
 69
69 -
 70
70 -
 71
71 -
 72
72 -
 73
73 -
 74
74 -
 75
75 -
 76
76 -
 77
77 -
78
-
79
-
80
-
81
-
82
-
83
-
84
-
85
-
86
-
87
-
88
-
89
-
90
-
91
-
92
-
93
-
94
-
95
-
96
-
97
-
98
-
99
-
100
-
101
-
102
-
103
-
104
-
105
-
106
-
107
-
108
-
109
-
110
-
111
-
112
-
113
-
114
-
115
-
116
-
117
-
118
-
119
-
120
-
121
-
122
-
123
-
124
-
125
-
126
-
127
-
128
-
129
-
130
-
131
-
132
-
133
-
134
-
135
-
136
-
137
-
138
-
139
-
140
-
141
-
142
-
143
-
144
-
145
-
146
-
147
-
148
-
149
-
150
-
151
-
152
-
153
-
154
-
155
-
156
-
157
-
158
-
159
-
160
-
161
-
162
 |
 |
