Brother International MFC-9200C Users Manual - English
Brother International MFC-9200C Manual
 |
View all Brother International MFC-9200C manuals
Add to My Manuals
Save this manual to your list of manuals |
Brother International MFC-9200C manual content summary:
- Brother International MFC-9200C | Users Manual - English - Page 1
OWNER'S MANUAL MFC 9200C ® - Brother International MFC-9200C | Users Manual - English - Page 2
, MFCs and bundled software, accurately exchange date data with the Brother products. Please continue to check our Web page for updates at http://www.brother.com. All remedies will be provided to individual customers via software patches through software download or from Brother Customer Service - Brother International MFC-9200C | Users Manual - English - Page 3
(FAQs), it is all there. Visit us at: http://www.brother.com You can check here for Brother driver updates. Brother Bulletin Board Brother's Bulletin Board Numbers are USA: 1-888-298-3616 From within Canada: 1-514-685-2040 For Customer Service USA: 1-800-284-4329 (voice) 1-908-575-8790 (fax - Brother International MFC-9200C | Users Manual - English - Page 4
Line Cord Paper Cassette Assembly (Includes paper output tray) Owner's Manual LC04BK LC04C LC04M LC04Y BP72CL BPGLL BPTRL QPD120 UG3565001 LE2228001 Item LE3385001 (For USA) LE3490001 (French For Canada) Note Software on Floppy Disks are NOT available. Brother Coated Paper is Ink Jet Paper. ii - Brother International MFC-9200C | Users Manual - English - Page 5
THE LIKE) ARISING OUT OF THE USE OR INABILITY TO USE THE SOFTWARE EVEN IF BROTHER'S LICENSOR HAS BEEN ADVISED OF THE POSSIBILITY OF SUCH DAMAGES. BECAUSE SOME Compilation and Publication Notice Under the supervision of Brother Industries Ltd., this manual has been compiled and published, covering the - Brother International MFC-9200C | Users Manual - English - Page 6
: Brother warrants to you for the Warranty Period that there are no defects in the materials, workmanship or Year 2000 compliance of this Product. The "Warranty Period" is 1 year from the date you purchased this product. The "Warranty Period" for consumable items, such as Ink Cartridges, Print Heads - Brother International MFC-9200C | Users Manual - English - Page 7
at 1-800-284-4329. At any time, free technical support in the form of Frequently Asked Questions, troubleshooting tips and service center locator is available through our fax-back system at 1-800-521-2846 or Brother's Internet Web Site (www.brother.com). Now you can visit us on-line (www.brothermall - Brother International MFC-9200C | Users Manual - English - Page 8
(Canada) Ltd. ("Brother"), or its Authorized Service Centers, will repair this MFC/Facsimile machine free of charge if defective in material or workmanship. This Limited Warranty does not include cleaning, consumables (including, without limitation, print cartridges, print head, toner and drum - Brother International MFC-9200C | Users Manual - English - Page 9
scanner glass. 2 Press Function, 3, 1, 1. 3 When NEXT FAX ONLY? appears, press Set. 4 Press or to select ON (or OFF) and press Set. 5 Press or to select a comment and press Set. 6 Enter two digits MANUAL. Brother fax-back system : 1-800-521-2846 Brother Web Site : http://www.brother.com Brother - Brother International MFC-9200C | Users Manual - English - Page 10
press the two-digit Speed Dial number. 3 Press Start. viii Search/Speed Dial 1 Place the original face up in the ADF, or face down on the scanner glass. 2 Press Search/Speed Dial, then enter the first letter of the name you're looking for. 3 Press or to search the memory. 4 Press Start, when - Brother International MFC-9200C | Users Manual - English - Page 11
IMPORTANT SAFETY INSTRUCTIONS 2-3 Release the Scanner Lock 2-3 Paper 2-4 About Brother Paper 2-4 Paper Specifications for Paper Cassette and Manual Feed Slot 2-5 Print Area 2-6 Loading Paper in the Multi-Purpose Paper Cassette 2-7 Connecting the MFC 2-8 Installing the Ink Cartridges - Brother International MFC-9200C | Users Manual - English - Page 12
If you are installing the MFC to work with a PBX:...... 2-16 Custom Features on a Single Line 2-16 On-Screen Programming 3-1 User-Friendly Programming 3-1 Function Mode 3-1 Alternating Displays 3-2 Function Selection Table 3-2 1. Fax Functions 3-2 2. Printer Functions 3-5 3. Copy Functions - Brother International MFC-9200C | Users Manual - English - Page 13
Changing the Fax Receive Code 5-4 Printing a Fax in Memory 5-4 Polling 5-5 Setting Up Polling Receive 5-5 Setting Up Sequential Polling Receive 5-5 Feeder) ........ 6-1 Faxing from the Scanner Glass 6-2 Fax Resolution 6-3 Contrast 6-3 Manual Transmission (With an External Telephone) - Brother International MFC-9200C | Users Manual - English - Page 14
Remote Retrieval 8-3 Using Remote Retrieval Access Code 8-3 Remote Commands 8-4 Retrieving Memory Status List 8-4 Retrieving Fax Messages 8-5 Changing Fax Forwarding Number 8-5 Printing Reports 9-1 MFC Settings and Activity 9-1 To Print a Report 9-1 Transmission Verification (Xmit) Report - Brother International MFC-9200C | Users Manual - English - Page 15
Setting 11-3 Using the Options Key 11-3 Changing Default Settings 11-5 Paper Type 11-6 Video Printing Quality 11-6 Video Type 11-6 Print Size 11-7 Video Printing Color Adjustment 11-7 Video Printing Contrast 11-8 Video Capture to PC 11-8 12 Walk-Up PhotoCapture Center 12-1 Introduction - Brother International MFC-9200C | Users Manual - English - Page 16
Software 13-27 To install Multi-Function Link® Pro (Main Application 13-27 To Install Automatic E-mail Printing (Optional Application 13-28 To Register Your MFC 9200C On-Line (For USA only 13-29 To view On-Line Documentation 13-29 To Install PhotoPrinter Pro 13-30 To View Brother Support - Brother International MFC-9200C | Users Manual - English - Page 17
Printing/Fax 14-4 Printer Operation Keys 14-4 Reset Key 14-4 Ink Management Key 14-5 Turning Off Bi-directional Printing 14-5 15 Printer Driver Settings 15-1 Using the Brother MFC9200C Series Printer Driver ......... 15-1 The Paper Tab 15-1 Paper Size 15-2 User Defined Paper - Brother International MFC-9200C | Users Manual - English - Page 18
16-3 Brother Control Center Features 16-4 Auto Configuration 16-4 Scanning Operations 16-4 Copy Operations 16-5 PC Fax Operation 16-5 Scanner Settings to Word Processor 16-11 Scanner Settings 16-11 Word Processor 16-11 User Defined Button 16-12 Scanner Settings 16-12 Target Application - Brother International MFC-9200C | Users Manual - English - Page 19
Scanner 17-5 Scanning a Document into the PC 17-5 Settings in the Scanner Window 17-6 Resolution 17-6 Color Type 17-6 Size 17-7 Custom 17-7 Adjust 17-7 Paper Using Multi-Function Link® Pro Software 18-1 Introduction 18-1 Brother Resource Manager 18-1 MFC Remote Setup 18-2 Multi-Function - Brother International MFC-9200C | Users Manual - English - Page 20
21 Using the Brother MFC with a New Power Macintosh® G3, G4 or iMac™/iBook 21-1 Set up Your USB Equipped Apple® Macintosh® G3,G4 or iMac™ with Mac OS 8.5/8.51/8.6/9.0 21-1 Installing the Brother Printer and Scanner Drivers 21-1 Installing PaperPort 21-2 Using the Brother Printer Driver with your - Brother International MFC-9200C | Users Manual - English - Page 21
23-6 How to Improve Print Quality 23-9 Test Print 23-9 Cleaning the Print Head 23-9 Aligning Ink Cartridges 23-10 Turning Off Bi-directional Printing 23-11 Packing and Shipping the MFC 23-11 Routine Maintenance 23-14 Cleaning the Scanner 23-14 Cleaning the MFC Printer Platen 23-15 Cleaning - Brother International MFC-9200C | Users Manual - English - Page 22
Printer S-2 Printing S-2 Controller S-2 Print Media S-3 Consumable Items S-3 25 Glossary G-1 26 Index I-1 27 Remote Retrieval Access Card R-1 xx - Brother International MFC-9200C | Users Manual - English - Page 23
xxi - Brother International MFC-9200C | Users Manual - English - Page 24
purchasing a Brother Multi-Function Center (MFC). This MFC has been designed to be simple to use, with LCD screen prompts to guide you through functions. However, you can use your MFC to its fullest potential by taking a few minutes to read this manual. Finding Information All chapter headings and - Brother International MFC-9200C | Users Manual - English - Page 25
Only) After programming your Station ID, please fill out the TEST SHEET included with your MFC and fax it to Brother's Automated Fax Response System as your first transmission. This will verify that your MFC is properly installed. (See Setting Station ID, page 4-1.) When this document is received - Brother International MFC-9200C | Users Manual - English - Page 26
12 13 11 9 10 56 7 8 MFC 9200C Control Panel Overview 1-3 INTRODUCTION 4 3 12 - Brother International MFC-9200C | Users Manual - English - Page 27
of 158 locations at once. 11 Color Printer Keys: Reset Clears settings from the printer memory, and restores factory default settings. Ink Management Cleans the ink print heads. Resets the ink dot counter after replacing an ink cartridge. 12 Color Scanner Keys: Scan Image Press this key to scan - Brother International MFC-9200C | Users Manual - English - Page 28
machines that both have the ECM feature. If they do, you may send and receive fax messages that are continuously checked for their integrity. Sufficient memory must be available in your MFC for this feature to work. 1-5 INTRODUCTION - Brother International MFC-9200C | Users Manual - English - Page 29
Cord Ink Cartridges Paper Cassette Test Sheet StartCard Reference Guide improving Print Quality Owner's Manual Brother Color Suite you connect the MFC to your computer using bi-directional IEEE-1284 compliant parallel cable. Note If an item is missing, call Brother Customer Service at 1-800- - Brother International MFC-9200C | Users Manual - English - Page 30
to electrical outlets controlled by wall switches or automatic timers. Disruption of power can wipe out information in the MFC's memory. Do not connect your MFC to electrical outlets on the same circuit as large appliances or other equipment that might disrupt the power supply. Avoid interference - Brother International MFC-9200C | Users Manual - English - Page 31
be a remote risk of electric shock from lightning. Release the Scanner Lock 1 Press the blue Scanner Cover Release Button on the right side of the MFC and lift the scanner cover until it locks in the open position. Scanner Cover 2 The blue Scanner Lock Lever is on the back left underside of the - Brother International MFC-9200C | Users Manual - English - Page 32
in the printer driver. When using coated paper, transparencies or glossy paper, avoid stacking by removing each page after it exits the machine. About Brother Paper Brother paper is manufactured specifically for this MFC, to provide optimum print quality: High Quality Coated Paper for Color Ink Jet - Brother International MFC-9200C | Users Manual - English - Page 33
s Paper and envelopes already printed with a laser printer s Envelopes preprinted on the inside s Paper and envelopes that cannot be arranged uniformly when stacked Paper Specifications for Paper Cassette and Manual Feed Slot Paper Type Cut Sheet Coated Paper Transparencies Glossy Paper Envelopes - Brother International MFC-9200C | Users Manual - English - Page 34
Envelopes 3 4 1 2 2 unprintable area Paper Type Cut Sheet Organizer Envelopes Paper Size Letter, Legal A4 Executive K, L DL, C5, CM10, Monarch Fax Mono Copy Color Copy Printer Fax Mono Copy Color Copy Printer Printer Printer Printer *Printer depends on the Printer driver. (inch) 1234 0.16 - Brother International MFC-9200C | Users Manual - English - Page 35
on the left and pull out the front part of the cassette. Button 4 Stack up to 250 sheets of paper face down in the cassette and slide the width and length paper adjusters to fit around it. Do not place paper above the maximum paper height line, or paper may jam. Legal Letter Position Position - Brother International MFC-9200C | Users Manual - English - Page 36
the MFC's power turned on when you connect it to a telephone line. When you want to move your MFC, protect yourself by disconnecting the telephone line first, and then the power cord. Caution Operating the MFC before you install the ink cartridges will permanently damage the print head. 2-8 ASSEMBLY - Brother International MFC-9200C | Users Manual - English - Page 37
paper and installed in the MFC. The LCD alternately shows; SET CARTRIDGES PLS OPEN COVER Caution Close the document cover before you open the Scanner Cover. 2 Press the blue Scanner Cover Release Button on the right side of the MFC and lift the scanner cover. After a few seconds, the print head - Brother International MFC-9200C | Users Manual - English - Page 38
cartridge holder as a guide. Then, gently insert the Black ink cartridge by tilting it toward you and then pressing it backward until it clicks into place. 7 Repeat Steps 4-6 to install each color ink cartridge. 8 After installing all ink cartridges, close the scanner cover. Your MFC enters a "head - Brother International MFC-9200C | Users Manual - English - Page 39
during initial ink cartridge installation, the LCD shows: PRINT OK? 1.YES 2.NO 10 Check the print quality of the test sheet. If it is not good, clean the print head again by pressing 2. The LCD will ask you if the print quality is OK for each color. Press 2 for any color with a problem. You can - Brother International MFC-9200C | Users Manual - English - Page 40
(the recommended setting is two rings). The MFC cannot hear CNG tones until the TAD has answered the call, and with four rings there are only 8-10 seconds of CNG tones left for the fax "handshake". Make sure you carefully follow the instructions in this manual for recording your outgoing message. We - Brother International MFC-9200C | Users Manual - English - Page 41
manual faxes. For example: "After the beep, leave a message or send a fax by pressing 51 and Start." Note We recommend beginning your OGM with an initial 5-second silence because the MFC cannot hear fax tones over a resonant or loud voice. You may try omitting this pause, but if your MFC has trouble - Brother International MFC-9200C | Users Manual - English - Page 42
would be transferred to a line that does not have a fax machine. Your MFC will work best on a dedicated line. Two-Line Phone System A two-line access both lines. If it can, you must separate the line for your MFC. (See Easy Receive, page 5-2.) Converting Telephone Wall Outlets There are three ways - Brother International MFC-9200C | Users Manual - English - Page 43
You will need at least three telephone line cords, the one that came with your MFC and two for your external two-line TAD. You will need a fourth line cord as always. There are two ways to add a two-line telephone to the MFC's wall outlet. You can plug the telephone line cord from the two-line - Brother International MFC-9200C | Users Manual - English - Page 44
to MANUAL. All incoming calls should initially be regarded as telephone calls. 3 The MFC may be used with either pulse or tone dialing telephone service (For Canada only). Custom Features on a Single Line To learn how custom features may affect your faxing operations, see Chapter 23, Troubleshooting - Brother International MFC-9200C | Users Manual - English - Page 45
-Friendly Programming We have designed your Multi-Function Center with on-screen programming. User-friendly programming helps you take full advantage of all the functions your MFC has to offer. (See Using This Manual, page 1-1.) Since your programming is done on the LCD, we created step-by-step on - Brother International MFC-9200C | Users Manual - English - Page 46
a help message giving brief instructions about how to proceed. Manual. To help you understand the function selections, options and settings that are found in the MFC time for the LCD display and heading on fax transmissions. Program your name to French. Factory Setting 2001 1/1 00:00 - LOW - Brother International MFC-9200C | Users Manual - English - Page 47
Factory Setting 1. RING DELAY Number of rings before MFC RING DELAY: answers. 04 2. EASY RECEIVE Receives fax messages ON without pressing the Start key. 3. REMOTE CODE Enter code to activate the MFC from an extension phone. ON ( 51) 4. REDUCTION Reduces size of image. AUTO 5. PAPER - Brother International MFC-9200C | Users Manual - English - Page 48
Function Description Factory Setting 1. FAX FWD/PAGING Set up MFC to forward fax OFF messages-OR-to call your pager. 2. FAX STORAGE Stores incoming faxes in OFF memory for remote retrieval. 3. REMOTE ACCESS Personalizes the code for 159 retrieving faxes. 4. PRINT FAX Prints incoming - Brother International MFC-9200C | Users Manual - English - Page 49
2. Printer Functions Function 1. TEST PRINT 2. VERTICAL ALIGN 3. BI-DIR PRINT Description Use these functions when you need to adjust the print quality. Factory Setting - - ON Page 23-9 23-10 14-5 3. Copy Functions Function 1. PAPER TYPE 2. QUALITY 3. COLOR ADJUST 4. CONTRAST 5. ONE COLOR - Brother International MFC-9200C | Users Manual - English - Page 50
TYPE 2. QUALITY 3. BRIGHTNESS 4. CONTRAST 5. COLOR ADJUST 6. TRUE2LIFE Description Factory Setting Identifies the type of paper in the cassette. PLAIN Selects Normal, High or Draft print. NORMAL Adjusts the brightness. - Adjusts the contrast. - Adjusts the amount of Red, - Green or - Brother International MFC-9200C | Users Manual - English - Page 51
Setting Date and Time Your MFC displays the date and time, and prints it on every fax you send. In the event of a power failure, you may have to reset the date and time. All other settings remain unaffected. 1 Press Function, 1, 1, 1. YEAR:XX 2 Enter the last two digits of the year and press - Brother International MFC-9200C | Users Manual - English - Page 52
text into the MFC. Most number keys have three or four letters printed above them. The keys for 0, #, and don't have printed letters because they are right of the cursor are deleted. Re-enter the correct text and/or digits. You can also back up and type over incorrect letters. Repeating letters If - Brother International MFC-9200C | Users Manual - English - Page 53
machine comes set to accommodate tone (multi-frequency) dialing service. If you have pulse (rotary) dialing service, you must change the dialing mode. 1 Press The default setting is LOW. When the beeper is set to LOW or HIGH, the MFC beeps every time you press a key or make an error, and at the end - Brother International MFC-9200C | Users Manual - English - Page 54
set the volume of the MFC one-way speaker. 1 Press , LOW, MED, or HIGH and press Set. 3 Press Stop to exit. Memory Storage In the event of a power failure, all settings in the INITIAL SETUP, SEND) are stored permanently. You may have to reset the date and time. Turning On Automatic Daylight Savings - Brother International MFC-9200C | Users Manual - English - Page 55
How it works When to use it The MFC automatically For dedicated fax lines. answers every manual receive) If an external TAD (telephone answering device) is connected to the EXT. jack, the TAD automatically answers every call. Voice messages are stored in the external TAD. Fax messages are printed - Brother International MFC-9200C | Users Manual - English - Page 56
't automatically connect a fax call when you lift an external or extension phone handset, press the Fax Receive code 5 1. Note If you send faxes from a computer on the same phone line and the MFC intercepts them, set Easy Receive to OFF. 1 Press Function, 1, 2, 2. 2 Use or to select ON or OFF and - Brother International MFC-9200C | Users Manual - English - Page 57
, select 88% legal size, select 70% Setting Paper Size You can use three sizes of paper for printing your faxes - letter, legal and A4. When you change the kind of paper you have loaded in the MFC, you will need to change the setting for paper size, so your MFC will know how to fit the incoming - Brother International MFC-9200C | Users Manual - English - Page 58
3 If you want to, enter a new Fax Receive Code, then press Set. FAX RECEIVE:*51 4 Press Stop to exit. Printing a Fax in Memory If you have Fax Storage ON for remote retrieval, you can still print a fax in the memory when you are at your MFC. (See Setting Fax Storage, page 8-2.) 1 Press Function - Brother International MFC-9200C | Users Manual - English - Page 59
KEY 4 Press Start. The LCD shows DIALING. Setting Up Sequential Polling Receive Your MFC can request documents from several fax units in a single operation. Afterward, a Sequential Polling Report will be printed. 1 Press Function, 1, 2, 6. 2 Press or to select Polling ON and press Set. POLLING - Brother International MFC-9200C | Users Manual - English - Page 60
tasks you've scheduled, such as Delayed Fax or Polling Transmit. (See Checking the Job Status, page 6-6.) 1 Press Function, 1, 4. Jobs waiting to be sent from memory appear on the LCD. If 4.REMAINING JOBS there are no jobs, the LCD shows "NO JOB WAITING". 2 If you have more than two jobs waiting - Brother International MFC-9200C | Users Manual - English - Page 61
use curled, wrinkled, folded, ripped paper, or paper with staples, paper clips, paste or tape attached. DO NOT use cardboard, newspaper or fabric. (To fax this kind of original, See Faxing from the Scanner Glass, page 6-2.) s Make sure documents written with ink are completely dry. s Originals to - Brother International MFC-9200C | Users Manual - English - Page 62
first. 2 Adjust the paper guides to fit the width of your original. 3 Stagger the pages. Then place them in the ADF, until you feel the first page lightly touch the feed roller. 4 Pull up the document stopper. Originals are Face Up in the ADF Document Stopper Faxing from the Scanner Glass You can - Brother International MFC-9200C | Users Manual - English - Page 63
1 to CLEAR it-OR-2 to EXIT. If memory is full, and you are faxing a single page, it will be sent in real time. You can fax a single color page from the scanner glass. You cannot fax from the scanner glass when the MFC is sending, receiving or printing a fax. Fax Resolution Before sending each - Brother International MFC-9200C | Users Manual - English - Page 64
scanner glass. 2 Pick up the handset of the external phone and listen for a dial tone. 3 Enter the fax number you want to call. (You can enter the digits the MFC starts sending the fax without scanning the original into memory. Manual and Automatic Fax Redial If you're sending a fax manually and the - Brother International MFC-9200C | Users Manual - English - Page 65
set temporary settings, dial a number, and begin scanning the fax into memory-even when the MFC is receiving a fax, sending a fax, or printing a fax from memory. The LCD shows the new job number and available memory. Note If you get a MEMORY FULL message while scanning the first page of a fax, press - Brother International MFC-9200C | Users Manual - English - Page 66
MFC will scan originals into memory before sending. Then, as soon as the phone line is free, the MFC will start dialing and sending the fax. If memory becomes full, the MFC for memory transmission. You can set REAL TIME TX to ON. 1 Place the original face up in the ADF, or face down on the scanner - Brother International MFC-9200C | Users Manual - English - Page 67
page includes the name stored in the One Touch or Speed Dial memory. If you're dialing manually, the name is left blank. (See One Touch Dialing and can enter up to two customized messages, each 27 characters long: 5.(USER DEFIND) 6.(USER DEFIND) Note Use the chart on page 4-2 to help enter characters - Brother International MFC-9200C | Users Manual - English - Page 68
original face up in the ADF, or face down on the scanner glass. 2 Press Function, 1, 3, 1. 3 When the screen or custom comments and press Set. 6 Enter two digits to indicate the number of pages you are sending, and without the Station ID. You can set the MFC to send a cover page whenever you send a - Brother International MFC-9200C | Users Manual - English - Page 69
the sample page and attach it to your fax. 1 Press Function, 1, 3, 1. 2 Press or to select PRINT SAMPLE? and press Set. 3 Press Start. Your MFC prints a copy of your cover page: -- -- -- COVER PAGE -- -- -- TO: FROM: FAX: TEL: COMMENT: PAGE[S] TO FOLLOW Advanced Sending Operations Overseas - Brother International MFC-9200C | Users Manual - English - Page 70
fax. 1 Place the original face up in the ADF, or face down on the scanner glass. 2 Press Function, 1, 3, 6. 6.DELAYED FAX 3 Accept the displayed time or 6. 5 Enter the fax number. 6 Press Start. The MFC starts scanning the document into memory. It will wait until the time you have entered to send - Brother International MFC-9200C | Users Manual - English - Page 71
and others with normal print. Resolution settings return to STANDARD after the fax is sent. 1 Place the original face up in the ADF, or face down on the scanner glass. 2 Press Function, 1, 3, 4. 3 Press or to select resolution for page 1, then press Set. 4 Repeat Step 3 for subsequent pages. 5 Press - Brother International MFC-9200C | Users Manual - English - Page 72
MFC to do three types of easy dialing: One Touch, Speed Dial and Groups for Broadcasting faxes. If you loose electrical power, auto dial numbers in memory key 1 is pre-programmed for Brother fax-back system, USA only. You can /Pause as you're entering the digits. Pressing Redial/Pause enters a 3.5 - Brother International MFC-9200C | Users Manual - English - Page 73
MFC has 100 Speed Dial locations. 1 Press Function, 1, 5, 2. SPEED-DIAL? # 2 Use the dial pad to enter a two-digit location (00-99) and press Set. 3 Enter the number (up to 20 digits . Even if you lose electrical power, numbers stored in memory will not be lost. Changing One Touch and Speed Dial - Brother International MFC-9200C | Users Manual - English - Page 74
pad and the chart on page 4-2 to enter a name for the group and press Set. (For example, NEW CLIENTS.) 7 Press Stop to exit. You can print a list of all One Touch and Speed Dial numbers. (See - Brother International MFC-9200C | Users Manual - English - Page 75
face down on the scanner glass. 2 Press Search/Speed Dial, press #, then press the two-digit Speed Dial location. ( codes or credit card numbers, you can "broadcast" faxes automatically to up to 158 different locations from the MFC. However, available memory will vary with the types of jobs in memory - Brother International MFC-9200C | Users Manual - English - Page 76
Manual dialing, using the dial pad. 7 Press Start. Your MFC will read the original into memory and then start sending faxes to the numbers you entered. Access Codes 7000". To temporarily change a number, you can substitute part of the number with manual dialing using the dial pad. For example, to - Brother International MFC-9200C | Users Manual - English - Page 77
Fax Redial If you're sending a fax manually and the line is busy, press Redial service, you will not need this feature to send tone signals. 1 Lift the handset of an external phone. 2 Press #. Any digits dialed after this send tone signals. 3 When you hang up, the MFC returns to pulse dialing service - Brother International MFC-9200C | Users Manual - English - Page 78
Number When Fax Forwarding is set to ON, your MFC stores the received fax in memory, then dials the fax number you've programmed, Enter your pager phone number (up to 20 digits) followed by # # and press Set. Do not include the area code if it is the same as that of your MFC. For example, 1 8 0 0 5 - Brother International MFC-9200C | Users Manual - English - Page 79
on. (See Printing a Fax in Memory, page 5-4.) Changing Remote Retrieval Access Code Enter your Remote Retrieval Access Code when the MFC picks up your three-digit number from 000 to 999 and press Set. The " " cannot be changed. (Do not use the same digits that appear in your Fax Receive Code.) 3 - Brother International MFC-9200C | Users Manual - English - Page 80
. If you wait longer than 30 seconds to enter a command, the MFC will hang up. If you enter an invalid command, the MFC will beep three times. 5 Press 9 0 to reset the MFC when you're finished. 6 Hang up. Note If your MFC is set to Manual mode, you can access it by waiting about 2 minutes, then - Brother International MFC-9200C | Users Manual - English - Page 81
forwarded (up to 20 digits), and then press # #. Note You cannot use and # as dial numbers. However, if you want to store a pause, press #. 5 After you hear your MFC beep, hang up and wait. Your MFC will call the remote fax machine. The remote fax machine will print the Memory Status List. REMOTE - Brother International MFC-9200C | Users Manual - English - Page 82
number. 2 When you hear the beep, immediately enter your Remote Retrieval Access Code (1 5 9 ). 3 As soon as you hear two short beeps, digits), and then press # #. 7 After you hear your MFC beep, hang up and wait. Your MFC will call the remote fax machine. The remote fax machine will print the Memory - Brother International MFC-9200C | Users Manual - English - Page 83
for REMOTE FAX OPT are included. 7.MEMORY STATUS Lists summary information and amount of occupied memory. 8.ORDER FORM Prints an Accessories and Supplies Order Form for ordering directly from Brother. To Print a Report 1 Press Function, 1, 6. (See Printing Reports, page 9-1.) 2 Enter the number - Brother International MFC-9200C | Users Manual - English - Page 84
Press Stop to exit. Activity Report Interval You can set the MFC to print activity reports at a specific interval (6, 12, 24 hours, 2, 4 or 7 If you've set the interval to OFF, you can print the report manually by following the steps in To Print a Report, page 9-1. 1 Press Function, 1, 6, - Brother International MFC-9200C | Users Manual - English - Page 85
the cassette before making copies. Do not pull on the paper while copying is in progress. Copy Keys Making a Single Copy 1 Place the original face up in the ADF, or face down on the scanner glass. 2 Press Mono Copy or Color Copy. 3 As needed, use Options and Enlarge/Reduce keys to change - Brother International MFC-9200C | Users Manual - English - Page 86
-OR-Press Stop to cancel. To gain extra memory, you can turn off Fax Storage (see page 8-2.) -OR-Print fax messages in memory (see page 5-4.). Multiple Copies (Using the Scanner Glass) Use the Options key to choose additional settings: paper type, brightness, copy quality, sort, and special copy - Brother International MFC-9200C | Users Manual - English - Page 87
multiple copies if you first print incoming faxes in memory and restore the memory to 100%. 5 Place the next page to be copied on the scanner glass and press Set. Enlarge/Reduce and Options. These setting are temporary, and the MFC returns to its default settings when you finish copying. You can - Brother International MFC-9200C | Users Manual - English - Page 88
. These options will be displayed in the order of the chart below. Press Options: COPY:PAPER TYPE PAPER:PLAIN PAPER:INK JET PAPER:GLOSSY PAPER:PHOTO PAPER:TRNSPRNCY INK JET:BROTHER INK JET:OTHER COPY:BRIGHTNESS COPY:QUALITY COPY:OPTIONS - + QUALITY:DRAFT QUALITY:NORMAL QUALITY:HIGH QUALITY - Brother International MFC-9200C | Users Manual - English - Page 89
, PHOTO or TRNSPRNCY), and press Set. Brother coated paper is ink jet paper. If you are using non-Brother ink jet paper or Brother coated paper, select Note INK JET. If you selected INK JET: 5 Press or to select BROTHER (BP72CL) or OTHER (non-Brother ink jet) paper type, and press Set. To select - Brother International MFC-9200C | Users Manual - English - Page 90
2in1 4in1 Poster You can create a poster size copy of a photograph. Poster size copy can be made only by using scanner glass. 12 Press Mono Copy or Color Copy. 13 Using the dial pad, enter the number of copies you want (up to 99). For example, - Brother International MFC-9200C | Users Manual - English - Page 91
Choosing the Quality The copy quality can be NORMAL, HIGH, PHOTO, or DRAFT: DRAFT: NORMAL: HIGH: PHOTO: Fast copy speed and lowest ink consumption. Use DRAFT to save time (documents to be proof-read, large documents, or many copies). Recommended mode for ordinary printouts. Good copy quality with - Brother International MFC-9200C | Users Manual - English - Page 92
ADJUST 4.CONTRAST 5.ONE COLOR PAPER:PLAIN PAPER:INK JET PAPER:GLOSSY PAPER:PHOTO PAPER:TRNSPRNCY QUALITY:NORMAL QUALITY:HIGH QUALITY:PHOTO QUALITY:DRAFT COLOR:RED R: - COLOR:GREEN G: - COLOR:BLUE B: - - + COLOR:OFF COLOR:CYAN COLOR:MAGENTA COLOR:YELLOW INK JET:BROTHER INK JET:OTHER + + + is - Brother International MFC-9200C | Users Manual - English - Page 93
the LCD shows the type of INK JET paper, press Set. If you did not select INK JET, skip to Step 4. 4 Press Stop to exit. 1.PAPER TYPE PAPER:PLAIN PAPER:INK JET PAPER:GLOSSY PAPER:PHOTO PAPER:TRNSPRNCY Note The MFC ejects paper with printed surfaces face up onto the paper tray in the front of the - Brother International MFC-9200C | Users Manual - English - Page 94
Copy Contrast You can change the contrast to make the image sharper and more vivid. 1 Press Function, 3, 4. 2 Press to decrease contrast-OR-Press and press Set. to increase contrast 3 Press Stop to exit. Single Color (One Color) For black and white originals, you can select a single color ( - Brother International MFC-9200C | Users Manual - English - Page 95
either criminal or civil liability. This memorandum is intended to be a guide rather than a complete listing of every possible prohibition. In case of Selective Service or draft papers • Passports • United States/Canadian Postage Stamps (canceled or uncanceled) • Food Stamps • Immigration Papers • - Brother International MFC-9200C | Users Manual - English - Page 96
video. Some camcorders, digital cameras, video games or VCRs do not correctly conform with NTSC standards. Then you would not be able to capture video signals. You can do video printing on only Letter, Legal and A4 size paper. Auto Switch Whenever you connect video equipment to the MFC and turn the - Brother International MFC-9200C | Users Manual - English - Page 97
LCD shows: VIDEO:PRESS COPY CAPTURE READY 3 Press Color Copy when you see the picture you want to capture and print. The MFC begins printing, and beeps when printing is complete. If the MFC is not receiving video signals, Color Copy will not work. However, if there is an original in the ADF, the - Brother International MFC-9200C | Users Manual - English - Page 98
settings are temporary, and the MFC returnd to its default settings when you finish printing. You might want to try PAPER TYPE PAPER:PLAIN PAPER:INK JET PAPER:GLOSSY PAPER:PHOTO PAPER:TRNSPRNCY INK JET:BROTHER INK JET:OTHER VIDEO:VIDEO TYPE VCOIDLEOOR:M:OOFFVING VIDEO:STILL VIDEO:PRINT - Brother International MFC-9200C | Users Manual - English - Page 99
jet paper or Brother coated paper, select Note INK JET. If you selected INK JET: 5 Press or to select BROTHER (BP72CL) or OTHER (non-Brother ink jet) paper type, and press Set. To select VIDEO:VIDEO TYPE: 6 Repeat Step 3. 7 Press or to select MOVING or STILL, and press Set. To select VIDEO:PRINT - Brother International MFC-9200C | Users Manual - English - Page 100
VIDEO TYPE 4.PRINT SIZE 5.COLOR ADJUST 6.CONTRAST PAPER:PLAIN PAPER:INK JET PAPER:GLOSSY PAPER:PHOTO PAPER:TRNSPRNCY QUALITY:NORMAL QUALITY:HIGH VIDEO:MOVING VIDEO:STILL SIZE:5.75"X4.25" SIZE:4"X3" SIZE:4"X3"X6 COLOR:RED R: - COLOR:GREEN G: - COLOR:BLUE B: - - + INK JET:BROTHER INK JET:OTHER - Brother International MFC-9200C | Users Manual - English - Page 101
are using non-Brother ink jet paper, select OTHER (in Step 3). 1.PAPER TYPE PAPER:PLAIN PAPER:INK JET PAPER:GLOSSY PAPER:PHOTO PAPER:TRNSPRNCY • If you did not select INK JET, go to Step 4. 3 When the LCD shows the type of INK JET paper, press Set. 4 Press Stop to exit. Video Printing Quality - Brother International MFC-9200C | Users Manual - English - Page 102
size you want and press Set. 3 Press Stop to exit. Printed Position x 5.75" x 4.25" 4" x 3" 4.PRINT SIZE SIZE:5.75"X4.25" SIZE:4"X3" SIZE:4"X3"X6 Ž 4" x 3" x 6 5.75" 4.25" 3" 4" 3" 4" Video Printing Color Adjustment 1 Press Function, 4, 5. 5.COLOR ADJUST 2 Press or to select RED, GREEN - Brother International MFC-9200C | Users Manual - English - Page 103
Video Printing Contrast You can change the Contrast to help an image look sharper and more vivid. 1 Press Function, 4, 6. 2 Press to decrease contrast. -OR- Press to increase contrast. 6.CONTRAST 3 Press Set. 4 Press Stop to exit. - + Video Capture to PC For instructions on using your MFC - Brother International MFC-9200C | Users Manual - English - Page 104
Up PhotoCapture 12 Center™ Introduction Your Brother MFC includes two media drives for use with popular digital camera media: Compact Flash™ and SmartMedia™. The PhotoCapture Center™ feature of your MFC enables you to print digital photos from your digital camera at high resolution for photo quality - Brother International MFC-9200C | Users Manual - English - Page 105
print images from a digital camera. If your digital camera supports DPOF printing, you will be able to select on the Digital Camera display the images and number of copies you wish to print. When the memory card (CompactFlash™ or SmartMedia™) with DPOF information is inserted into your Brother MFC - Brother International MFC-9200C | Users Manual - English - Page 106
other numbers or files names that your digital camera or PC have used to identify the pictures. You can print a thumbnail page (Index) that you can select only the images you want to print and use the Options key to select paper type, quality, print size and color enhancement. The LCD shows: S - Brother International MFC-9200C | Users Manual - English - Page 107
below. Press Options: PAPER TYPE QUALITY PRINT SIZE COLOR ENHANCE PAPER:PLAIN PAPER:INK JET PAPER:GLOSSY PAPER:PHOTO PAPER:TRNSPRNCY QUALITY:NORMAL QUALITY:HIGH QUALITY:PHOTO SIZE:5.75" X 4.25" SIZE:4" X 3" SIZE:4" X 3" X 6 SIZE:8" X 6" TRUE2LIFE:OFF TRUE2LIFE:ON INK JET:BROTHER INK JET:OTHER is - Brother International MFC-9200C | Users Manual - English - Page 108
JET: 4 Press or to select BROTHER (BP72CL) or OTHER (non-Brother ink jet) paper type, and press Set. To select QUALITY: 5 Repeat Step 3. 6 Press or to select NORMAL, HIGH or PHOTO, and press Set. Note See Choosing the Quality, page 10-7. To select PRINT SIZE: 7 Repeat Step 3. 8 Press or to select - Brother International MFC-9200C | Users Manual - English - Page 109
3.BRIGHTNESS 4.CONTRAST 5.COLOR ADJUST 6.TRUE2LIFE PAPER:PLAIN PAPER:INK JET PAPER:GLOSSY PAPER:PHOTO PAPER:TRNSPRNCY QUALITY:HIGH QUALITY:PHOTO QUALITY:NORMAL - + - + COLOR:RED COLOR:GREEN COLOR:BLUE WHITE BALANCE SHARPNESS COLOR DENSITY INK JET:BROTHER INK JET:OTHER is default setting - Brother International MFC-9200C | Users Manual - English - Page 110
type and press Set. • If you are using Brother coated paper, select INKJET, then select BROTHER (in Step 4). • If you are using non-Brother ink jet paper, select OTHER. PAPER:PLAIN PAPER:INK JET PAPER:GLOSSY PAPER:PHOTO PAPER:TRNSPRNCY • If you did not select INK JET go to Step 4. 3 When the LCD - Brother International MFC-9200C | Users Manual - English - Page 111
of white. The white parts of a picture may appear troubleshoot difficulties. When an error message appears on the LCD, the MFC will beep to get your attention. MEDIA ERROR-This message appears when you insert a media card that is either bad or not formatted, or if there is a problem - Brother International MFC-9200C | Users Manual - English - Page 112
print file on the media card selects a .JPG image that is not on the card. MEMORY FULL-This message appears when you are working with images that are too large for the MFC's memory (For Windows® Only), Chapter 19. For the complete manual of the PhotoCapture Center™ application, see the On-Line - Brother International MFC-9200C | Users Manual - English - Page 113
with Your PC Multi-Function Link® Pro software (MFL Pro) turns your Brother machine into a multi-function center, by enabling you to use your fax machine as a printer and a scanner and to use it from Windows® applications in your computer. MFC 9200 is a 6 in1 multi-function center. This machine - Brother International MFC-9200C | Users Manual - English - Page 114
minimum computer requirements you need to set up and operate the MFC drivers. Windows® Operating System 95, 98, 98SE NT 4.0 Workstation 2000 the MFC to the PC on page 13-17. Notice to PC User A small filter core and cable tie are enclosed in the vinyl bag with your MFC. PLEASE SAVE THESE PARTS. You - Brother International MFC-9200C | Users Manual - English - Page 115
Parallel Interface Connector and the Cable Tie, pressing until you hear a click. Filter Core Cable Tie Filter Core to MFC Bi-directional Parallel Cable 3 Unplug the MFC power cord from the electrical outlet before connecting the parallel interface cable. 4 Make sure the computer is turned off - Brother International MFC-9200C | Users Manual - English - Page 116
the location of your computer's parallel printer port, see the User's Guide for your computer. 7 Before plugging in your computer and turning it on, plug in the electrical cord of the Brother machine, then turn on your PC. Note Please follow the instructions for the operating system you are using - Brother International MFC-9200C | Users Manual - English - Page 117
from disk provided by hardware manufacturer" and click OK. -OR- For Windows® ME Users: 9 Select "Specify the location of the driver (Advanced)" and click Next. Note The dialog boxes in Steps 10 to 18 are for Windows® 98SE. 10 Select (Recommended) and click Next. 11 Insert - Brother International MFC-9200C | Users Manual - English - Page 118
12 Select Specify a location and remove the other check marks, then click Browse to locate the file. 13 Double-click the CD icon and click the "x:\w9x\para" folder. (X:is the drive letter for your CD-ROM drive), then click OK. 14 Make sure Specify a location is selected and click Next. 13 - 6 S E T - Brother International MFC-9200C | Users Manual - English - Page 119
15 Make sure your printer driver name is displayed and click Next. 16 You can type a name for this printer, or you can use the name supplied on screen. When you have finished, click Finish. 17 When the Add New Hardware Wizard appears, click Finish. S E T T I N G U P T H E M F C A N D P C T O W O R K - Brother International MFC-9200C | Users Manual - English - Page 120
status bar reaches 100%, the remaining drivers will be copied. 18 Click OK. All the drivers have been installed. Now you can print and scan. Note If you want to install PaperPort® or Multi-Function Link® Pro, go to the CD section. (See Installing the Brother Software on page 13-27.) Using Windows - Brother International MFC-9200C | Users Manual - English - Page 121
9 Select (Recommended) and click Next. 10 Insert the MFL Pro CD-ROM into your CD-ROM drive. 11 Select Specify a location and remove the other check marks, then click Next. 12 Click Browse to locate the file. S E T T I N G U P T H E M F C A N D P C T O W O R K T O G E T H E R 13 - 9 - Brother International MFC-9200C | Users Manual - English - Page 122
13 Double-click the CD icon and click the "x:\w2k\para" (x:is the drive letter for your CD-ROM drive.) folder, then click OK. 14 Make sure Specify a location is selected and click Next. 15 Click Finish. 13 - 10 S E T T I N G U P T H E M F C A N D P C T O W O R K T O G E T H E R - Brother International MFC-9200C | Users Manual - English - Page 123
8-15 to install the Printer and Scanner drivers. Note You might see the "Digital Signature Not Found" dialog box during installation. If you see it, click Yes to install the driver. 17 Click Finish. When the Setup window appears, and the status bar reaches 100%, the remaining drivers will be copied - Brother International MFC-9200C | Users Manual - English - Page 124
. (See Installing the Brother Software, page 13-27.) Using Windows NT® Workstation Version 4.0 Note Windows NT® Workstation 4.0 does not have Plug & Play, so you'll have to install the drivers manually: 8 Click the Start button in the Task bar and select Setting, then Printer. Then doubleclick Add - Brother International MFC-9200C | Users Manual - English - Page 125
10 Select LPT1: and click Next. 11 Insert the MFL Pro CD-ROM into your CD-ROM drive, then click Have Disk. 12 Click Browse to locate the file. S E T T I N G U P T H E M F C A N D P C T O W O R K T O G E T H E R 13 - 13 - Brother International MFC-9200C | Users Manual - English - Page 126
letter for your CD-ROM drive) folder, then click Open. 14 Make sure Specify a location is selected and click OK. 15 Select your printer model, then click Next. (This dialog box may not be displayed for some MFC models.) 13 - 14 S E T T I N G U P T H E M F C A N D P C T O W O R K T O G E T H E R - Brother International MFC-9200C | Users Manual - English - Page 127
16 Click Next. 17 Select Not Shared, then click Next. 18 Select Yes (Recommended) to Print a Test Page, then click Finish. S E T T I N G U P T H E M F C A N D P C T O W O R K T O G E T H E R 13 - 15 - Brother International MFC-9200C | Users Manual - English - Page 128
19 After the test page has been printed, click Yes. Now the printer driver has been installed, and you can see the driver in the Printer list. The rest of the Brother drivers will have to be installed manually. 20 Click the Start button in the task bar, then select Run. Enter x:\nt40\setup\setup.exe - Brother International MFC-9200C | Users Manual - English - Page 129
22 Click OK. All the drivers have been installed. Now you can print and scan. Note If you want to install PaperPort®, MFL Pro, go to the CD section. (See Installing the Brother Software, page 13-27.) Using a USB Cable to Connect the MFC to the PC (Using Windows® 98, 98SE, ME and Windows® 2000 - Brother International MFC-9200C | Users Manual - English - Page 130
may be installed in a different order depending on the operating system you are using. For Windows® ME Users: Select Specify the location of the driver (Advanced), then click Next. Note The dialog boxes in Steps 5 to 22 are for Windows® 98SE. 5 Select (Recommended) and click Next. 6 Insert the - Brother International MFC-9200C | Users Manual - English - Page 131
the other check marks, then click Browse to locate the file. 8 Double-click the CD icon. For Windows® 98, 98SE users, click the "x:\W98\usb" folder -OR- For Windows® ME users, click the "x:\WME\usb" folder. Then click OK. 9 Make sure Specify a location is selected and click Next. Note Windows® 98 - Brother International MFC-9200C | Users Manual - English - Page 132
the Insert Disk Wizard appears, remove the MFL Pro CD-ROM and insert the Windows® 98/98SE/ME CD-ROM (to get the Windows® standard driver) and click OK. 11 Click Finish. (If you inserted the Windows® 98/98SE/ ME CD-ROM, remove the CD-ROM and reinsert the MFL Pro - Brother International MFC-9200C | Users Manual - English - Page 133
13 Select (Recommended) and click Next. 14 Select Specify a location and click Next. 15 Click Next. S E T T I N G U P T H E M F C A N D P C T O W O R K T O G E T H E R 13 - 21 - Brother International MFC-9200C | Users Manual - English - Page 134
Steps 4 to 10. 18 After the USB Composite Device, PhotoCapture Center™ Fax Modem, Scanner and Printer Drivers have been installed, select BRUSB: USB Printer Port as the printer port and click Next. 19 Enter a name for the printer, or you can use the displayed name. When you have finished, click Next - Brother International MFC-9200C | Users Manual - English - Page 135
installed, click Finish. All the drivers have been installed. Now you can print and scan. Note If you want to install PaperPort®, Multi-Function Link® Pro, go to the CD section. (See Installing the Brother Software, page 13-27.) S E T T I N G U P T H E M F C A N D P C T O W O R K T O G E T H E R 13 - Brother International MFC-9200C | Users Manual - English - Page 136
Using Windows® 2000 Professional 4 When the Found New Hardware Wizard screen appears, click Next. 5 Select (Recommended) and click Next. 6 Insert the MFL Pro CD-ROM into your CD-ROM drive. 7 Select Specify a location and remove the other check marks, then click Next. 13 - 24 S E T T I N G U P T H E - Brother International MFC-9200C | Users Manual - English - Page 137
8 Click Browse to locate the file. 9 Double-click the CD icon and click the "x:\W2K\usb" folder, then click OK. (x: is the driver letter for your CD-ROM drive) 10 Make sure Specify a location is displayed. 11 Click Next. S E T T I N G U P T H E M F C A N D P C T O W O R K T O G E T H E R 13 - 25 - Brother International MFC-9200C | Users Manual - English - Page 138
might see "Digital Signature Not Found" dialog during installation. If you see it, click Yes to install the driver. All the drivers have been installed. Now you can print and scan. Note If you want to install PaperPort®, or MFL Pro, go to the CD section. (See Installing the Brother Software, page 13 - Brother International MFC-9200C | Users Manual - English - Page 139
Installing the Brother Software IMPORTANT You must install the Printer and Scanner drivers before you can install the MFL Pro software. (See the beginning of this Chapter.) 1 Insert MFL Pro CD-ROM into your CD-ROM drive. A window appears listing the following options: (If this window - Brother International MFC-9200C | Users Manual - English - Page 140
3 Follow the instructions on the screen. ScanSoft™ PaperPort® will be installed Printing (Optional Application): 2 Click on "Install E-mail Print" from the main CD-ROM screen. This is optional software and will not be required for printing, faxing and scanning operations. The "Automatic E-mail Print - Brother International MFC-9200C | Users Manual - English - Page 141
To Register Your MFC 9200C On-Line (For USA only): 2 Click "On-Line Registration" to go online to register your product from the main menu. (On-Line Registration is only available for users in the USA.) You can also mail in the "Warranty Registration Card" which is included in the carton. To view On - Brother International MFC-9200C | Users Manual - English - Page 142
98SE, Windows® 2000 Professional, Windows® ME, when you are using a USB cable to connect your MFC to the PC. 3 Click "Install PhotoPrinter Pro" to install program. To View Brother Support Information: 2 Click "Brother Support" from the main menu to get all the contact infomation you need if you have - Brother International MFC-9200C | Users Manual - English - Page 143
CD-ROM for last-minute important installation and troubleshooting information. To uninstall Multi-Function Link® Pro, click the Uninstall icon in the Brother MFL Pro Program group and follow the instructions on the screen. S E T T I N G U P T H E M F C A N D P C T O W O R K T O G E T H E R 13 - 31 - Brother International MFC-9200C | Users Manual - English - Page 144
To receive faxes into your PC through the MFC: 1 Make sure the MFC is connected to the PC. The PC and the Multi-Function Link® Pro Main Menu must be running at all times. (See Installing the Brother Software, page 13-27.) 2 Load the Multi-Function Link® Pro software into your PC. (See Installing the - Brother International MFC-9200C | Users Manual - English - Page 145
Printing at 1200 dpi resolution on special coated paper or glossy paper gives you highest resolution output. Low Running Cost-Whenever you run out of a particular color ink, you'll replace only the cartridge computer. Printer Driver You can change the following printer settings when you print from - Brother International MFC-9200C | Users Manual - English - Page 146
of Paper To achieve high quality printing using your MFC, it's very important to select the right kind of paper. Be sure to read About Brother Paper, on page 2-4 before selecting and purchasing paper for the MFC. Multi-purpose Paper Cassette You can use plain paper, coated paper, transparencies - Brother International MFC-9200C | Users Manual - English - Page 147
, on your PC, in the printer driver Properties Paper tab, select "manual feed". 1 Place the paper on top of the paper cassette with the print side face down. 2 Align the paper against the right paper guide and slide it into the manual feed slot. Manual Feed Slot Right Paper Guide If you forget to - Brother International MFC-9200C | Users Manual - English - Page 148
You can use the manual feed slot to print one envelope at a time. 1 Select the paper size setting in the printer driver Properties window. (See The Paper Tab, page 15-1.) 2 Press the Scanner Cover Release Button, then lift the scanner cover. 3 Move the purple paper thickness adjustment lever down - Brother International MFC-9200C | Users Manual - English - Page 149
you are having trouble with one of the 2.REPLACE INK ink colors, you may need to clean the print head. (See How to Improve Print Quality, page 23-9.) If you get an error message NEAR EMPTY or INK EMPTY, you will need to replace the ink cartridge for the appropriate color. (See Troubleshooting and - Brother International MFC-9200C | Users Manual - English - Page 150
15 Printer Driver Settings 15 Using the Brother MFC9200C Series Printer Driver The Brother MFC9200C Series printer driver enables you to change settings and override defaults as you change your paper, document type, and colors for printing. In the Brother MFC9200C Series on BRMFC: Properties dialog - Brother International MFC-9200C | Users Manual - English - Page 151
(139.7 x 215.9 mm) User Defined Paper Size The printer can handle any paper size within the following range; Minimum paper size in your application software. In addition, check the margin settings when you select the smallest paper size. If they are too large, it may result in nothing being printed - Brother International MFC-9200C | Users Manual - English - Page 152
view the printed text upright. Copies The Copies selection tells Windows how many copies you want to print from a software application. Note this function. The MFC spools the job in your computer and sends the data starting from the last page to the printer. Since the MFC prints from the last page - Brother International MFC-9200C | Users Manual - English - Page 153
is primarily used for printing on standardsize paper. Manual Feed If your paper has difficulty feeding from the paper cassette, we recommend using the Manual paper feed method. You will have to load paper sheet by sheet. The MFC stops before printing and the Printer Driver shows "Load one sheet - Brother International MFC-9200C | Users Manual - English - Page 154
The Quality/Color Tab The Quality/Color tab enables you to select the print quality, media, colors (matched to PC monitor, custom colors, or mono), and document type. Click the Quality/Color tab to display this screen: Select the - Brother International MFC-9200C | Users Manual - English - Page 155
the preset quality for best printing result. Paper Type Plain Paper Ink Jet Paper (Coated Paper) Glossy Paper Transparency Transparency (mirror) Suitable print quality Normal Fine Super Fine Normal Normal Note Use only genuine Brother Coated Paper (Ink Jet), Glossy Paper, or Transparencies to get - Brother International MFC-9200C | Users Manual - English - Page 156
text and business graphics are printed vividly and photographic images are printed softly. s Auto The printer driver automatically selects the document type If you want to select the color matching method and halftone method manually, select this mode and press the Custom Setting button to access - Brother International MFC-9200C | Users Manual - English - Page 157
or True2Life. Halftone Pattern The MFC can use several methods to ON Adjusts the color in the image for better print quality. Print time will be longer with True2Life set to other influences will effect the appearance of white. The white parts of a picture may appear to be slightly pink, yellow - Brother International MFC-9200C | Users Manual - English - Page 158
. s Blue Increase the intensity of the Blue color to add more blue to the whole image. Printing from your PC When you select the print command from your PC, it sends a print command and data to the MFC. The LCD shows the date and time, and RECEIVING DATA. If there are more pages, the - Brother International MFC-9200C | Users Manual - English - Page 159
Brother Control Center The Brother Control Center is a software utility that pops up on the PC screen whenever paper is placed in the ADF. This allows you to access the most frequently used scanning applications only with a few mouse clicks. Using the Control Center eliminates the need to manually - Brother International MFC-9200C | Users Manual - English - Page 160
AutoLoad the Brother Control Center The Control Center is initially configured to automatically load each time Windows® is started. When the Control Center is loaded, the Control Center - Brother International MFC-9200C | Users Manual - English - Page 161
the control panel, you must have connected the MFC to your Windows® based PC and loaded the appropriate Brother Drivers for your version of Windows®. When you are ready up in the ADF, or face down on the scanner glass. 2 Press Scan/OCR. 3 The MFC will scan the original perform OCR in ScanSoft™ - Brother International MFC-9200C | Users Manual - English - Page 162
3 The MFC will scan the original, create a file attachment, and launch your E-mail application, displaying the new message waiting to be addressed. SCANNING:E-MAIL Brother Control Center Features Auto Configuration During the installation process the Control Center checks your system to - Brother International MFC-9200C | Users Manual - English - Page 163
PhotoPaint. Copy Operations Copy-allows you to use the PC and any Windows® printer driver for enhanced copy functions. You can scan the page on the Brother MFC and print the copies using any of the features of the Brother MFC printer driver-OR-you can direct the copy output to any standard Windows - Brother International MFC-9200C | Users Manual - English - Page 164
this checkbox if you want Brother MFL Control Center to load when you boot your computer. Setting Up the Scanner Configurations The Pop-Up Each mode has its own set of stored settings. You can keep the factory default settings or change them at any time: Resolution-Select the scanning resolution - Brother International MFC-9200C | Users Manual - English - Page 165
in the Control Center window without first placing an original in the ADF. Place the original in the Brother machine's ADF, then click OK to return to the Control Center screen. Scan to File Scanner Settings From the pull-down list, select the scanning mode that is appropriate for the type of - Brother International MFC-9200C | Users Manual - English - Page 166
Destination Folder PaperPort Folder-Select this checkbox to scan the original into your PaperPort folder. Other Folder-Select this checkbox, to scan the original as another file type and/or into another directory/folder. File-If you selected Other Folder, from the pull-down list select the type of - Brother International MFC-9200C | Users Manual - English - Page 167
Scanner Settings From the pull-down list, select the scanning mode that is appropriate for the type of file: Faxing, Filing and Copying; Text for OCR; - Brother International MFC-9200C | Users Manual - English - Page 168
checkbox to combine all files of the same type into one file. (For Brother Color Models Only) Convert non-image files to color-Click this checkbox to ones: Highlight the name(s) you want to add to your list, click the User button, then click OK to return to the Link Preference window. From the Link - Brother International MFC-9200C | Users Manual - English - Page 169
Send Scan to Word Processor Scanner Settings From the pull-down list, select the scanning mode that is appropriate for the type of file: Faxing, Filing and Copying; Text for OCR; - Brother International MFC-9200C | Users Manual - English - Page 170
you want to use the OCR package that was installed with the Brother software. Click the OCR Settings... button to choose how the OCR format you want to use for your word processor or text documents. User Defined Button Scanner Settings From the pull-down list, select the scanning mode that is - Brother International MFC-9200C | Users Manual - English - Page 171
Settings... button to set up links for your user-defined application. Copy/Two on One Copy Scanner Settings From the pull-down list, select the click the Modify Settings... button. Copy Settings Brother MFC9200C Copies-Enter the number of copies you want to print. To change the copy options, click - Brother International MFC-9200C | Users Manual - English - Page 172
Send a Fax Scanner Settings From the pull-down list, select the scanning mode that is appropriate for the type of file: Faxing, Filing and Copying; Text for OCR; - Brother International MFC-9200C | Users Manual - English - Page 173
FAX Settings Brother MFL Pro Fax FAX Resolution-From the . The MFL Pro Fax on COM1 Properties screen appears: Select the Paper Size and Orientation (Portrait or Landscape) and click OK. To return to the factory default settings, click the Restore Defaults button. U S I N G T H E W I N D O W S ®- B A - Brother International MFC-9200C | Users Manual - English - Page 174
® ScanSoft™ PaperPort® for Brother is a document management application combine or "stack" documents of different formats for printing, faxing or filing. ScanSoft™ PaperPort® can be on the CD-ROM.) The complete ScanSoft™ PaperPort® Owner's Manual, including ScanSoft™ TextBridge® OCR, is in the On- - Brother International MFC-9200C | Users Manual - English - Page 175
Viewing Items in ScanSoft™ PaperPort® ScanSoft™ PaperPort® provides several ways to view items: Desktop View displays a thumbnail, a small graphic that represents each item in a Desktop or folder. Items in the selected folder appear on the PaperPort® Desktop. You can see PaperPort® items (MAX - Brother International MFC-9200C | Users Manual - English - Page 176
not automatically recognize one of the applications on your computer, you can manually create a link using the Create New Link command. (See PaperPort® TextBridge® OCR (Converting Image Text to Text You Can Edit) Software by: ScanSoft™ ScanSoft™ TextBridge® OCR is automatically installed when you - Brother International MFC-9200C | Users Manual - English - Page 177
s Print to MFC, but you can also scan images directly into hundreds of other software applications that support TWAIN scanning. These applications include popular programs like Adobe Photoshop, Adobe PageMaker, CorelDraw and many more. To choose Brother Multi-Function Link® Pro as your scanner driver - Brother International MFC-9200C | Users Manual - English - Page 178
will appear: Scanning a Document into the PC 1 Place your original face up in the ADF or face down on the scanner glass. 2 Adjust the following settings, if needed, in the Scanner window: • Resolution • Color Type (Black & White, Gray [Error Diffusion], True Gray, 256 Color or 24-bit color) • Size - Brother International MFC-9200C | Users Manual - English - Page 179
Settings in the Scanner Window Resolution: Resolution: Select the scanning resolution from the Resolution drop-down list. Higher resolutions take more memory and transfer time, but can achieve a finer scanned image. You can choose: • 100 x 100 dpi • 150 x 150 dpi • 200 x 100 dpi (Black & White, Gray - Brother International MFC-9200C | Users Manual - English - Page 180
(210 x 297 mm.) • Legal (8 1/2 x 14 in.) • A5 (148 x 210 mm.) • B5 (182 x 257 mm.) • Executive (7 1/4 x 10 1/2 in.) • Business Card (90 x 60 mm.) • Custom (User adjustable from 0.35 x 0.35 in. to 8.5 x 14 in.) After you select a custom size, you can adjust the scanning area further by using the left - Brother International MFC-9200C | Users Manual - English - Page 181
Paper: Check the Photo box if the image is a photograph. Video Capture: The Video any unwanted portions from the image. When you are satisfied with the preview, select the Start button from the scanner window to scan the image. How to use PreScan to adjust an image: 1 Place the original face up in - Brother International MFC-9200C | Users Manual - English - Page 182
area of the original will appear in the PaperPort® window. 7 In the PaperPort® window, use the options available to refine the image. (See PaperPort® for Brother Online Documentation on the CD-ROM for details.) 17 - 9 U S I N G S C A N S O F T ™ - Brother International MFC-9200C | Users Manual - English - Page 183
your PC. Once the frame is an image file, it can be saved, printed, faxed, and inserted into other files. Connecting Your Video Equipment Before you front of the MFC. Capturing An Image You can access Multi-Function Link® Pro's TWAIN dialog box from the ScanSoft™ PaperPort® for Brother viewer or - Brother International MFC-9200C | Users Manual - English - Page 184
To capture a frame as an image: 1 Connect your video equipment to the MFC. 2 From PaperPort®, select Acquire from the File menu, or click on the Scan (TWAIN) icon. Multi-Function Link® Pro's TWAIN dialog box will appear: 3 In - Brother International MFC-9200C | Users Manual - English - Page 185
4 Select the Source of the video: • Live Camera • Tape/VCR • Laser Disc® • Digital Camera 5 Select the Type of video: • Auto-is the most common choice, since the system will determine the Type for you. • Moving • Still • High Quality • - Brother International MFC-9200C | Users Manual - English - Page 186
Link® Pro software. Detailed installation and setup instructions are in the On-Line Documentation section of the Brother CD-ROM that is included with your MFC. Check the online README.WRI file in the root directory of the CD-ROM for last-minute important information and troubleshooting tips that - Brother International MFC-9200C | Users Manual - English - Page 187
Setup application without uploading the data to the MFC. APPLY This uploads the data to the MFC, but does not exit the Remote Setup application. PRINT This command prints the selected items on the MFC. You can not print the data until it is uploaded to the MFC. Click APPLY to upload the new data to - Brother International MFC-9200C | Users Manual - English - Page 188
an electronic Phone Book program and a Log Manager that maintains a record of all PC fax transactions. The Main Menu can be accessed through the Brother. Multi-Function Link® Pro program group. Sending a Fax from Your PC Sending a Quick Fax A QuickFax is a cover page only fax with a message. This - Brother International MFC-9200C | Users Manual - English - Page 189
Sending a Fax from the Main Menu You can send a fax from the Main Menu and attach multiple files. The "attachments" can be in different file formats. 1 From the Main Menu window, select the Send Fax button-OR-Select Send Fax from the Start pull-down menu. The Send Fax window will appear: 2 Enter - Brother International MFC-9200C | Users Manual - English - Page 190
the document in a Windows® application. 2 Select Brother MFL Pro Fax as your printer. 3 Select the Print command to begin the fax transmission. The Fax MFC, first you must have connected your MFC to your computer. Then, you can load the Multi-Function Link® Pro software. (See Setting Up the MFC and - Brother International MFC-9200C | Users Manual - English - Page 191
Viewing Received Faxes Faxes that are received into the PC will appear in the InBox of the Log Manager. To access the Log Manager, from the Main Menu click the Log Manager button-OR-From the Start pull-down menu, select Mail/Log. 1 In the Log Manager, select the Fax folder. 2 Then select the InBox - Brother International MFC-9200C | Users Manual - English - Page 192
the power cord, USB cable or remove a SmartMedia™ or CompactFlash™ card from the MFC while the MFC is reading the card (LED is flashing). You can loose data or damage the card. Note While the MFC is printing from the PhotoCapture Center™ function, the PC cannot access the PhotoCapture Center™ for - Brother International MFC-9200C | Users Manual - English - Page 193
the appropriate slot on your MFC. 2 The Brother PhotoCapture Manager will launch the PhotoPrinter software once it detected the insertion of the memory card. 3 PhotoPrinter automatically starts up in the "Get Photo/Album" user interface with a custom designed Brother "PhotoCapture Center™" Add Photo - Brother International MFC-9200C | Users Manual - English - Page 194
to "New Album". Provides a pull-down menu of existing albums to select. If the user does not enter an album name, the software will automatically create an "untitled-1" as per normal "Get Photo" function. The user can also type in a new album name. Automatically Create album do not show this - Brother International MFC-9200C | Users Manual - English - Page 195
mail. s Provides an "In Memory" printer driver: You can receive and print e-mail data at the same time, by searching for a specified character string in the mail header. It allows you to see the sender, subject and relevant part of the mail content. Before You Use this Software Please read in the - Brother International MFC-9200C | Users Manual - English - Page 196
no longer than 6 feet (1.8 meters). To work with your MFC, your USB-Equipped Apple® Macintosh® must be set up with Mac OS 8.5/8.51/8.6/9.0. (The Brother Scanner Driver works only with Mac OS 8.6/9.0) Installing the Brother Printer and Scanner Drivers 1 Turn on the power to your Macintosh® and wait - Brother International MFC-9200C | Users Manual - English - Page 197
. 3. Follow the instructions. Using the Brother Printer Driver with your Apple® Macintosh® To select the Printer: 1 From the Apple menu, open the Chooser. 2 Highlight the printer driver you installed. On the right side of the Chooser, click the printer to which you want to print. Close the Chooser - Brother International MFC-9200C | Users Manual - English - Page 198
menu and select Page Setup. You can change the settings for Paper, Paper Thickness, Paper Source, Orientation, and Scale, then click OK. 4 From application software such as PaperPort®, click File menu and select Print. Click Print to start printing. Note If you want to change Copies, Pages, Quality - Brother International MFC-9200C | Users Manual - English - Page 199
Using Brother TWAIN Scanner Driver with Your Apple® Macintosh® The Brother MFC software includes a TWAIN Scanner driver for Macintosh®. This Macintosh® TWAIN Scanner driver can be used with application that supports the TWAIN specification. You can use PaperPort® for scanning. U S I N G T H E B R O - Brother International MFC-9200C | Users Manual - English - Page 200
Accessing the Scanner Run your PaperPort® software. You will see the PaperPort® icon in the upper right hand corner of your screen. The first time you use the Brother TWAIN driver, set it as the default by choosing the Select Source, then click the PaperPort® icon. Afterward, for each original, you - Brother International MFC-9200C | Users Manual - English - Page 201
Settings in the Scanner Window Image Resolution Choose the scanning resolution from the Resolution pop-up menu. Higher resolution takes more memory and transfer time, but can achieve a finer scanned image. (Each model has different resolutions. See Specification.) Color Type Black & White-Set the - Brother International MFC-9200C | Users Manual - English - Page 202
x 297 mm) • Legal (8.5 x 14 inches) • A5 (148 x 210 mm) • B5 (182 x 257 mm) • Executive (7.25 x 10.5 inches) • Business Card (90 x 60 mm) • Custom (User adjustable from 0.35 x 0.35 inches to 8.5 x 14 inches) After you choose a custom size, you can adjust the scanning area. Click and hold the mouse - Brother International MFC-9200C | Users Manual - English - Page 203
Miscellaneous Brightness Adjust the brightness setting to obtain the best image. The Brother TWAIN Scanner driver offers 100 brightness settings (-50 to 50). The default value is 0, representing an "average" setting. You can set the brightness level by dragging the slidebar - Brother International MFC-9200C | Users Manual - English - Page 204
, the areas of the image that are left blank will be different. Colors that fall within the gamuts of both devices are left unchanged. Scanner Profile Select your Brother MFC. 21 - 9 U S I N G T H E B R O T H E R M F C W I T H A N E W P O W E R M A C I N T O S H ® G 3 , G 4 O R i M A C ™/ i B O O K - Brother International MFC-9200C | Users Manual - English - Page 205
of the Brother MFC again. 5 Adjust the settings for Resolution, Color Type (Gray Scale), Brightness, Contrast, and Size in the Scanner Setup dialog box, as needed. 6 Click Start. This time only the selected area of the original will appear in the Scanning Area. 7 In your editing software application - Brother International MFC-9200C | Users Manual - English - Page 206
wiring using a compatible modular jack that is Part 68 compliant. See the Installation section of this manual for details. The REN is useful to your calling area. If your MFC 9200C damages the telephone line, the telephone company may discontinue your service temporarily. If possible, they will - Brother International MFC-9200C | Users Manual - English - Page 207
If you experience trouble with your MFC 9200C, please contact a Brother Authorized Service Center for information on obtaining service or repair. The telephone company may ask that you disconnect this equipment from the line until the problem has been corrected or until you are sure that the - Brother International MFC-9200C | Users Manual - English - Page 208
. ENERGY STAR® Compliance Statement As an ENERGY STAR® Partner, Brother Industries, Ltd. has determined that product meets the ENERGY STAR® guidelines for energy efficiency. Important Safety Instructions 1 Read all of these instructions. 2 Save them for later reference. 3 Follow all warnings and - Brother International MFC-9200C | Users Manual - English - Page 209
voltage points or short out parts resulting in the risk of fire or MFC must be disconnected quickly. 17 Unplug this product from the wall outlet and refer servicing to Brother Authorized Service instructions are followed. Adjust only those controls that are covered by the operating instructions - Brother International MFC-9200C | Users Manual - English - Page 210
Brother Industries, Ltd. © Copyright 2000 Brother Industries, Ltd. All rights reserved. © Copyright 2000 Smith Micro Software software title is mentioned in this manual has a Software trademark of International Paper. All other brand and product names mentioned in this manual are registered trademarks - Brother International MFC-9200C | Users Manual - English - Page 211
a difficulty with your MFC using this manual, call our fax-back system and follow the voice prompts to receive faxed instructions about using the system, at: http://www.brother.com You can check here for Brother Printer Driver updates. Brother Bulletin Board Brother's Bulletin Board Numbers - Brother International MFC-9200C | Users Manual - English - Page 212
CHECK PAPER MFC is out of paper. Add paper. CHECK SCAN LOCK The scanner lock is locked. Release the scanner lock INK EMPTY One or more of the ink cartridges is out of Replace the ink cartridges. See p. 23-16. ink. MACHINE ERROR XX MFC has a mechanical problem. Call Brother Customer Service - Brother International MFC-9200C | Users Manual - English - Page 213
paper or paper clip, etc. may be jammed inside the MFC. The paper is jammed in the MFC. An ink cartridge is not installed properly. The print head detects low temperature. Set up the One Touch or Speed Dial number. See page 7-1. See PhotoCapture Center™ Requirements, page 12-9. Press the Scanner - Brother International MFC-9200C | Users Manual - English - Page 214
or printed sheet is jammed, follow the appropriate set of instructions to remove it. Original is Jammed in the Top of the ADF Unit 1 Remove any paper Original is Jammed Inside the ADF Unit 1 Open the document cover. 2 Remove any paper from the ADF that is not jammed. ADF Unit 3 Lift the ADF unit. 4 - Brother International MFC-9200C | Users Manual - English - Page 215
is Jammed Inside the MFC 1 Remove the paper cassette. 2 Press the blue release button and pull the jammed paper out toward you. Blue Release Button 3 Slide the paper cassette into the MFC until it locks into place. T R O U B L E S H O O T I N G A N D R O U T I N E M A I N T E N A N C E 23 - 5 - Brother International MFC-9200C | Users Manual - English - Page 216
years, after that the ink may become clogged. Cartridge expiration dates are printed on the package. Make sure the Printer Driver matches the type of paper you are using (see page 15-6.). Try using recommended special paper (see Chapter 2). The recommended environment for your MFC is between 50°F to - Brother International MFC-9200C | Users Manual - English - Page 217
Order' from the 'Paper' tab in the printer driver. When using ATM fonts, some characters are missing or some characters are printed in the same place. If you are using Windows 95 or 98, select 'Printer Settings' from the 'Start' menu. Open 'Brother MFC-9200' properties. Click 'Spool Setting - Brother International MFC-9200C | Users Manual - English - Page 218
box). 2. Make sure the MFC is not displaying an error message on the LCD Display. 3. Make sure no other device drivers, which also communicate through that the computer's parallel port settings in the BIOS are set to support a bi-directional machine, i.e., Parallel Port Mode-ECP Video Capture LCD - Brother International MFC-9200C | Users Manual - English - Page 219
color you want to clean and press Set. The MFC will clean the print head.When cleaning is finished, the MFC will go back online. Note If you clean the print head at least five times and the print has not improved, call Brother Customer Service for assistance at 1-800-284-4329 (USA), 1-800853-6660 - Brother International MFC-9200C | Users Manual - English - Page 220
This feature allows you to check and align the ink cartridges to assure best print quality. Make sure there is paper in the cassette before you start the alignment procedure. 1 Press Function, 2, 2. 2.VERTICAL ALIGN 2 Press Start. The MFC prints a sample page. Study the alignment page and decide - Brother International MFC-9200C | Users Manual - English - Page 221
select OFF. 3.BI-DIR PRINT Don't handle the paper until the ink is dry. Special ink jet, glossy and transparency paper will take longer to dry than plain paper, so do not touch the printed copy until the ink has dried. Packing and Shipping the MFC Whenever you transport the MFC, use the packing - Brother International MFC-9200C | Users Manual - English - Page 222
in original packing materials or protective wrapping. 7 Remove the ink cartridges and replace them with the yellow shipping cover that was part of the original packing materials. 8 Wrap the MFC in the plastic bag. 9 Place the MFC and paper cassette in the original carton with the original packing - Brother International MFC-9200C | Users Manual - English - Page 223
yellow shipping cover or the ink cartridges be in position during shipment. Otherwise, the print head will be damaged, voiding your warranty. 10 Pack additional parts (cord, paper cassette, printed materials) into the carton. Note If you are returning the MFC to Brother as part of the Swap Program - Brother International MFC-9200C | Users Manual - English - Page 224
Routine Maintenance Cleaning the Scanner Unplug the MFC and lift the document cover. Clean the scanner glass and the white film with isopropyl alcohol on a lint free cloth. White Film Document Cover Lift the ADF unit. Clean the white roller and - Brother International MFC-9200C | Users Manual - English - Page 225
is dry or lightly moistened with isopropyl alcohol. Printer Platen Flat Cable Paper Feed Star Wheel WARNING Be careful not to touch the paper feed star wheels and flat cable. Cleaning the Pick-up Roller 1 Remove the paper cassette from the MFC. 2 Wipe the pick-up rollers with a cloth moistened - Brother International MFC-9200C | Users Manual - English - Page 226
cover release button and lift the scanner cover. 4 Remove the ink cartridge by pulling it toward you and lifting it up and out of the print head. 5 Open the new ink cartridge bag for the color on the display and remove the ink cartridge. 6 Hold the new ink cartridge as shown in the illustration - Brother International MFC-9200C | Users Manual - English - Page 227
Each color has its own correct position. Insert each new ink cartridge into the carriage using the color indicator on the print head as a guide. 8 After installing the ink cartridges, close the scanner cover. Your MFC prepares for a "head cleaning" and goes online. The display screen prompts you to - Brother International MFC-9200C | Users Manual - English - Page 228
For Customer Service If you still cannot solve a problem with your MFC, call Brother Customer Service (see Brother Numbers, page i). 23 - 18 T R O U B L E S H O O T I N G A N D R O U T I N E M A I N T E N A N C E - Brother International MFC-9200C | Users Manual - English - Page 229
MFC 9200C is a 6 in 1 Multi-Function Center: Color Printer, Color Copier (multiple copies), Color Scanner, Plain Paper Fax, Color PC Fax (via your PC), and Video Capture, PhotoCapture Center™. Fax Compatibility Coding System Modem Speed Document Size Scanning/Printing Width Paper Cassette Printer - Brother International MFC-9200C | Users Manual - English - Page 230
Best Print Quality Power Source Power Consumption Dimensions Brother Standard Chart No. 1" (a typical business letter, Standard resolution). Specifications and printed materials are subject to change for improvement without prior notice. Printer Printing Print Method Resolution Print Speed Print - Brother International MFC-9200C | Users Manual - English - Page 231
print delivery to the paper output tray) To prevent smearing the ink, we recommend removing printed pages from the paper output tray immediately after they exit the machine. Consumable Items Ink Service Life of Ink Cartridge Black and 3 individual color ink cartridges separate from the print head - Brother International MFC-9200C | Users Manual - English - Page 232
memory, in numerical order. Automatic E-Mail Printing Software application that automatically prints incoming e-mail messages on the MFC by line noise or static. Coding Method Method of coding the information contained in a Prints a page at the other party's machine, that contains the sender - Brother International MFC-9200C | Users Manual - English - Page 233
print head and/or resets the ink dot counter after replacing an ink cartridge. interval The preprogrammed time period between automatically printed Activity Reports. You can print Activity Reports on demand without interrupting this cycle. LCD (liquid crystal display) The display screen on the MFC - Brother International MFC-9200C | Users Manual - English - Page 234
waiting in memory and cancel jobs individually. remote retrieval access The ability to access your MFC remotely from a touch tone phone. remote activation allows you to transfer a fax call, answered at an external or extension phone, to the MFC. remote retrieval access code The four-digit code (159 - Brother International MFC-9200C | Users Manual - English - Page 235
transmission The process of sending documents over the phone lines from your MFC to the receiving fax machine. User Setting List A printed report that shows the current settings of your MFC. Xmit Report (Transmission Report) A listing of each transmission, date, time, and number of pages. GLOSSARY - Brother International MFC-9200C | Users Manual - English - Page 236
Questions (FAQs) i Home Page i test sheet, sending 1-2 Brother paper 2-4 C canceling a scheduled job 5-6 I - 1 fax forwarding 8-4 fax jobs in memory 5-6 jobs awaiting redial 6-7 paging 8-4 cleaning 23-9 cycle 2-11 Printer Platen 23-15 Scanner 23-14 clear 1-3, 1-4 CNG tones 1-5 Color Adjustment 10 - Brother International MFC-9200C | Users Manual - English - Page 237
Code 8-2 troubleshooting 5-4 Fax Forwarding 8-1 changing remotely 8-4, 8-5 programming a number 8-1 FAX mode 1-5 Fax Receive Code 5-2, 5-4 fax receiving tones 1-5 fax redial 6-4 fax storage 8-2 printing from 5-4 setting 8-2 fax, stand-alone 6-9 receiving 5-1 difficulty 23-6 erasing from memory - Brother International MFC-9200C | Users Manual - English - Page 238
Brother Software helpful hints for Windows® 13-31 Multi-Function Link® Pro 13-27 J jack 2-14 EXT.jack external telephone 2-12 TAD (answering machine) 2-13 jam 23-5 L LCD (Liquid Crystal Display) 1-3, 1-4, 3-1 light original 6-3 M Manual mode 5-1 transmission 6-4 manual transmission 6-4 memory - Brother International MFC-9200C | Users Manual - English - Page 239
code changing 8-2 using 8-3 checking what's in memory Memory Status List 8-4 commands 8-4 getting your faxes 8-5 Memory Status 8-4 reports 9-1 Help list 9-1 how to print phone lines 2-14 S safety instructions 22-3 Scanner Cover 2-9 Scanner Cover Release Button 2-9 scanner, cleaning 23-14 Scroll 3-1 - Brother International MFC-9200C | Users Manual - English - Page 240
tray 2-1 triplex adapter 2-14 troubleshooting 23-1 error messages on LCD 23-2 if you are having difficulty 23-6 incoming Calls 23-7 Phone line difficulty 23-6 printer difficulties 23-7 printing 13-24 User Setting 9-1 V vertical alignment 2-11 VIDEO Auto Switch 11-1 Video Printing 11-1 Volume - Brother International MFC-9200C | Users Manual - English - Page 241
using touch tone. 2 When your MFC answers, immediately enter your Remote Retrieval Access Code (159 ). 3 Your MFC signals the kinds of messages received: 1 long beep - Fax message(s) No beeps - No messages. 4 After 2 short beeps, enter a command. 5 Press 9 0 to reset your MFC when you finish. 6 Hang - Brother International MFC-9200C | Users Manual - English - Page 242
Changing Remote Retrieval Access Code 1 Press Function, 1, 7, 3. 2 Enter a three-digit number from 000 to 999. The , press 6. Turn Fax Storage off, press 7. RETRIEVE A FAX Press 9 6 then to Print a Memory Status List, press 1. then enter the number of remote fax machine, and press . After - Brother International MFC-9200C | Users Manual - English - Page 243
compliance with the above conditions may not prevent degradation of service in some situations. Repairs to certified equipment should be coordinated by a representative designated by the supplier. Any repairs or alterations made by the user to this equipment, or equipment malfunctions, may give the - Brother International MFC-9200C | Users Manual - English - Page 244
de Ville, Dollard-des-Ormeaux, QC, CANADA H9B 3H6 Visit us on the World Wide Web http://www.brother.com These machines are made for use in the USA and CANADA only. We cannot recommend using them overseas because overseas is at your own risk and will void your warranty. LE3385001 Printed in Malaysia
-
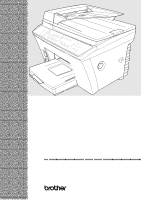 1
1 -
 2
2 -
 3
3 -
 4
4 -
 5
5 -
 6
6 -
 7
7 -
8
-
9
-
10
-
11
-
12
-
13
-
14
-
15
-
16
-
17
-
18
-
19
-
20
-
21
-
22
-
23
-
24
-
25
-
26
-
27
-
28
-
29
-
30
-
31
-
32
-
33
-
34
-
35
-
36
-
37
-
38
-
39
-
40
-
41
-
42
-
43
-
44
-
45
-
46
-
47
-
48
-
49
-
50
-
51
-
52
-
53
-
54
-
55
-
56
-
57
-
58
-
59
-
60
-
61
-
62
-
63
-
64
-
65
-
66
-
67
-
68
-
69
-
70
-
71
-
72
-
73
-
74
-
75
-
76
-
77
-
78
-
79
-
80
-
81
-
82
-
83
-
84
-
85
-
86
-
87
-
88
-
89
-
90
-
91
-
92
-
93
-
94
-
95
-
96
-
97
-
98
-
99
-
100
-
101
-
102
-
103
-
104
-
105
-
106
-
107
-
108
-
109
-
110
-
111
-
112
-
113
-
114
-
115
-
116
-
117
-
118
-
119
-
120
-
121
-
122
-
123
-
124
-
125
-
126
-
127
-
128
-
129
-
130
-
131
-
132
-
133
-
134
-
135
-
136
-
137
-
138
-
139
-
140
-
141
-
142
-
143
-
144
-
145
-
146
-
147
-
148
-
149
-
150
-
151
-
152
-
153
-
154
-
155
-
156
-
157
-
158
-
159
-
160
-
161
-
162
-
163
-
164
-
165
-
166
-
167
-
168
-
169
-
170
-
171
-
172
-
173
-
174
-
175
-
176
-
177
-
178
-
179
-
180
-
181
-
182
-
183
-
184
-
185
-
186
-
187
-
188
-
189
-
190
-
191
-
192
-
193
-
194
-
195
-
196
-
197
-
198
-
199
-
200
-
201
-
202
-
203
-
204
-
205
-
206
-
207
-
208
-
209
-
210
-
211
-
212
-
213
-
214
-
215
-
216
-
217
-
218
-
219
-
220
-
221
-
222
-
223
-
224
-
225
-
226
-
227
-
228
-
229
-
230
-
231
-
232
-
233
-
234
-
235
-
236
-
237
-
238
-
239
-
240
-
241
-
242
-
243
-
244
 |
 |
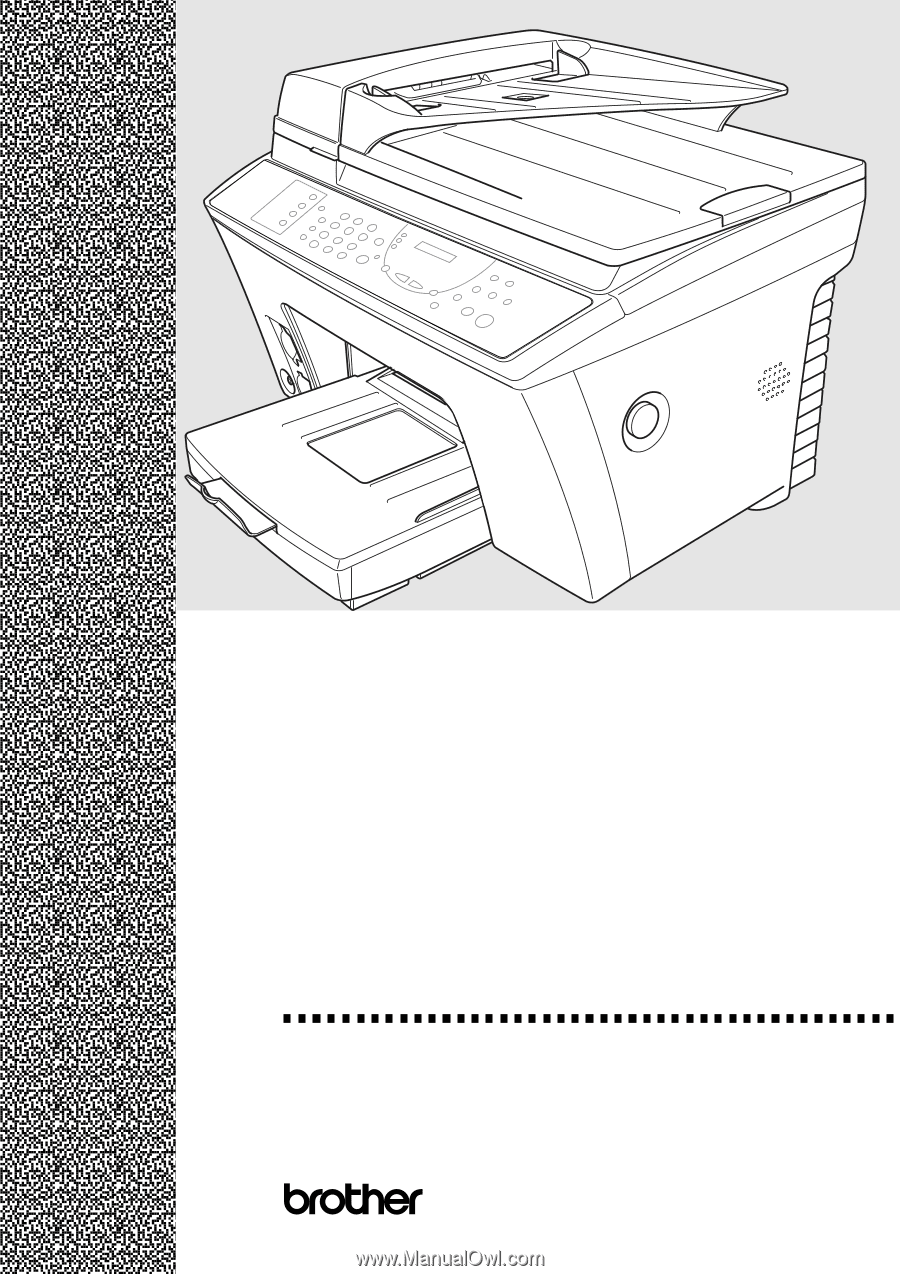
MFC 9200C
®
OWNER’S MANUAL