Brother International MFC-9200C Users Manual - English - Page 180
Size:, Custom:, Adjust:
 |
View all Brother International MFC-9200C manuals
Add to My Manuals
Save this manual to your list of manuals |
Page 180 highlights
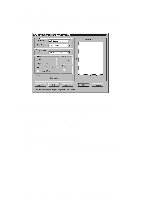
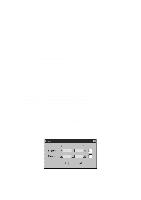
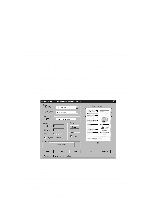
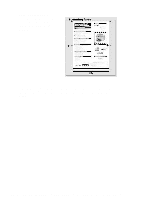
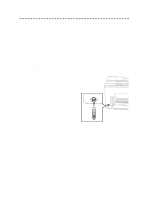
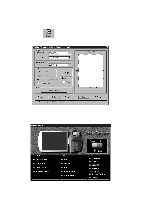
Size: Set the Size to one of the following: • Letter (8 1/2 x 11 in.) • A4 (210 x 297 mm.) • Legal (8 1/2 x 14 in.) • A5 (148 x 210 mm.) • B5 (182 x 257 mm.) • Executive (7 1/4 x 10 1/2 in.) • Business Card (90 x 60 mm.) • Custom (User adjustable from 0.35 x 0.35 in. to 8.5 x 14 in.) After you select a custom size, you can adjust the scanning area further by using the left mouse button to drag the dotted outline of the scanning area. This is required when you want to crop an image when scanning. To scan business cards, select the Business Card (90 x 60 mm.) size setting and place the business card at the top center of a carrier sheet. Carrier sheets are available from your Dealer. When scanning photographs or other images for use in a word processor or other graphics application, you should try different settings for the contrast, mode and resolution to see which settings best suit your needs. Custom: This section displays the size you selected. To adjust the scanning area size to business card size automatically, check the Business Card Size box. Adjust: In the Adjust section, click the Image button. The Image screen will appear: Use the cursor to drag the indicator buttons to the left or right to adjust the Brightness and the Contrast, as needed. 17 - 7 U S I N G S C A N S O F T ™ P A P E R P O R T ® F O R B R O T H E R / T E X T B R I D G E ®
-
 1
1 -
2
-
3
-
4
-
5
-
6
-
7
-
8
-
9
-
10
-
11
-
12
-
13
-
14
-
15
-
16
-
17
-
18
-
19
-
20
-
21
-
22
-
23
-
24
-
25
-
26
-
27
-
28
-
29
-
30
-
31
-
32
-
33
-
34
-
35
-
36
-
37
-
38
-
39
-
40
-
41
-
42
-
43
-
44
-
45
-
46
-
47
-
48
-
49
-
50
-
51
-
52
-
53
-
54
-
55
-
56
-
57
-
58
-
59
-
60
-
61
-
62
-
63
-
64
-
65
-
66
-
67
-
68
-
69
-
70
-
71
-
72
-
73
-
74
-
75
-
76
-
77
-
78
-
79
-
80
-
81
-
82
-
83
-
84
-
85
-
86
-
87
-
88
-
89
-
90
-
91
-
92
-
93
-
94
-
95
-
96
-
97
-
98
-
99
-
100
-
101
-
102
-
103
-
104
-
105
-
106
-
107
-
108
-
109
-
110
-
111
-
112
-
113
-
114
-
115
-
116
-
117
-
118
-
119
-
120
-
121
-
122
-
123
-
124
-
125
-
126
-
127
-
128
-
129
-
130
-
131
-
132
-
133
-
134
-
135
-
136
-
137
-
138
-
139
-
140
-
141
-
142
-
143
-
144
-
145
-
146
-
147
-
148
-
149
-
150
-
151
-
152
-
153
-
154
-
155
-
156
-
157
-
158
-
159
-
160
-
161
-
162
-
163
-
164
-
165
-
166
-
167
-
168
-
169
-
170
-
171
-
172
-
173
-
174
-
 175
175 -
 176
176 -
 177
177 -
 178
178 -
 179
179 -
 180
180 -
 181
181 -
 182
182 -
 183
183 -
 184
184 -
 185
185 -
186
-
187
-
188
-
189
-
190
-
191
-
192
-
193
-
194
-
195
-
196
-
197
-
198
-
199
-
200
-
201
-
202
-
203
-
204
-
205
-
206
-
207
-
208
-
209
-
210
-
211
-
212
-
213
-
214
-
215
-
216
-
217
-
218
-
219
-
220
-
221
-
222
-
223
-
224
-
225
-
226
-
227
-
228
-
229
-
230
-
231
-
232
-
233
-
234
-
235
-
236
-
237
-
238
-
239
-
240
-
241
-
242
-
243
-
244
 |
 |
