Canon BJ-30 User Guide - Page 21
Connecting Your Printer to the Computer
 |
View all Canon BJ-30 manuals
Add to My Manuals
Save this manual to your list of manuals |
Page 21 highlights
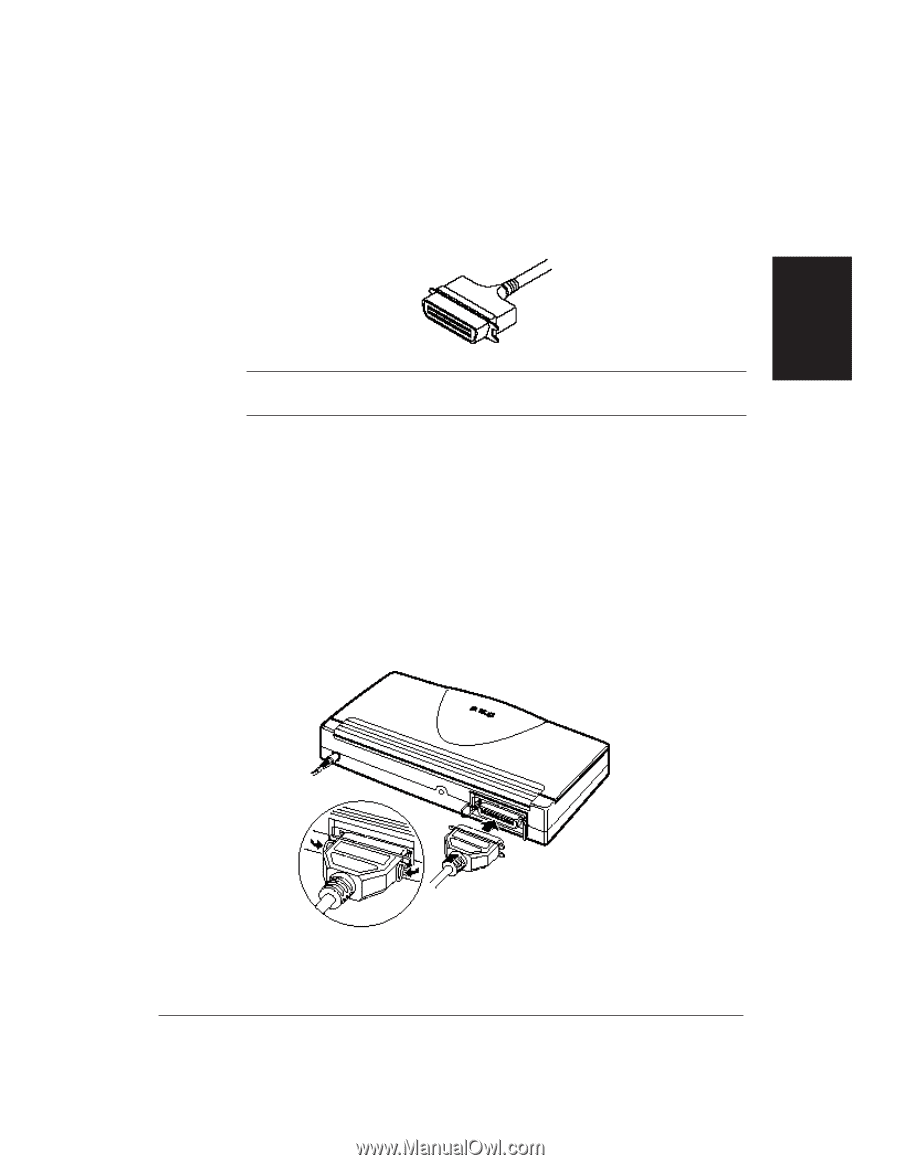
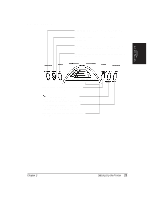
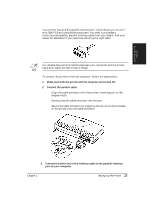
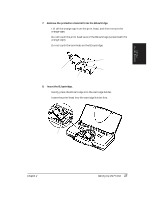
Setting Up the Printer Connecting Your Printer to the Computer Your printer has an 8-bit parallel interface port, which allows you to use it with IBM PCs and compatible computers. You need to purchase a Centronics-compatible, parallel interface cable from your dealer. Ask your dealer for assistance if you need help selecting the right cable. N For reliable data communications between your computer and the printer, use a short cable, six feet or less in length. To connect the printer to the host computer, follow the steps below: 1. Make sure both the printer and the computer are turned off. 2. Connect the parallel cable. t Align the cable connector with the printer's interface port so the shapes match. t Gently press the cable connector into the port. t Secure the cable connector by snapping the two wire clips (located on the printer) into the cable connector. 3. Connect the other end of the interface cable to the parallel interface port on your computer. Chapter 2 Setting Up the Printer 13
-
 1
1 -
2
-
3
-
4
-
5
-
6
-
7
-
8
-
9
-
10
-
11
-
12
-
13
-
14
-
15
-
 16
16 -
 17
17 -
 18
18 -
 19
19 -
 20
20 -
 21
21 -
 22
22 -
 23
23 -
 24
24 -
 25
25 -
 26
26 -
27
-
28
-
29
-
30
-
31
-
32
-
33
-
34
-
35
-
36
-
37
-
38
-
39
-
40
-
41
-
42
-
43
-
44
-
45
-
46
-
47
-
48
-
49
-
50
-
51
-
52
-
53
-
54
-
55
-
56
-
57
-
58
-
59
-
60
-
61
-
62
-
63
-
64
-
65
-
66
-
67
-
68
-
69
-
70
-
71
-
72
-
73
-
74
-
75
-
76
-
77
-
78
-
79
-
80
-
81
-
82
-
83
-
84
-
85
-
86
-
87
-
88
-
89
-
90
-
91
-
92
-
93
-
94
-
95
-
96
-
97
-
98
-
99
-
100
-
101
-
102
-
103
-
104
-
105
-
106
-
107
-
108
-
109
-
110
-
111
-
112
-
113
-
114
-
115
-
116
-
117
-
118
-
119
-
120
-
121
-
122
-
123
-
124
-
125
-
126
-
127
-
128
-
129
-
130
-
131
-
132
-
133
-
134
-
135
-
136
-
137
-
138
-
139
-
140
-
141
-
142
-
143
-
144
-
145
-
146
-
147
-
148
-
149
-
150
-
151
-
152
-
153
-
154
-
155
-
156
-
157
-
158
-
159
-
160
-
161
-
162
-
163
-
164
-
165
-
166
-
167
-
168
-
169
-
170
-
171
-
172
-
173
-
174
-
175
-
176
-
177
-
178
-
179
-
180
-
181
-
182
-
183
 |
 |