Dell 964 User's Guide2 - Page 30
PictBridge Mode, PictBridge Default Settings Menu
 |
UPC - 940356014026
View all Dell 964 manuals
Add to My Manuals
Save this manual to your list of manuals |
Page 30 highlights
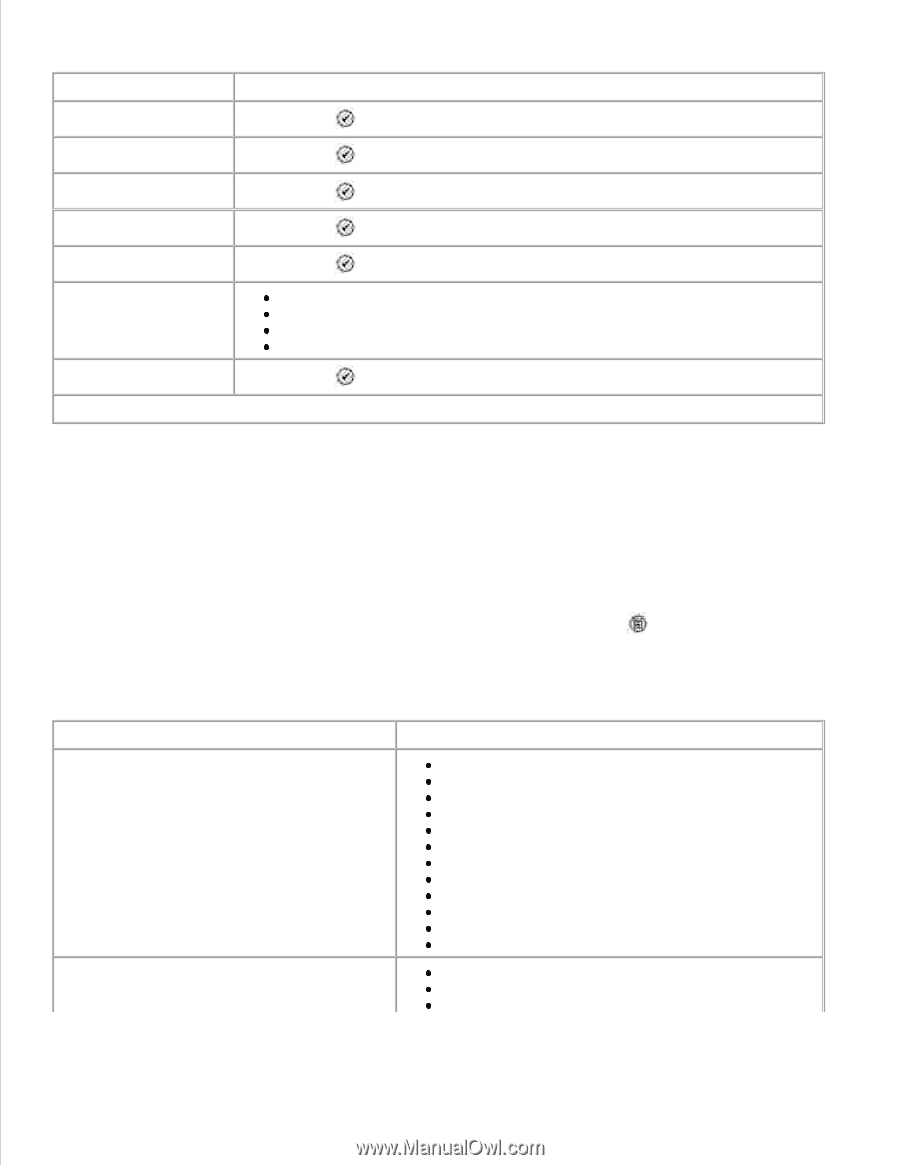
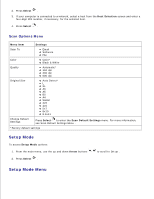
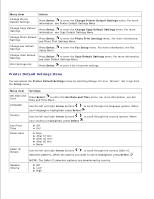
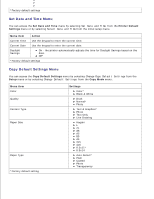
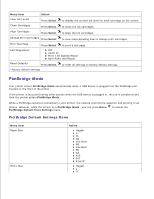
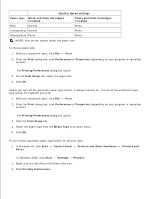
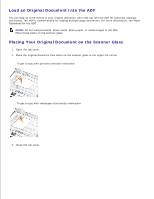
Menu item Action View Ink Levels Press Select to display the current ink level for each cartridge on the screen. Clean Cartridges Press Select to clean the ink cartridges. Align Cartridges Press Select to align the ink cartridges. Change Print Cartridges Press Select to view steps detailing how to change print cartridges. Print Test Page Press Select to print a test page. Call Diagnostics Off* Audio on Print T.30 Signals Report Both Audio and Report Reset Defaults Press Select to reset all settings to factory default settings. *Factory default settings PictBridge Mode Your printer enters PictBridge Mode automatically when a USB device is plugged into the PictBridge port located on the front of the printer. If the printer is busy performing other actions when the USB device is plugged in, the job is completed and then the printer enters PictBridge Mode . While a PictBridge camera is connected to your printer, the camera controls the selection and printing of all photos. However, while the printer is in PictBridge Mode , you can press Menu PictBridge Default Print Settings menu. to access the PictBridge Default Settings Menu Menu item Paper Size Photo Size Action Hagaki L 2L A6 10x15cm A5 13x18cm B5 A4 4x6 5x7 8.5x11* Hagaki L 2L
-
 1
1 -
2
-
3
-
4
-
5
-
6
-
7
-
8
-
9
-
10
-
11
-
12
-
13
-
14
-
15
-
16
-
17
-
18
-
19
-
20
-
21
-
22
-
23
-
24
-
 25
25 -
 26
26 -
 27
27 -
 28
28 -
 29
29 -
 30
30 -
 31
31 -
 32
32 -
 33
33 -
 34
34 -
 35
35 -
36
-
37
-
38
-
39
-
40
-
41
-
42
-
43
-
44
-
45
-
46
-
47
-
48
-
49
-
50
-
51
-
52
-
53
-
54
-
55
-
56
-
57
-
58
-
59
-
60
-
61
-
62
-
63
-
64
-
65
-
66
-
67
-
68
-
69
-
70
-
71
-
72
-
73
-
74
-
75
-
76
-
77
-
78
-
79
-
80
-
81
-
82
-
83
-
84
-
85
-
86
-
87
-
88
-
89
-
90
-
91
-
92
-
93
-
94
-
95
-
96
-
97
-
98
-
99
-
100
-
101
-
102
-
103
-
104
-
105
-
106
-
107
-
108
-
109
-
110
-
111
-
112
-
113
-
114
-
115
-
116
-
117
-
118
-
119
-
120
-
121
-
122
-
123
-
124
-
125
-
126
-
127
-
128
 |
 |