Dell 964 User's Guide2 - Page 62
Receive a Fax Automatically, Arrow, Start, Dialing and Sending, Auto Answer, Select
 |
UPC - 940356014026
View all Dell 964 manuals
Add to My Manuals
Save this manual to your list of manuals |
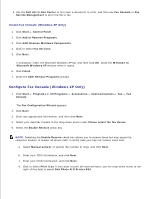
Page 62 highlights
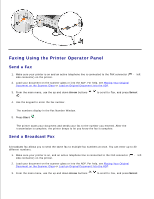
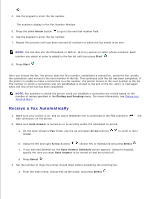
3. . 4. Use the keypad to enter the fax number. The numbers display in the Fax Number Window. 5. Press the down Arrow button to go to the next fax number field. 6. Use the keypad to enter the fax number. 7. Repeat this process until you have entered all numbers to which the fax needs to be sent. NOTE: You can also use the Phonebook or Redial History options to select phone numbers. Each number you select or enter is added to the fax list until you press Start . 8. Press Start . After you initiate the fax, the printer dials the first number, establishes a connection, sends the fax, breaks the connection, and moves to the next number in the list. This continues until the list has been completed. If the printer is unable to make a connection to a fax number, the printer moves to the next number in the list. The number to which a connection was not established is moved to the end of the list, and it is tried again when the rest of the list has been completed. NOTE: Fax numbers to which the printer could not establish a connection are retried based on the number of retries specified in the Dialing and Sending menu. For more information, see Dialing and Sending Menu. Receive a Fax Automatically 1. Make sure your printer is on, and an active telephone line is connected to the FAX connector ( - left side connector) on the printer. 2. Make sure Auto Answer is turned on or is currently within the scheduled on period. a. On the main screen in Fax mode, use the up and down Arrow buttons Answer. to scroll to Auto b. Using the left and right Arrow buttons choose Yes or Scheduled and press Select . c. If you selected Scheduled, the Auto Answer Schedule screen appears. Using the keypad, specify the time you want Auto Answer to be turned on and be turned off. d. Press Select . 3. Set the number of rings the printer should allow before answering the incoming fax. a. From the main menu, choose Fax as the mode, and press Select . b.
-
 1
1 -
2
-
3
-
4
-
5
-
6
-
7
-
8
-
9
-
10
-
11
-
12
-
13
-
14
-
15
-
16
-
17
-
18
-
19
-
20
-
21
-
22
-
23
-
24
-
25
-
26
-
27
-
28
-
29
-
30
-
31
-
32
-
33
-
34
-
35
-
36
-
37
-
38
-
39
-
40
-
41
-
42
-
43
-
44
-
45
-
46
-
47
-
48
-
49
-
50
-
51
-
52
-
53
-
54
-
55
-
56
-
 57
57 -
 58
58 -
 59
59 -
 60
60 -
 61
61 -
 62
62 -
 63
63 -
 64
64 -
 65
65 -
 66
66 -
 67
67 -
68
-
69
-
70
-
71
-
72
-
73
-
74
-
75
-
76
-
77
-
78
-
79
-
80
-
81
-
82
-
83
-
84
-
85
-
86
-
87
-
88
-
89
-
90
-
91
-
92
-
93
-
94
-
95
-
96
-
97
-
98
-
99
-
100
-
101
-
102
-
103
-
104
-
105
-
106
-
107
-
108
-
109
-
110
-
111
-
112
-
113
-
114
-
115
-
116
-
117
-
118
-
119
-
120
-
121
-
122
-
123
-
124
-
125
-
126
-
127
-
128
 |
 |
