Dell 964 User's Guide2 - Page 53
Editing Scanned Text Using Optical Character, Recognition OCR - photo driver
 |
UPC - 940356014026
View all Dell 964 manuals
Add to My Manuals
Save this manual to your list of manuals |
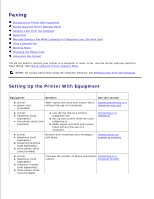
Page 53 highlights
2. The Dell All-In-One Center opens. NOTE: You can also open the Dell All-In-One Center from the operator panel on your printer. When your printer is in Scan mode, press the Start button computer. . The Dell All-In-One Center opens on your 3. From the Send scanned image to: drop-down menu, select the program you want to use. 4. From the Scan section, click See More Scan Settings. 5. Click the Advanced button. 6. Click Display Advanced Scan Settings to change advanced options. The Advanced Scan Settings dialog box opens. 7. On the Scan tab, click the Scan multiple items before output box. 8. Click OK. 9. When you finish customizing your settings, click Scan Now. After you scan the first page, a prompt appears requesting the next page. 10. Place the next sheet on the scanner glass, and click Yes. Repeat until you finish scanning all pages. 11. When finished, click No. The program opens with the multiple pages scanned. Editing Scanned Text Using Optical Character Recognition (OCR) Optical Character Recognition (OCR) is a software feature that converts a scanned image into editable text within a word-processing program. NOTE: Ensure you have OCR software installed on your computer. A copy of OCR software was provided with your printer and should have installed at the same time as your printer drivers. 1. Load your original document. For help, see Load an Original Document Into the ADF or Placing Your Original Document on the Scanner Glass. 2. Click Start Programs or All Programs Dell Printers Dell Photo AIO Printer 964 Dell All-In-One Center. The Dell All-In-One Center opens. 3.
-
 1
1 -
2
-
3
-
4
-
5
-
6
-
7
-
8
-
9
-
10
-
11
-
12
-
13
-
14
-
15
-
16
-
17
-
18
-
19
-
20
-
21
-
22
-
23
-
24
-
25
-
26
-
27
-
28
-
29
-
30
-
31
-
32
-
33
-
34
-
35
-
36
-
37
-
38
-
39
-
40
-
41
-
42
-
43
-
44
-
45
-
46
-
47
-
 48
48 -
 49
49 -
 50
50 -
 51
51 -
 52
52 -
 53
53 -
 54
54 -
 55
55 -
 56
56 -
 57
57 -
 58
58 -
59
-
60
-
61
-
62
-
63
-
64
-
65
-
66
-
67
-
68
-
69
-
70
-
71
-
72
-
73
-
74
-
75
-
76
-
77
-
78
-
79
-
80
-
81
-
82
-
83
-
84
-
85
-
86
-
87
-
88
-
89
-
90
-
91
-
92
-
93
-
94
-
95
-
96
-
97
-
98
-
99
-
100
-
101
-
102
-
103
-
104
-
105
-
106
-
107
-
108
-
109
-
110
-
111
-
112
-
113
-
114
-
115
-
116
-
117
-
118
-
119
-
120
-
121
-
122
-
123
-
124
-
125
-
126
-
127
-
128
 |
 |