Dell 964 User's Guide2 - Page 63
Receive a Fax Manually, Receive a Fax With an Answering Machine Connected to the, Printer, Arrow
 |
UPC - 940356014026
View all Dell 964 manuals
Add to My Manuals
Save this manual to your list of manuals |
Page 63 highlights
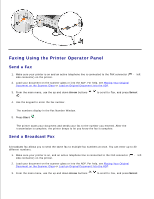
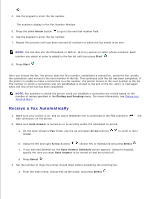
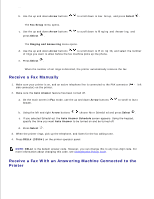
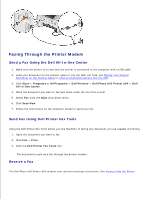
3. a. b. Use the up and down Arrow buttons to scroll down to Fax Setup, and press Select . The Fax Setup menu opens. c. Use the up and down Arrow buttons press Select . to scroll down to Ringing and Answering, and The Ringing and Answering menu opens. d. Use the up and down Arrow buttons to scroll down to Pick Up On, and select the number of rings you want to allow before the fax machine picks up the phone. e. Press Select . When the number of set rings is detected, the printer automatically receives the fax. Receive a Fax Manually 1. Make sure your printer is on, and an active telephone line is connected to the FAX connector ( - left side connector) on the printer. 2. Make sure the Auto Answer feature has been turned off. a. On the main screen in Fax mode, use the up and down Arrow buttons Answer. to scroll to Auto b. Using the left and right Arrow buttons choose No or Scheduled and press Select . c. If you selected Scheduled, the Auto Answer Schedule screen appears. Using the keypad, specify the time you want Auto Answer to be turned on and be turned off. d. Press Select . 3. When the printer rings, pick up the telephone, and listen for the fax calling tone. 4. Press DELL# (3355#) on the printer operator panel. NOTE: DELL# is the default answer code. However, you can change this to any four-digit code. For more information about changing this code, see Changing the Pickup Code. Receive a Fax With an Answering Machine Connected to the Printer
-
 1
1 -
2
-
3
-
4
-
5
-
6
-
7
-
8
-
9
-
10
-
11
-
12
-
13
-
14
-
15
-
16
-
17
-
18
-
19
-
20
-
21
-
22
-
23
-
24
-
25
-
26
-
27
-
28
-
29
-
30
-
31
-
32
-
33
-
34
-
35
-
36
-
37
-
38
-
39
-
40
-
41
-
42
-
43
-
44
-
45
-
46
-
47
-
48
-
49
-
50
-
51
-
52
-
53
-
54
-
55
-
56
-
57
-
 58
58 -
 59
59 -
 60
60 -
 61
61 -
 62
62 -
 63
63 -
 64
64 -
 65
65 -
 66
66 -
 67
67 -
 68
68 -
69
-
70
-
71
-
72
-
73
-
74
-
75
-
76
-
77
-
78
-
79
-
80
-
81
-
82
-
83
-
84
-
85
-
86
-
87
-
88
-
89
-
90
-
91
-
92
-
93
-
94
-
95
-
96
-
97
-
98
-
99
-
100
-
101
-
102
-
103
-
104
-
105
-
106
-
107
-
108
-
109
-
110
-
111
-
112
-
113
-
114
-
115
-
116
-
117
-
118
-
119
-
120
-
121
-
122
-
123
-
124
-
125
-
126
-
127
-
128
 |
 |