Dell 964 User's Guide2 - Page 69
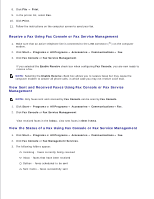
View the Status of a Fax Using Fax Console or Fax Service Management
 |
UPC - 940356014026
View all Dell 964 manuals
Add to My Manuals
Save this manual to your list of manuals |
Page 69 highlights
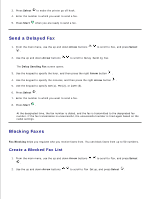
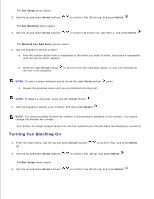
7. 8. Click File Print. 9. In the printer list, select Fax. 10. Click Print. 11. Follow the instructions on the computer screen to send your fax. Receive a Fax Using Fax Console or Fax Service Management 1. Make sure that an active telephone line is connected to the LINE connector ( ) on the computer modem. 2. Click Start Programs or All Programs Accessories Communications Fax. 3. Click Fax Console or Fax Service Management. If you selected the Enable Receive check box when configuring Fax Console, you are now ready to receive a fax. NOTE: Selecting the Enable Receive check box allows you to receive faxes but may cause the computer modem to answer all phone calls, in which case you may not receive voice mail. View Sent and Received Faxes Using Fax Console or Fax Service Management NOTE: Only faxes sent and received by Fax Console can be seen by Fax Console. 1. Click Start Programs or All Programs Accessories Communications Fax. 2. Click Fax Console or Fax Service Management. View received faxes in the Inbox; view sent faxes in Sent Items. View the Status of a Fax Using Fax Console or Fax Service Management 1. Click Start Programs or All Programs Accessories Communications Fax. 2. Click Fax Console or Fax Management Services. 3. The following folders appear: Incoming - faxes currently being received Inbox - faxes that have been received Outbox - faxes scheduled to be sent Sent Items - faxes successfully sent 4. 5.
-
 1
1 -
2
-
3
-
4
-
5
-
6
-
7
-
8
-
9
-
10
-
11
-
12
-
13
-
14
-
15
-
16
-
17
-
18
-
19
-
20
-
21
-
22
-
23
-
24
-
25
-
26
-
27
-
28
-
29
-
30
-
31
-
32
-
33
-
34
-
35
-
36
-
37
-
38
-
39
-
40
-
41
-
42
-
43
-
44
-
45
-
46
-
47
-
48
-
49
-
50
-
51
-
52
-
53
-
54
-
55
-
56
-
57
-
58
-
59
-
60
-
61
-
62
-
63
-
 64
64 -
 65
65 -
 66
66 -
 67
67 -
 68
68 -
 69
69 -
 70
70 -
 71
71 -
 72
72 -
 73
73 -
 74
74 -
75
-
76
-
77
-
78
-
79
-
80
-
81
-
82
-
83
-
84
-
85
-
86
-
87
-
88
-
89
-
90
-
91
-
92
-
93
-
94
-
95
-
96
-
97
-
98
-
99
-
100
-
101
-
102
-
103
-
104
-
105
-
106
-
107
-
108
-
109
-
110
-
111
-
112
-
113
-
114
-
115
-
116
-
117
-
118
-
119
-
120
-
121
-
122
-
123
-
124
-
125
-
126
-
127
-
128
 |
 |