Dell Latitude 7030 Rugged Extreme Tablet Owners Manual - Page 126
Next steps
 |
View all Dell Latitude 7030 Rugged Extreme Tablet manuals
Add to My Manuals
Save this manual to your list of manuals |
Page 126 highlights
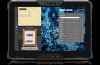
NOTE: The RJ45 port/USB port/audio jack bezel that is removed from the faulty display assembly must be replaced in the replacement display assembly. 3. Replace the screw (M2x2) to secure the RJ45 port/USB port/audio jack bezel to the display-panel assembly. NOTE: Steps 2 and 3 apply only to tablets shipped with an RJ45 port, or USB port, or audio jack installed. NOTE: The M.2 SSD absorber and thermal pad are reusable and are required to be transferred onto the new display assembly for any display-assembly replacement. Next steps 1. Install the system board. 2. Install the WWAN/SSD daughter-board. 3. Install the WWAN card, if applicable. 4. Install the WWAN-card heat-sink. 5. Install the blank top-cover, or the RJ45-port assembly, or the USB-port assembly, or the audio-jack assembly, or the 1D-2D barcode-scanner assembly, whichever is applicable. 6. Install the front camera and microphone assembly. 7. Install the world-facing camera. 8. Install the wireless card. 9. Install the I/O daughter-board. 10. Install the back-cover assembly. 11. Install the SIM card (for hot-swappable batteries), if applicable. 12. Install the hot-swappable batteries, if applicable. 13. Install the handle, if applicable. 14. Install the stylus. 15. Follow the procedure in After working inside your tablet. 126 Removing and installing Field Replaceable Units (FRUs)
-
 1
1 -
2
-
3
-
4
-
5
-
6
-
7
-
8
-
9
-
10
-
11
-
12
-
13
-
14
-
15
-
16
-
17
-
18
-
19
-
20
-
21
-
22
-
23
-
24
-
25
-
26
-
27
-
28
-
29
-
30
-
31
-
32
-
33
-
34
-
35
-
36
-
37
-
38
-
39
-
40
-
41
-
42
-
43
-
44
-
45
-
46
-
47
-
48
-
49
-
50
-
51
-
52
-
53
-
54
-
55
-
56
-
57
-
58
-
59
-
60
-
61
-
62
-
63
-
64
-
65
-
66
-
67
-
68
-
69
-
70
-
71
-
72
-
73
-
74
-
75
-
76
-
77
-
78
-
79
-
80
-
81
-
82
-
83
-
84
-
85
-
86
-
87
-
88
-
89
-
90
-
91
-
92
-
93
-
94
-
95
-
96
-
97
-
98
-
99
-
100
-
101
-
102
-
103
-
104
-
105
-
106
-
107
-
108
-
109
-
110
-
111
-
112
-
113
-
114
-
115
-
116
-
117
-
118
-
119
-
120
-
 121
121 -
 122
122 -
 123
123 -
 124
124 -
 125
125 -
 126
126 -
 127
127 -
 128
128 -
 129
129 -
 130
130 -
 131
131 -
132
-
133
-
134
-
135
-
136
-
137
-
138
-
139
-
140
-
141
-
142
-
143
-
144
-
145
-
146
-
147
-
148
-
149
-
150
-
151
-
152
-
153
-
154
-
155
-
156
-
157
 |
 |
