HP CP3525x HP Color LaserJet CP3525 Series Printers - User Guide - Page 128
Set document effects, Set document finishing options, Effects, Finishing
 |
UPC - 883585892105
View all HP CP3525x manuals
Add to My Manuals
Save this manual to your list of manuals |
Page 128 highlights
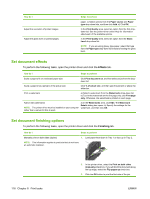
How do I Adjust the resolution of printed images Adjust the gloss level on printed pages. Steps to perform paper. c) Select options from the Paper source and Paper type drop-down lists, and then click Add. d) Click OK. In the Print Quality area, select an option from the first dropdown list. See the printer-driver online Help for information about each of the available options. In the Print Quality area, select an option from the Gloss Level drop-down list. NOTE: If you are using glossy-type paper, select that type from the Paper type drop-down list instead of setting the gloss level. Set document effects To perform the following tasks, open the printer driver and click the Effects tab. How do I Steps to perform Scale a page to fit on a selected paper size Click Print document on, and then select a size from the dropdown list. Scale a page to be a percent of the actual size Click % of actual size, and then type the percent or adjust the slider bar. Print a watermark a) Select a watermark from the Watermarks drop-down list. b) To print the watermark on the first page only, click First page only. Otherwise, the watermark is printed on each page. Add or edit watermarks NOTE: The printer driver must be installed on your computer rather than a server for this to work. a) In the Watermarks area, click Edit. The Watermark Details dialog box opens. b) Specify the settings for the watermark, and then click OK. Set document finishing options To perform the following tasks, open the printer driver and click the Finishing tab. How do I Steps to perform Manually print on both sides (duplex) 1. Load paper face-down in Tray 1 or face-up in Tray 2. NOTE: This information applies to products that do not have an automatic duplexer. 116 Chapter 8 Print tasks 2. In the printer driver, select the Print on both sides (manually) check box. If you will bind the document along the top edge, select the Flip pages up check box. 3. Click the OK button to print the first side of the job. ENWW
-
 1
1 -
2
-
3
-
4
-
5
-
6
-
7
-
8
-
9
-
10
-
11
-
12
-
13
-
14
-
15
-
16
-
17
-
18
-
19
-
20
-
21
-
22
-
23
-
24
-
25
-
26
-
27
-
28
-
29
-
30
-
31
-
32
-
33
-
34
-
35
-
36
-
37
-
38
-
39
-
40
-
41
-
42
-
43
-
44
-
45
-
46
-
47
-
48
-
49
-
50
-
51
-
52
-
53
-
54
-
55
-
56
-
57
-
58
-
59
-
60
-
61
-
62
-
63
-
64
-
65
-
66
-
67
-
68
-
69
-
70
-
71
-
72
-
73
-
74
-
75
-
76
-
77
-
78
-
79
-
80
-
81
-
82
-
83
-
84
-
85
-
86
-
87
-
88
-
89
-
90
-
91
-
92
-
93
-
94
-
95
-
96
-
97
-
98
-
99
-
100
-
101
-
102
-
103
-
104
-
105
-
106
-
107
-
108
-
109
-
110
-
111
-
112
-
113
-
114
-
115
-
116
-
117
-
118
-
119
-
120
-
121
-
122
-
 123
123 -
 124
124 -
 125
125 -
 126
126 -
 127
127 -
 128
128 -
 129
129 -
 130
130 -
 131
131 -
 132
132 -
 133
133 -
134
-
135
-
136
-
137
-
138
-
139
-
140
-
141
-
142
-
143
-
144
-
145
-
146
-
147
-
148
-
149
-
150
-
151
-
152
-
153
-
154
-
155
-
156
-
157
-
158
-
159
-
160
-
161
-
162
-
163
-
164
-
165
-
166
-
167
-
168
-
169
-
170
-
171
-
172
-
173
-
174
-
175
-
176
-
177
-
178
-
179
-
180
-
181
-
182
-
183
-
184
-
185
-
186
-
187
-
188
-
189
-
190
-
191
-
192
-
193
-
194
-
195
-
196
-
197
-
198
-
199
-
200
-
201
-
202
-
203
-
204
-
205
-
206
-
207
-
208
-
209
-
210
-
211
-
212
-
213
-
214
-
215
-
216
-
217
-
218
-
219
-
220
-
221
-
222
-
223
-
224
-
225
-
226
-
227
-
228
-
229
-
230
-
231
-
232
-
233
-
234
-
235
-
236
-
237
-
238
-
239
-
240
-
241
-
242
-
243
-
244
-
245
-
246
-
247
-
248
-
249
-
250
-
251
-
252
-
253
-
254
-
255
-
256
-
257
-
258
-
259
-
260
-
261
-
262
-
263
-
264
 |
 |
