JVC GZ-E200 User Manual - English - Page 24
Scenes of Intelligent Auto, Operation Buttons for Video Recording, Recording
 |
View all JVC GZ-E200 manuals
Add to My Manuals
Save this manual to your list of manuals |
Page 24 highlights
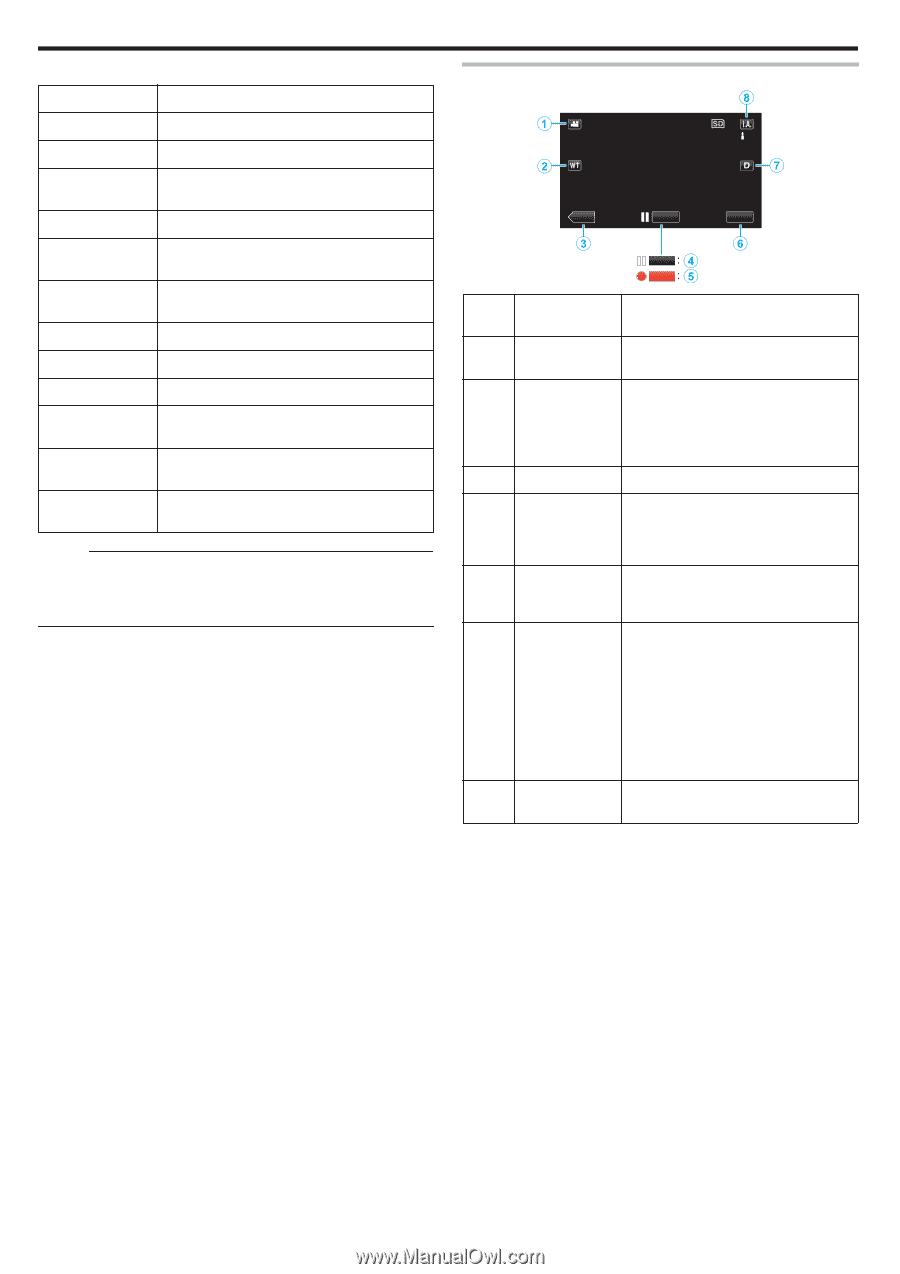
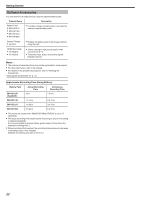
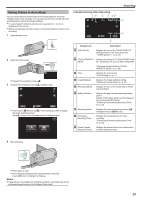
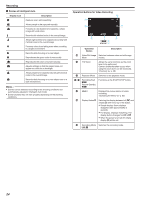
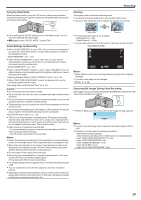
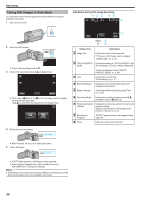
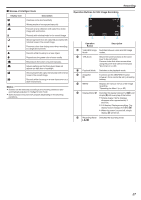
Recording o Scenes of Intelligent Auto Display Icon E Description Captures one's skin beautifully. A Allows people to be captured naturally. D Focuses at a far distance and captures a sharp image with vivid colors. I Records with minimal noise in the overall image. B Allows night scenes to be captured accurately with minimal noise in the overall image. J Prevents colors from fading even when recording in a bright environment. G Records while focusing on a near object. H Reproduces the green color of trees vividly. F Reproduces the colors of sunset naturally. C Adjusts settings so that the subject does not appear too dark due to backlight. K Allows people to be captured naturally with minimal noise in the overall image. L Records while focusing on a near object even in a dark environment. Memo : 0 Scenes can be detected according to the shooting conditions and automatically adjusted in Intelligent Auto mode. 0 Some functions may not work properly depending on the shooting conditions. Operation Buttons for Video Recording ˻PLAY REC MENU REC REC . Operation Button Description A Video/Still Image Switches between video and still image Mode modes. B T/W Zoom Allows the same functions as the zoom lever to be performed. Camera shake that often occurs when using the zoom lever can be minimized. "Zooming" (A p. 25) C Playback Mode Switches to the playback mode. D / E Recording Start 6 Record-Standby 7 Functions as the START/STOP button. F MENU Displays the various menus of video recording. "Operating the Menu" (A p. 85) G Display Button n Switches the display between full (m) and simple (n) with every tap of the button. 0 Simple display: Some displays disappear after approximately 3 seconds. 0 Full display: Displays everything. The display button changes from n to m. 0 When the power is turned off, simple display (n) will be set. H Recording Mode Switches the recording mode. P/H 24
-
 1
1 -
2
-
3
-
4
-
5
-
6
-
7
-
8
-
9
-
10
-
11
-
12
-
13
-
14
-
15
-
16
-
17
-
18
-
 19
19 -
 20
20 -
 21
21 -
 22
22 -
 23
23 -
 24
24 -
 25
25 -
 26
26 -
 27
27 -
 28
28 -
 29
29 -
30
-
31
-
32
-
33
-
34
-
35
-
36
-
37
-
38
-
39
-
40
-
41
-
42
-
43
-
44
-
45
-
46
-
47
-
48
-
49
-
50
-
51
-
52
-
53
-
54
-
55
-
56
-
57
-
58
-
59
-
60
-
61
-
62
-
63
-
64
-
65
-
66
-
67
-
68
-
69
-
70
-
71
-
72
-
73
-
74
-
75
-
76
-
77
-
78
-
79
-
80
-
81
-
82
-
83
-
84
-
85
-
86
-
87
-
88
-
89
-
90
-
91
-
92
-
93
-
94
-
95
-
96
-
97
-
98
-
99
-
100
-
101
-
102
-
103
-
104
-
105
-
106
-
107
-
108
-
109
-
110
-
111
-
112
-
113
-
114
-
115
-
116
-
117
-
118
-
119
-
120
-
121
-
122
-
123
-
124
-
125
-
126
-
127
 |
 |