Konica Minolta bizhub 363 bizhub 423/363/283/223 Copy Operations User Guide - Page 118
System Settings]
 |
View all Konica Minolta bizhub 363 manuals
Add to My Manuals
Save this manual to your list of manuals |
Page 118 highlights
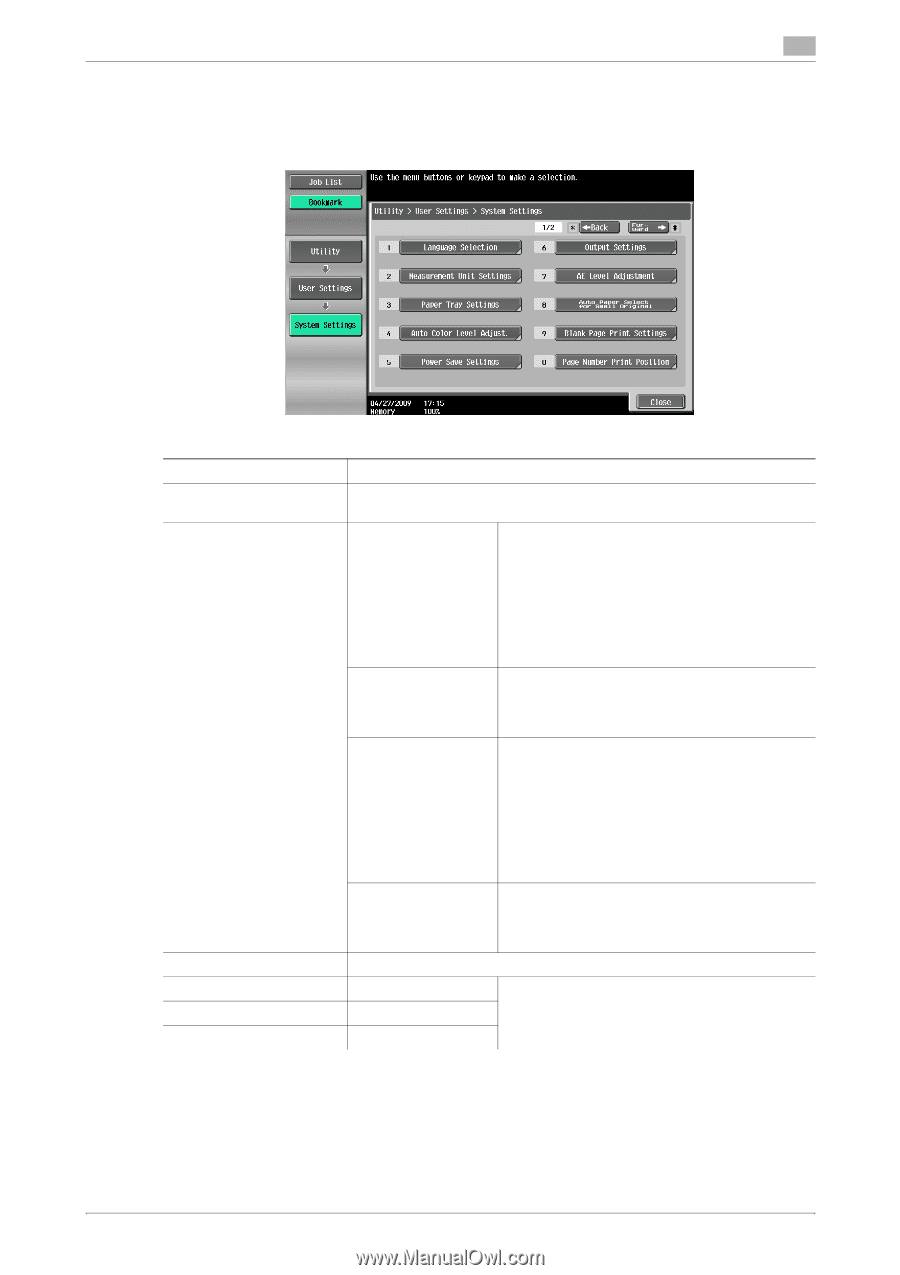
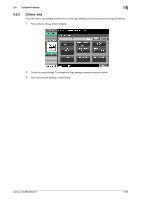
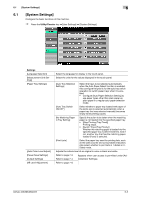
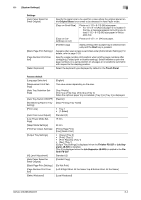
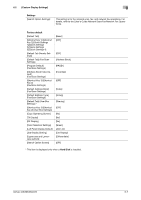
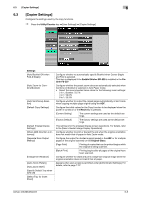
6.1 [System Settings] 6 6.1 [System Settings] Configure the basic functions of this machine. % Press the Utility/Counter key ö[User Settings] ö [System Settings]. Settings [Language Selection] [Measurement Unit Settings] [Paper Tray Settings] [Auto Color Level Adjust.] [Power Save Settings] [Output Settings] [AE Level Adjustment] Select the language for display in the touch panel. Select the units for the values displayed in the touch panel. [Auto Tray Selection Settings] Select the trays to be selected automatically when the Auto Paper Select function is enabled. Also configure the priority for the auto tray switch operation to switch paper trays when it is enabled. • Configure [Auto Paper Selection Setting] to use paper types other than plain paper as plain paper in a regular auto paper selection mode. [Auto Tray Switch ON/OFF] Select whether a paper tray loaded with paper of the same size is selected automatically when a paper tray that was selected manually becomes empty while printing copies. [No Matching Paper in Tray Setting] Specify the action to be taken when the matching paper is not loaded into the specified paper tray. • [Stop Printing (Tray Fixed)] Printing stops. • [Switch Trays (Tray Priority)] Whether the matching paper is loaded into the specified paper tray is determined first. And if not, another tray that has the matching paper loaded (if any) is selected. [Print Lists] Select the paper tray used for printing lists, such as the sales counter and consumables indicators. Also select whether to print lists in 1-Sided or 2Sided mode. Adjusts the criteria level of an original in color or black and white. Refer to page 7-3. Appears when user access is permitted under [Ad- Refer to page 7-4. ministrator Settings]. Refer to page 7-8. bizhub 423/363/283/223 6-3
-
 1
1 -
2
-
3
-
4
-
5
-
6
-
7
-
8
-
9
-
10
-
11
-
12
-
13
-
14
-
15
-
16
-
17
-
18
-
19
-
20
-
21
-
22
-
23
-
24
-
25
-
26
-
27
-
28
-
29
-
30
-
31
-
32
-
33
-
34
-
35
-
36
-
37
-
38
-
39
-
40
-
41
-
42
-
43
-
44
-
45
-
46
-
47
-
48
-
49
-
50
-
51
-
52
-
53
-
54
-
55
-
56
-
57
-
58
-
59
-
60
-
61
-
62
-
63
-
64
-
65
-
66
-
67
-
68
-
69
-
70
-
71
-
72
-
73
-
74
-
75
-
76
-
77
-
78
-
79
-
80
-
81
-
82
-
83
-
84
-
85
-
86
-
87
-
88
-
89
-
90
-
91
-
92
-
93
-
94
-
95
-
96
-
97
-
98
-
99
-
100
-
101
-
102
-
103
-
104
-
105
-
106
-
107
-
108
-
109
-
110
-
111
-
112
-
 113
113 -
 114
114 -
 115
115 -
 116
116 -
 117
117 -
 118
118 -
 119
119 -
 120
120 -
 121
121 -
 122
122 -
 123
123 -
124
-
125
-
126
-
127
-
128
-
129
-
130
-
131
-
132
-
133
-
134
-
135
-
136
-
137
-
138
-
139
-
140
-
141
-
142
-
143
-
144
-
145
-
146
-
147
-
148
-
149
-
150
-
151
-
152
-
153
-
154
-
155
-
156
-
157
-
158
-
159
-
160
-
161
-
162
-
163
-
164
-
165
-
166
-
167
-
168
-
169
-
170
-
171
-
172
-
173
-
174
-
175
-
176
-
177
-
178
-
179
-
180
-
181
-
182
-
183
-
184
-
185
-
186
-
187
-
188
-
189
-
190
-
191
-
192
-
193
-
194
-
195
-
196
-
197
-
198
-
199
-
200
-
201
-
202
-
203
-
204
-
205
-
206
-
207
-
208
-
209
-
210
-
211
-
212
-
213
-
214
-
215
-
216
-
217
-
218
-
219
-
220
-
221
-
222
-
223
-
224
-
225
-
226
-
227
-
228
-
229
-
230
-
231
-
232
-
233
-
234
-
235
-
236
-
237
-
238
-
239
-
240
-
241
-
242
-
243
-
244
-
245
-
246
-
247
-
248
-
249
-
250
-
251
-
252
-
253
-
254
-
255
-
256
-
257
-
258
-
259
-
260
-
261
-
262
-
263
-
264
-
265
-
266
 |
 |