Konica Minolta bizhub 601 bizhub 751/601 Print Operations User Manual - IC-208 - Page 76
Selecting and connecting the printer OS 10.2 and 10.3
 |
View all Konica Minolta bizhub 601 manuals
Add to My Manuals
Save this manual to your list of manuals |
Page 76 highlights
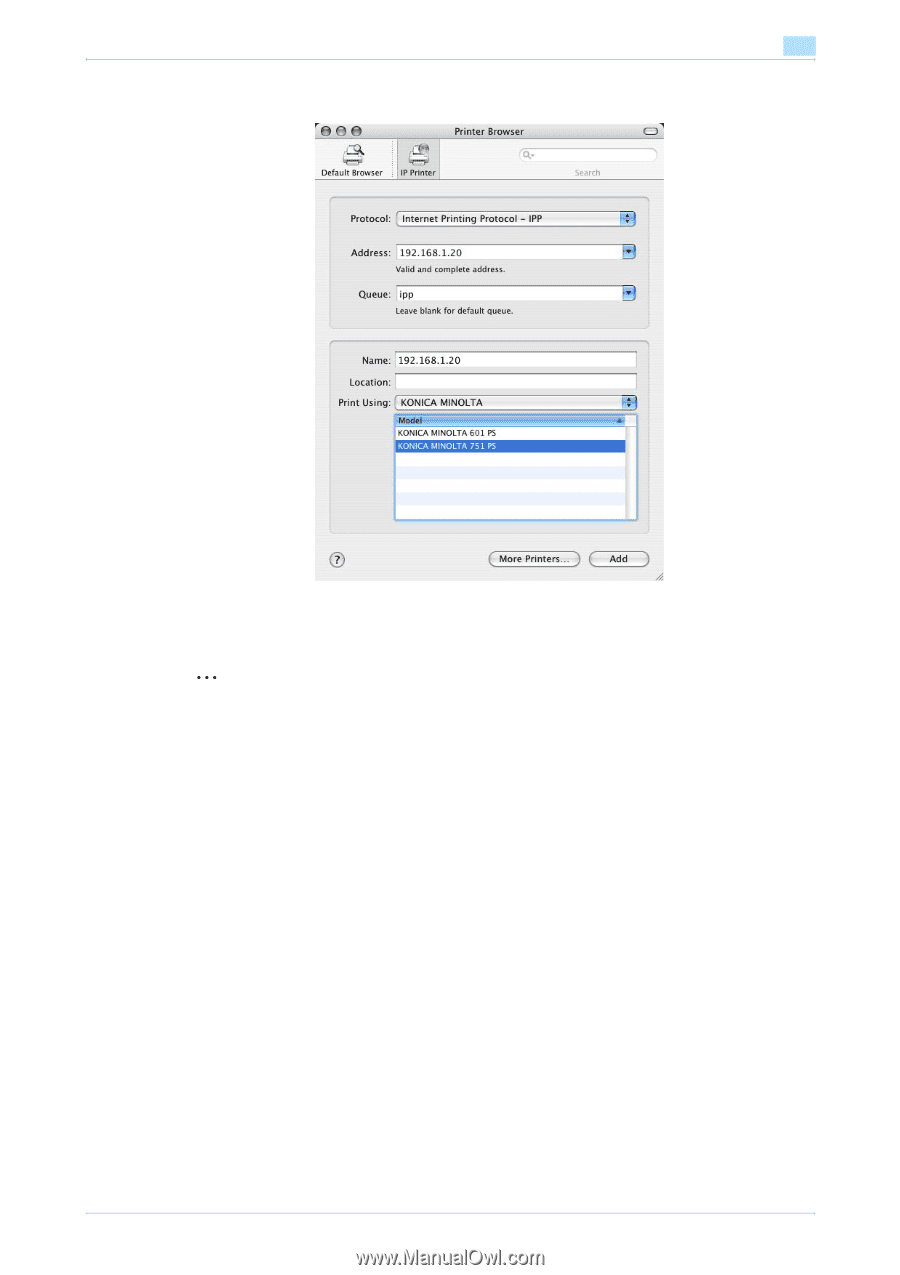
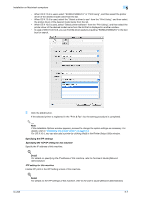
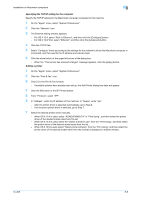
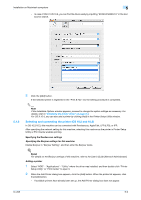
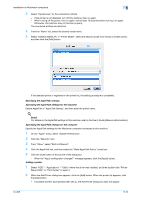
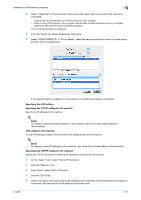
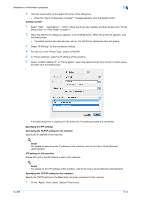
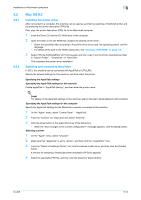
Installation on Macintosh computers 5 - In case of OS X 10.5/10.6, you can find the driver easily by inputting "KONICA MINOLTA" in the text box for search. 5.1.3 8 Click the [Add] button. If the selected printer is registered in the "Print & Fax" list, the setting procedure is completed. 2 Note If the Installable Options window appears, proceed to change the option settings as necessary. For details, refer to "Initializing the printer driver" on page 9-4. For OS X 10.4, you can also add a printer by clicking [Add] in the Printer Setup Utility window. Selecting and connecting the printer (OS 10.2 and 10.3) In OS 10.2/10.3, this machine can be connected with Rendezvous, AppleTalk, LPR (LPD), or IPP. After specifying the network setting for this machine, selecting this machine as the printer in Printer Setup Utility or Print Center enables printing. Specifying the Rendezvous settings Specifying the Bonjour settings for this machine Enable Bonjour in "Bonjour Setting", and then enter the Bonjour name. ! Detail For details on the Bonjour settings of this machine, refer to the User's Guide [Network Administrator]. Adding a printer 1 Select "HDD" - "Applications" - "Utility" where the driver was installed, and then double-click "Printer Setup Utility" or "Print Center" to open it. 2 When the Add Printer dialog box appears, click the [Add] button. When the printer list appears, click the [Add] button. - If available printers have already been set up, the Add Printer dialog box does not appear. IC-208 5-9
-
 1
1 -
2
-
3
-
4
-
5
-
6
-
7
-
8
-
9
-
10
-
11
-
12
-
13
-
14
-
15
-
16
-
17
-
18
-
19
-
20
-
21
-
22
-
23
-
24
-
25
-
26
-
27
-
28
-
29
-
30
-
31
-
32
-
33
-
34
-
35
-
36
-
37
-
38
-
39
-
40
-
41
-
42
-
43
-
44
-
45
-
46
-
47
-
48
-
49
-
50
-
51
-
52
-
53
-
54
-
55
-
56
-
57
-
58
-
59
-
60
-
61
-
62
-
63
-
64
-
65
-
66
-
67
-
68
-
69
-
70
-
 71
71 -
 72
72 -
 73
73 -
 74
74 -
 75
75 -
 76
76 -
 77
77 -
 78
78 -
 79
79 -
 80
80 -
 81
81 -
82
-
83
-
84
-
85
-
86
-
87
-
88
-
89
-
90
-
91
-
92
-
93
-
94
-
95
-
96
-
97
-
98
-
99
-
100
-
101
-
102
-
103
-
104
-
105
-
106
-
107
-
108
-
109
-
110
-
111
-
112
-
113
-
114
-
115
-
116
-
117
-
118
-
119
-
120
-
121
-
122
-
123
-
124
-
125
-
126
-
127
-
128
-
129
-
130
-
131
-
132
-
133
-
134
-
135
-
136
-
137
-
138
-
139
-
140
-
141
-
142
-
143
-
144
-
145
-
146
-
147
-
148
-
149
-
150
-
151
-
152
-
153
-
154
-
155
-
156
-
157
-
158
-
159
-
160
-
161
-
162
-
163
-
164
-
165
-
166
-
167
-
168
-
169
-
170
-
171
-
172
-
173
-
174
-
175
-
176
-
177
-
178
-
179
-
180
-
181
-
182
-
183
-
184
-
185
-
186
-
187
-
188
-
189
-
190
-
191
-
192
-
193
-
194
-
195
-
196
-
197
-
198
-
199
-
200
-
201
-
202
-
203
-
204
-
205
-
206
-
207
-
208
-
209
-
210
-
211
-
212
-
213
-
214
-
215
-
216
-
217
-
218
-
219
-
220
-
221
-
222
-
223
-
224
-
225
-
226
-
227
-
228
-
229
-
230
-
231
-
232
-
233
-
234
-
235
-
236
-
237
-
238
-
239
-
240
-
241
-
242
-
243
-
244
-
245
-
246
-
247
-
248
-
249
-
250
-
251
-
252
-
253
-
254
-
255
-
256
-
257
-
258
-
259
-
260
-
261
-
262
-
263
-
264
-
265
-
266
-
267
-
268
-
269
-
270
-
271
-
272
-
273
 |
 |