Kyocera KM-2560 Fax System (M) Operation Guide Rev-2.0 - Page 186
Remote Diagnosis, Setup and Registration, OPERATION GUIDE, TX/RX Common
 |
View all Kyocera KM-2560 manuals
Add to My Manuals
Save this manual to your list of manuals |
Page 186 highlights
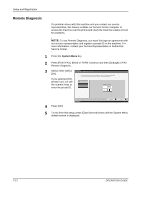
Setup and Registration Remote Diagnosis If a problem arises with this machine and you contact our service representative, this feature enables our Service Center computer to access the machine over the phone and check the machine's status or look for problems. NOTE: To use Remote Diagnosis, you must first sign an agreement with our service representative and register a preset ID on the machine. For more information, contact your Service Representative or Authorized Service Center. 1 Press the System Menu key. 2 Press [FAX/i-FAX], [Next] of TX/RX Common and then [Change] of FAX Remote Diagnosis. 3 Select either [Off] or [On]. If you selected [On], press [+] or [-] or use the numeric keys to enter the preset ID. FAX/i-FAX - FAX Remote Diagno sis Autho rize the access for Remote Diagnosis from the service representative. * Use [-]/[+] or the numeric keys to enter the predetermined ID. Off ID(0000 - 999 9) On 0000 Status 4 Press [OK]. Cancel OK 6/6/2006 10:00 5 To exit from this setup, press [Close] several times until the System Menu default screen is displayed. 7-12 OPERATION GUIDE
-
 1
1 -
2
-
3
-
4
-
5
-
6
-
7
-
8
-
9
-
10
-
11
-
12
-
13
-
14
-
15
-
16
-
17
-
18
-
19
-
20
-
21
-
22
-
23
-
24
-
25
-
26
-
27
-
28
-
29
-
30
-
31
-
32
-
33
-
34
-
35
-
36
-
37
-
38
-
39
-
40
-
41
-
42
-
43
-
44
-
45
-
46
-
47
-
48
-
49
-
50
-
51
-
52
-
53
-
54
-
55
-
56
-
57
-
58
-
59
-
60
-
61
-
62
-
63
-
64
-
65
-
66
-
67
-
68
-
69
-
70
-
71
-
72
-
73
-
74
-
75
-
76
-
77
-
78
-
79
-
80
-
81
-
82
-
83
-
84
-
85
-
86
-
87
-
88
-
89
-
90
-
91
-
92
-
93
-
94
-
95
-
96
-
97
-
98
-
99
-
100
-
101
-
102
-
103
-
104
-
105
-
106
-
107
-
108
-
109
-
110
-
111
-
112
-
113
-
114
-
115
-
116
-
117
-
118
-
119
-
120
-
121
-
122
-
123
-
124
-
125
-
126
-
127
-
128
-
129
-
130
-
131
-
132
-
133
-
134
-
135
-
136
-
137
-
138
-
139
-
140
-
141
-
142
-
143
-
144
-
145
-
146
-
147
-
148
-
149
-
150
-
151
-
152
-
153
-
154
-
155
-
156
-
157
-
158
-
159
-
160
-
161
-
162
-
163
-
164
-
165
-
166
-
167
-
168
-
169
-
170
-
171
-
172
-
173
-
174
-
175
-
176
-
177
-
178
-
179
-
180
-
 181
181 -
 182
182 -
 183
183 -
 184
184 -
 185
185 -
 186
186 -
 187
187 -
 188
188 -
 189
189 -
 190
190 -
 191
191 -
192
-
193
-
194
-
195
-
196
-
197
-
198
-
199
-
200
-
201
-
202
-
203
-
204
-
205
-
206
-
207
-
208
-
209
-
210
-
211
-
212
-
213
-
214
-
215
-
216
-
217
-
218
-
219
-
220
-
221
-
222
-
223
-
224
-
225
-
226
-
227
-
228
-
229
-
230
-
231
-
232
-
233
-
234
-
235
-
236
-
237
-
238
-
239
-
240
-
241
-
242
-
243
-
244
-
245
-
246
-
247
-
248
 |
 |
