Lexmark X4550 User's Guide - Page 61
Copying a document using the computer, Notes, Custom Resize, Borderless, Start Color, Start Black
 |
UPC - 734646040556
View all Lexmark X4550 manuals
Add to My Manuals
Save this manual to your list of manuals |
Page 61 highlights
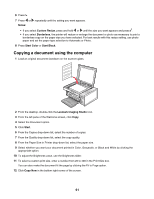
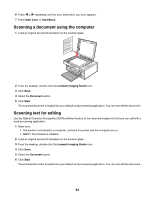
6 Press . 7 Press or repeatedly until the setting you want appears. Notes: • If you select Custom Resize, press and hold or until the size you want appears and press . • If you select Borderless, the printer will reduce or enlarge the document or photo as necessary to print a borderless copy on the paper size you have selected. For best results with this resize setting, use photo paper and set the paper type selection to Automatic or Photo. 8 Press Start Color or Start Black. Copying a document using the computer 1 Load an original document facedown on the scanner glass. 2 From the desktop, double-click the Lexmark Imaging Studio icon. 3 From the left pane of the Welcome screen, click Copy. 4 Select the Document option. 5 Click Start. 6 From the Copies drop-down list, select the number of copies. 7 From the Quality drop-down list, select the copy quality. 8 From the Paper Size in Printer drop-down list, select the paper size. 9 Select whether you want your document printed in Color, Grayscale, or Black and White by clicking the appropriate option. 10 To adjust the Brightness value, use the Brightness slider. 11 To select a custom print size, enter a number from 25 to 400 in the Print Size box. You can also make the document fit the page by clicking the Fit to Page option. 12 Click Copy Now in the bottom right corner of the screen. 61
-
 1
1 -
2
-
3
-
4
-
5
-
6
-
7
-
8
-
9
-
10
-
11
-
12
-
13
-
14
-
15
-
16
-
17
-
18
-
19
-
20
-
21
-
22
-
23
-
24
-
25
-
26
-
27
-
28
-
29
-
30
-
31
-
32
-
33
-
34
-
35
-
36
-
37
-
38
-
39
-
40
-
41
-
42
-
43
-
44
-
45
-
46
-
47
-
48
-
49
-
50
-
51
-
52
-
53
-
54
-
55
-
 56
56 -
 57
57 -
 58
58 -
 59
59 -
 60
60 -
 61
61 -
 62
62 -
 63
63 -
 64
64 -
 65
65 -
 66
66 -
67
-
68
-
69
-
70
-
71
-
72
-
73
-
74
-
75
-
76
-
77
-
78
-
79
-
80
-
81
-
82
-
83
-
84
-
85
-
86
-
87
-
88
-
89
-
90
-
91
-
92
-
93
-
94
-
95
-
96
-
97
-
98
-
99
-
100
-
101
-
102
-
103
-
104
-
105
-
106
-
107
-
108
-
109
 |
 |
