Magellan MobileMapper CX Getting Started Guide
Magellan MobileMapper CX - Hiking GPS Receiver Manual
 |
UPC - 009905860047
View all Magellan MobileMapper CX manuals
Add to My Manuals
Save this manual to your list of manuals |
Magellan MobileMapper CX manual content summary:
- Magellan MobileMapper CX | Getting Started Guide - Page 1
MobileMapper™CX Getting Started Guide - Magellan MobileMapper CX | Getting Started Guide - Page 2
undesired operation of the device. Magellan Professional Products - Limited Warranty (North, Central and South America) Magellan Navigation warrants their GPS receivers and hardware accessories to be free of defects in material and workmanship and will conform to our published specifications for - Magellan MobileMapper CX | Getting Started Guide - Page 3
charting and use good judgment. READ THE USER GUIDE CAREFULLY BEFORE USING THE PRODUCT. 1. MAGELLAN NAVIGATION WARRANTY Magellan Navigation warrants their GPS receivers and hardware accessories to be free of defects in material and workmanship and will conform to our published specifications for the - Magellan MobileMapper CX | Getting Started Guide - Page 4
receiver. Examples of such conditions include but are not limited to changes in the GPS or GLONASS transmission.). Opening, dismantling or repairing of this product by anyone other than an authorized Magellan Navigation Service Center will Sale of Goods, and shall benefit Magellan Navigation - Magellan MobileMapper CX | Getting Started Guide - Page 5
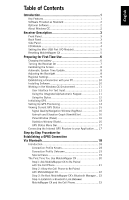
MobileMapper CX 5 Preparing for First-Time Use 6 Charging the battery 6 Turning the Receiver On 7 Calibrating the Screen 8 Automatic System Time Update 8 Adjusting the Backlight 8 Regional Settings 9 Establishing a Connection with your PC 10 Installing Software 10 Working in the Windows CE - Magellan MobileMapper CX | Getting Started Guide - Page 6
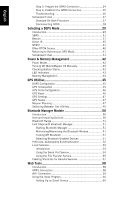
Mode 29 Introduction 29 SBAS 31 Beacon 31 Direct IP 35 NTRIP 37 Other RTCM Source 40 Returning to Autonomous GPS Mode 41 Subsequent Uses 41 Power & Memory Management 42 Power Modes 42 Turning Off MobileMapper CX Manually 43 Checking Battery Status 43 LED Indicators 43 Memory Management - Magellan MobileMapper CX | Getting Started Guide - Page 7
Accuracy 66 General Guidelines 66 Recording Data for Post-Processing 67 Appendices 69 Updating MobileMapper CX OS Firmware 69 Updating MobileMapper CX GPS Firmware 70 About Almanac Files 72 Choosing the Appropriate Real-Time Correction Age Limit ..... 72 Assessing MobileMapper Beacon - Magellan MobileMapper CX | Getting Started Guide - Page 8
English - Magellan MobileMapper CX | Getting Started Guide - Page 9
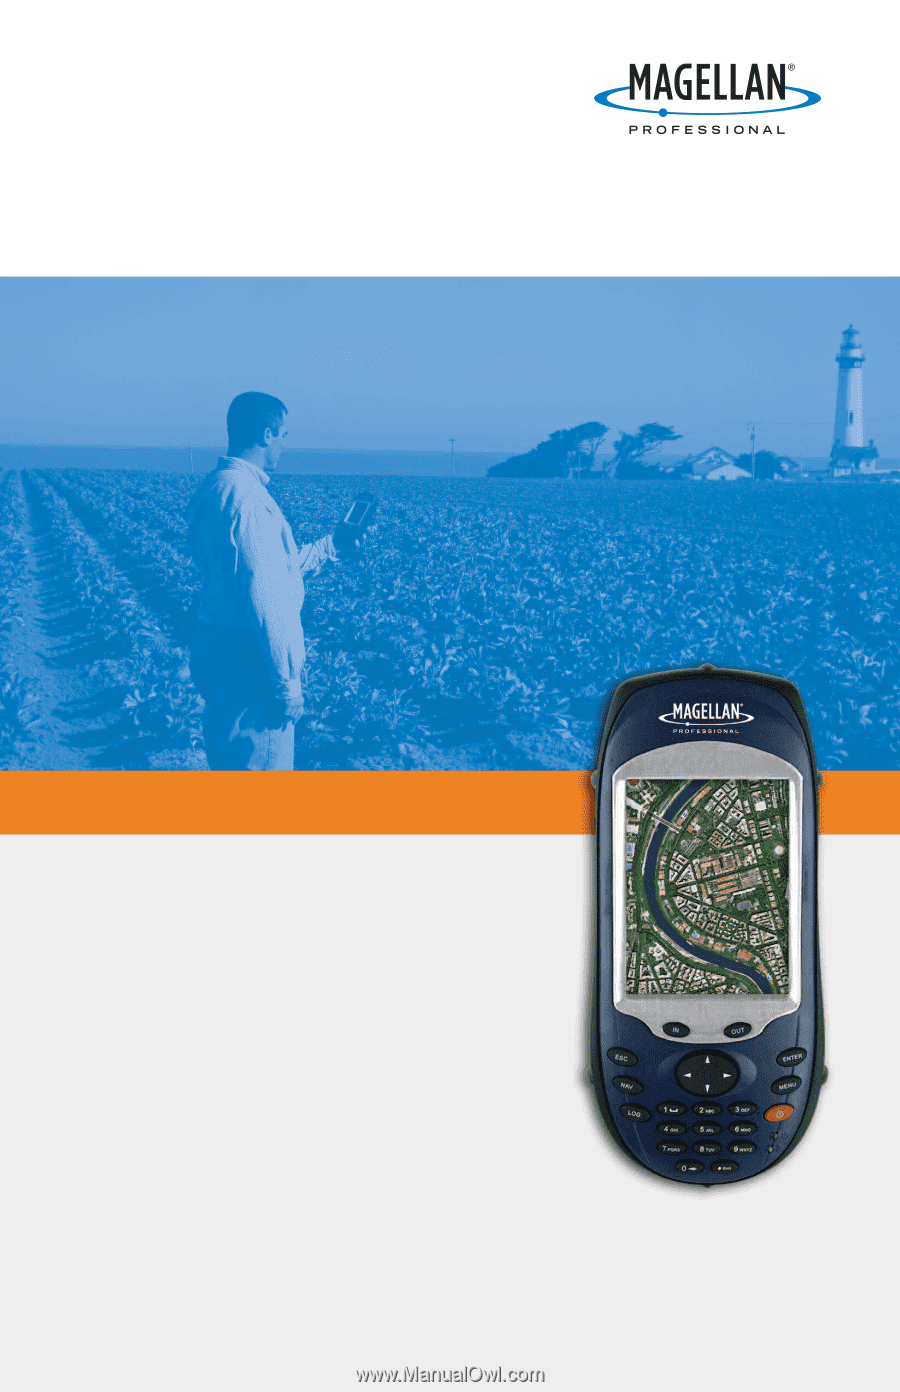
a MobileMapper CX from Magellan. This Getting Started guide will give you useful information about your Windows CE GPS handheld computer. It will also guide you in your first steps using the system. MobileMapper CX is a handheld device that integrates submeter GPS with Microsoft Windows CE in - Magellan MobileMapper CX | Getting Started Guide - Page 10
) or handheld PCs. The Windows CE graphical user interface (GUI) is very similar to desktop Windows operating systems. MobileMapper CX is embedded with the Windows CE 5.0 version. Like most Windows CE devices, the MobileMapper CX handheld has a touch screen. To interact with the MobileMapper CX, use - Magellan MobileMapper CX | Getting Started Guide - Page 11
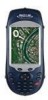
(LCD) • ¼ VGA GPS receiver includes: • Integrated GPS accurate to sub-meter with WAAS/ EGNOS • Ready for RTCM real-time corrections • Internal antenna. Alphanumeric keypad Back Panel Scrolling button Power button Power indicator Battery indicator Power/Communication connectors: • Connects to the - Magellan MobileMapper CX | Getting Started Guide - Page 12
English Side Panel External antenna connector Secure Digital Card slot door: • Open the door to ac- cess the SD card slot I/O Module USB host port (Type A) for connection to a WiFi key, USB flash drive, card reader etc. Mini USB (Type B) port DC power input connector Serial port (COM1) DB-9 - Magellan MobileMapper CX | Getting Started Guide - Page 13
with Microsft ActiveSync. Warning! The change will be effective only after you have re- MobileMapper CX switches off. You can then power on the device by pressing the power button. Note that using this key combination does not reset the GPS receiver. To reset only the GPS receiver, see GPS Reset - Magellan MobileMapper CX | Getting Started Guide - Page 14
-quar- ter turn counterclockwise. 3. Insert the battery into the battery compartment in the back of the MobileMapper CX handheld as shown below: 4. Close the battery door and tighten the screws. 5. Attach the clip-on I/O module to the MobileMapper CX handheld as shown below (insert lower part first - Magellan MobileMapper CX | Getting Started Guide - Page 15
below) and then let it charge the battery for approximately six hours. Connect DC power cable to this input 7. To detach the clip-on I/O module, press the release button on the module. Turning the Receiver On Once you have charged the battery in your MobileMapper CX, press the red power button until - Magellan MobileMapper CX | Getting Started Guide - Page 16
MobileMapper CX will automatically update the system date & time using the GPS time determined by the integrated GPS receiver and the time zone that you specify. To set the time zone: • In the task bar, double-tap the clock icon: This opens the Date/Time Properties screen. • Set the time zone field - Magellan MobileMapper CX | Getting Started Guide - Page 17
MobileMapper CX supports code sets and languages supported by the Windows CE operating system. These include European languages as well as multibyte languages such as simplified Chinese and Japanese. - From the MobileMapper CX you boot the MobileMapper CX device, the selected language will be used. 9 - Magellan MobileMapper CX | Getting Started Guide - Page 18
with your PC Using Microsoft ActiveSync, you can connect a desktop computer to your MobileMapper CX handheld via the USB data cable. This allows you to install software and transfer files to/ from MobileMapper CX. Magellan recommends you always use the lastest version of ActiveSync. Prerequisite - Magellan MobileMapper CX | Getting Started Guide - Page 19
English Working in the Windows CE Environment User Interface For Text Input MobileMapper CX comes with an integrated physical keypad and as with most Windows CE devices, you may also use an on-screen keyboard to enter text. To activate the on-screen (or "virtual") keyboard, tap the keyboard icon in - Magellan MobileMapper CX | Getting Started Guide - Page 20
English Dot-Shift Key The keyboard default is lower-case alphanumeric letters. - Press the Dot-Shift key to toggle from numeric lock to caps lock and default mode. - Press the Dot-Shift key twice to lock the keypad in numeric mode. The icon appears in the task bar indicating that the numeric lock - Magellan MobileMapper CX | Getting Started Guide - Page 21
buy a new one. Initializing GPS The first time a new GPS receiver is turned on, it might have difficulty calculating its position. To help the receiver using it. - GPS receiver has been reset. - Or the receiver has not been used for more than a few months. Take the MobileMapper CX to a location where - Magellan MobileMapper CX | Getting Started Guide - Page 22
accuracy of the position computed by the unit. Tap , then select Programs>GPS Utilities>GPS Settings to run the GPS on which to set an upper limit (see next field). The position of GPS satellites in orbit determine the DOP values for a position will be computed when the selected DOP type exceeds the - Magellan MobileMapper CX | Getting Started Guide - Page 23
too low (less than 20). GPS signals with lower SNRs will be very noisy and contribute to accuracy degradation. - Elevation Mask: Angle that specifies that any satellite must be at least a specified number of degrees above the horizon (typically 5 to 10°) before the signals from the satellite are to - Magellan MobileMapper CX | Getting Started Guide - Page 24
to the MobileMapper CX unit: - Speed - Altitude - Heading - Vertical speed. These parameters are updated every 45 seconds. Statistics Window (Stats) This window provides the averaged coordinates of the computed position and shows the accuracy figures corresponding to the GPS receiver used in - Magellan MobileMapper CX | Getting Started Guide - Page 25
(see screen opposite). Displays the current software version of the GPS Status utility. Connecting the Internal GPS Receiver to your Application As explained in GPS Ports Configuration on page 46, the COM2 port in MobileMapper CX is a virtual COM port named "GPS VSP Output" and has fixed settings - Magellan MobileMapper CX | Getting Started Guide - Page 26
connection, you will have to go through a relatively long procedure. But if you strictly follow this procedure, re-establishing this connection next time you use your MobileMapper CX will connection profiles. To list the connection profiles stored in your cell phone, refer to its instructions manual - Magellan MobileMapper CX | Getting Started Guide - Page 27
will have to enter the parameters of the connection profile in the Dial-Up Connection connection. The modem command should be entered in a dedicated field, on the Call Options tab of the "Network and Dial-up Connections , which means you should leave the User Name, Password and Domain parameters as - Magellan MobileMapper CX | Getting Started Guide - Page 28
MobileMapper CX 5 - Start creating a new connection icon - Enter the GPRS call number - Finish creating the new connection icon. Establish the GPRS connection On MobileMapper CX: 6 - Double-tap the new connection icon - Enter GPRS operator identification data - Start the GPRS connection. 20 - Magellan MobileMapper CX | Getting Started Guide - Page 29
on how to do this. 3. Make its Bluetooth device discoverable from external Bluetooth devices such as MobileMapper CX. Again, refer to your cell phone's manual for instructions on how to do this. 4. On MobileMapper CX, tap to search for any nearby Bluetooth-enabled devices, including your cell - Magellan MobileMapper CX | Getting Started Guide - Page 30
should enter a PIN number to secure the connection to the cell phone (see below). Enter a PIN Code 1. Tap inside the Pin field and type in any number. A two- "Add to Paired". 2. You will then be asked to enter the pin number you have previously defined in MobileMapper CX (see Step 1). When the - Magellan MobileMapper CX | Getting Started Guide - Page 31
now shows the Bluetooth services offered by your cell phone (see example opposite). Establish a Bluetooth Connection 1. Double-tap the Dial-Up Networking icon. As a result, a connection is automatically implemented using the first Bluetooth virtual port available on MobileMapper CX. The message - Magellan MobileMapper CX | Getting Started Guide - Page 32
circle on the Dial-Up Networking icon showing that the connection has been made (see opposite). Create a Shortcut for Future Connections This shortcut will allow you to save time for future connections as you won't have to list the local services of the cell phone to re-activate the Bluetooth link - Magellan MobileMapper CX | Getting Started Guide - Page 33
English 4. In the Select a modem field, select the port used on MobileMapper CX (i.e. the port assigned previously) to page 18). If you need to enter your GPRS connection profile, enter the three parameters below and enable the Save password option: • User Name • Password • Domain 3. Tap on the Dial - Magellan MobileMapper CX | Getting Started Guide - Page 34
"User Authenticated" and "Connected". The GPRS connection is now established. 7. Tap Hide to close the message window. 8. Tap to close the Connection window. 9. Now it's time to select your DGPS mode (refer to Selecting a DGPS Mode on page 29). Troubleshooting You may encounter problems when - Magellan MobileMapper CX | Getting Started Guide - Page 35
time you turn on MobileMapper CX and the cell phone, the procedure for re-establishing the GPRS connection will be significantly shorter, as User Authenticated" and "Connected". The GPRS connection is now established. 8. Tap Hide to close the message window. 9. Tap to close the Connection window. 10 - Magellan MobileMapper CX | Getting Started Guide - Page 36
GPRS You may want to disconnect the GPRS connection. Follow the instructions below to do this from the MobileMapper CX: 1. In the task bar, tap >Settings>Network and Dial-up Con- nections. 2. Tap on the icon representing the currently active GPRS connection. 3. Do one of the following: - Tap in the - Magellan MobileMapper CX | Getting Started Guide - Page 37
-time DGPS mode that can be used simultaneously with raw data recording. 2. Beacon: Differential corrections are received by the beltcarried Magellan MobileMapper beacon. This unit is connected to the MobileMapper CX via Bluetooth or a serial cable. 3. Direct IP: Differential corrections are taken - Magellan MobileMapper CX | Getting Started Guide - Page 38
differential corrections received over xx sec! Correction age limit = xx sec". This will happen after a time tied to the value you will have assigned to the Real Time Correction Age Limit parameter. When this warning message appears, MobileMapper CX will automatically switch to Autonomous GPS mode - Magellan MobileMapper CX | Getting Started Guide - Page 39
MobileMapper CX are possible with MobileMapper Beacon: via Bluetooth (preferred) or using a wire connection (RS232). For more information about MobileMapper Beacon, please refer to its Getting Started Guide. 1. If you are using Bluetooth: - Place MobileMapper Beacon between 60 cm (two feet) and 10 - Magellan MobileMapper CX | Getting Started Guide - Page 40
. - Then go to point 3. below. 2. If you are using COM1 on MobileMapper CX to communicate with MobileMapper Beacon (RS232 wire connection): - Attach the I/O module to MobileMapper CX. - Connect the serial cable provided with MobileMapper Bea- con between the two units. See diagram below. COM1 on - Magellan MobileMapper CX | Getting Started Guide - Page 41
you configure both the beacon and the connection to this beacon. - In the Port field, on top of the screen, set the port through which you will communicate with the MobileMapper beacon. Typically, you will select: • COM1, if you are using a wire connection to MobileMapper Beacon. • COM4, if you are - Magellan MobileMapper CX | Getting Started Guide - Page 42
current settings and performance indicators of the MobileMapper Beacon. The current tuning settings include reception frequency, MSK rate and station ID of the reference station being received. The performance indicators are the lock status (No/Yes), the signal strength, measured in dBµV, and the - Magellan MobileMapper CX | Getting Started Guide - Page 43
the Bluetooth and DialUp fields have been filled in accordingly.]. Each Direct IP configuration holds the key information allowing MobileMapper CX to connect to a given corrections provider. Having the capability to save several Direct IP configurations in MobileMapper CX will therefore allow you to - Magellan MobileMapper CX | Getting Started Guide - Page 44
the desired configuration from the Direct IP Configuration field, tap OK. This takes you back to the settings you have just made. - Tap the Connect button. The DGPS Configuration screen now indicates the Run GPS Status (see Viewing Current GPS Status on page 15) and check that MobileMapper CX is - Magellan MobileMapper CX | Getting Started Guide - Page 45
several NTRIP configurations. Each NTRIP configuration holds the key information allowing MobileMapper CX to connect to a given NTRIP caster. Having the capability to save several NTRIP configurations in MobileMapper CX will therefore allow you to quickly change the NTRIP caster without having to - Magellan MobileMapper CX | Getting Started Guide - Page 46
field, tap on the Add button and then enter the following parameters: • Name: NTRIP Configuration Name (freely choose a name) • Host: Host IP address • Port: Port number • Login: User name • Password: User from the NTRIP Configuration field, tap OK. MobileMapper CX connects to the NTRIP caster. - Magellan MobileMapper CX | Getting Started Guide - Page 47
in the Station field. • Cancel to return to the NTRIP Settings screen without changing the choice made in the Station field. - Tap the Connect button. The the message window. - Run GPS Status (see Viewing Current GPS Status on page 15) and check that MobileMapper CX is now operating in DGPS mode - Magellan MobileMapper CX | Getting Started Guide - Page 48
configure the connection to the external source. - In the Port field, on top of the screen, set the port through which you will communicate with the external device. By default, two ports are available: • COM1, the only "physical" COM port available on the MobileMapper CX. Note that COM1 will not be - Magellan MobileMapper CX | Getting Started Guide - Page 49
preset. If it was MobileMapper Beacon, the last used station is preset. This means the only thing you will have to do to get the MobileMapper CX running, and provided you agree with all the default choices, is to tap on the Connect button and then start using the corrections received by tapping OK - Magellan MobileMapper CX | Getting Started Guide - Page 50
used, the external power source also automatically recharges the internal battery. The built-in advanced power saving features also help to optimize power consumption while the system is idle. The MobileMapper CX system has three power saving modes when the battery power is used: 1. User Idle mode - Magellan MobileMapper CX | Getting Started Guide - Page 51
amount of time displayed in the Suspend field. Turning Off MobileMapper CX Manually Tap , then Shut Down. In the Shut Down window that opens, just tap OK. After a few seconds, the MobileMapper CX will shut down. Checking Battery Status To check the battery level, tap , then Settings>Control panel - Magellan MobileMapper CX | Getting Started Guide - Page 52
Management The MobileMapper CX has three types of memory: - The Nand Flash memory ("MyDevice"), a non volatile memory. - The removable SD Card memory, a non-volatile memory. - The RAM (volatile memory), mainly used for running pro- grams. Programs or data that are saved in the RAM will be erased - Magellan MobileMapper CX | Getting Started Guide - Page 53
you to configure and monitor MobileMapper CX's internal GPS receiver. This chapter describes the full set of GPS Utilities, which includes the following items: - DGPS Configuration - GPS Initialization - GPS Ports Configuration - GPS Reset - GPS Settings - GPS Status - Mission Planning Note that - Magellan MobileMapper CX | Getting Started Guide - Page 54
more information about MobileMapper CX data output, refer to NMEA Data Output on page 64. GPS Reset Use the Reset GPS utility to cause the internal GPS receiver to re-initialize. You may need to run this utility if for example you want to force the GPS receiver to acquire new almanac data from the - Magellan MobileMapper CX | Getting Started Guide - Page 55
English As explained in the GPS Reset window, you may reduce the time to first fix by running the GPS Initialization utility (see Initializing GPS on page 13). Until a new almanac file is received from the GPS constellation, MobileMapper CX uses a non-erasable almanac file stored in its memory to - Magellan MobileMapper CX | Getting Started Guide - Page 56
the location on Earth for which Mission Planning will determine the GPS constellation. - You can key in the exact fields. - Then tap OK to validate these coordinates. This takes you back to the Mission Planning window on which you can see the GPS software version of the Mission Planning utility. 48 - Magellan MobileMapper CX | Getting Started Guide - Page 57
right in the task bar to switch from a running application to another. For example if DGPS Configuration and GPS Status are both running in the background while using Mission Planning, the menu opposite will pop up when you tap this button. Just tap the name of the application you want to go - Magellan MobileMapper CX | Getting Started Guide - Page 58
phone used is the host device and MobileMapper CX is the inquiring device. The local service used in the cell phone is the Dial-Up Networking service. • When you output GPS data via the auxiliary port, MobileMapper CX is the host device and the external device receiving the data via Bluetooth is the - Magellan MobileMapper CX | Getting Started Guide - Page 59
English Bluetooth Range The maximum range in class 2 devices is 10 meters (30 feet) typically. A minimum distance of about 60 cm Bluetooth-Enabled Devices Use the following two buttons to let MobileMapper CX's local Bluetooth controller detect the Bluetooth-Enabled devices present nearby: 51 - Magellan MobileMapper CX | Getting Started Guide - Page 60
at the end of the search. When next tapping this button, you will just list all the Bluetooth-enabled devices that were detected during the last that attempts to pair itself with MobileMapper CX. - To change the PIN code, enter the desired code in the Default PIN field. - To make the device - Magellan MobileMapper CX | Getting Started Guide - Page 61
an auxiliary output (see GPS Ports Configuration on page 46). • File Transfer Service. This service allows any two Bluetooth-enabled devices to exchange files. • Object Push Service. This service is required to run the File Transfer Service but is not usable as such in MobileMapper CX. To list the - Magellan MobileMapper CX | Getting Started Guide - Page 62
Assuming you want to send the NMEA messages coming out from your MobileMapper CX to a computer screen, follow the procedure below, based on the use of MobileMapper CX's Serial Port Service: - On MobileMapper CX, make sure: • The Serial Port Service is activated and a COM port is assigned to it (COM4 - Magellan MobileMapper CX | Getting Started Guide - Page 63
local services offered by MobileMapper CX • Use the listed Serial Port Service icon to connect the computer to the MobileMapper CX Serial Port Service through one of its virtual ports (COM4). • Run HyperTerminal, name the session, select the computer port used to communicate with the external device - Magellan MobileMapper CX | Getting Started Guide - Page 64
two devices (you'll need to enter the PIN code defined in the host MobileMapper CX Bluetooth properties; see page 52). • List the local services offered by the remote (host) MobileMapper CX. • Double-tap the remote File Transfer Service icon to connect the inquiring unit to the host's File Transfer - Magellan MobileMapper CX | Getting Started Guide - Page 65
remote device has been found, you can create a shortcut for this service. This means you will no longer have to ask MobileMapper CX to find this service to be able to use it. - To create a shortcut, tap and hold the service icon and then select Shortcut in the popup menu. This instantly creates - Magellan MobileMapper CX | Getting Started Guide - Page 66
English Web Tools Introduction The Magellan MobileMapper CX unit comes with standard programs allowing Internet access and email exchange while being still in the field. MobileMapper CX lets you go to the Internet using one of the following two connections: • Via a Bluetooth-enabled, GPRS-enabled - Magellan MobileMapper CX | Getting Started Guide - Page 67
English WiFi Connection IMPORTANT! Only model 5421A from U.S.Robotics can be used with MobileMapper CX. The driver of this adapter being pre-installed, no installation phase is needed (the device is fully plug-and-play). You will however find an Installation Guide in the box but remember you don't - Magellan MobileMapper CX | Getting Started Guide - Page 68
..." combined with a correct signal strength (Good, Very Good, Excellent) reported just underneath. Tap OK to close the connection window. NOTE: Tap window. in the task bar to re-open the WiFi driver Using the Inbox Program Setting Up an Email Service Below are a few instructions to help you set - Magellan MobileMapper CX | Getting Started Guide - Page 69
type used by the email account you want to connect to. There are two possible service types: • IMAP4 Mail • POP3 Mail - Name the service or keep the default name (the default name is the same as the service type name). - Tap OK. - Enter the parameters listed below (see also POP3/IMAP4 comparative - Magellan MobileMapper CX | Getting Started Guide - Page 70
the program needs a return address. In this case, enter any valid email address. Note that this address will not be affected by the email traffic from/to your MobileMapper CX. (Example: [email protected]) Screens 2/3 and 3/3: Miscellaneous settings about how Inbox handles and filters emails (see - Magellan MobileMapper CX | Getting Started Guide - Page 71
can now view and edit the Inbox options (Compose, Read, Delete, Storage). See screen examples below. Using Inbox Once an Internet connection has been established via GPRS or WiFi and an email service has been created In Inbox, do the following to use the email box: - In the Inbox menu bar, select - Magellan MobileMapper CX | Getting Started Guide - Page 72
MobileMapper CX to another computing device via COM1, you must connect the two devices using a null modem cable. - Tap , then Programs>GPS Utilities>GPS Ports Configuration. - In the GPS Auxiliary Output pane, check on the Enable Messages option and then select the desired COM port in the Port field - Magellan MobileMapper CX | Getting Started Guide - Page 73
- In the GPS Auxiliary Output pane, check on the Enable Messages option and then select "COM6" in the Port field. - Tap Configure Port to configure the selected port. Enter its baud rate, number of start and stop bits and set its parity and flow control parameters. - Tap OK. MobileMapper CX will now - Magellan MobileMapper CX | Getting Started Guide - Page 74
three things you can do to improve signal reception: • While you do not need a survey-grade external antenna for sub-meter accuracy, using one will yield better accuracy in all environments. • If you are not using an external antenna, keep the MobileMapper CX receiver at a 45-degree angle the entire - Magellan MobileMapper CX | Getting Started Guide - Page 75
for optimizing MobileMapper CX accuracy when recording rover data that will be differentially corrected by MobileMapper Office in post-processed mode: All features must be logged while the receiver is continuously tracking at least 5 satellites with a PDOP less than 4 for at least 20 minutes. You - Magellan MobileMapper CX | Getting Started Guide - Page 76
be more accurate. When recording a job for post-processing, the receiver records GPS measurements the entire time the job is open - not just when you feature and the job, the feature will be recorded during a period lasting 20 minutes and you should have sub-meter accuracy. For this reason, it is - Magellan MobileMapper CX | Getting Started Guide - Page 77
current version of MobileMapper CX Operating System (OS) firmware can be downloaded from ftp.magellangps.com in the /Mobile Mapping/MM CX/Firmware/OS/ folder. 1. Turn on MobileMapper CX and either attach it to external power or make sure that there is at least a 25% charge in the battery (tap Start - Magellan MobileMapper CX | Getting Started Guide - Page 78
the receiver back on. 12.You may verify that the new OS firmware has been successfully uploaded by tapping: >Settings>Control Panel 13.Scroll down to the Magellan System Info icon. Double-tap on this icon. Confirm that the OS F/W Version is that which you just uploaded. Updating MobileMapper CX GPS - Magellan MobileMapper CX | Getting Started Guide - Page 79
Settings>Control Panel and scroll down to the Magellan System Info icon. 14.Double-tap the Magellan System Info icon and confirm that the GPS F/W version is that which you just uploaded. 15.To update another MobileMapper CX receiver with the latest GPS firmware, remove the SD card and insert it into - Magellan MobileMapper CX | Getting Started Guide - Page 80
Files When first using your MobileMapper CX, and because there is no recent almanac file available yet in the unit, the internal GPS receiver (or Mission Planning if used at that time) will use a default almanac file stored in its protected memory. After receiving GPS satellites for about 12 to - Magellan MobileMapper CX | Getting Started Guide - Page 81
status bar at the bottom of the screen, "Differential GPS" should be displayed and the indicator light should flash in blue.) But if you notice that the green indicator light on MobileMapper Beacon sometimes temporarily turns off, this means the signal received is not as strong as it should be. The - Magellan MobileMapper CX | Getting Started Guide - Page 82
how safe DGPS operation with MobileMapper Beacon will be, depending on the value of the SNR. SNR DGPS Data Reception Quality SNR - Magellan MobileMapper CX | Getting Started Guide - Page 83
English MobileMapper CX Port Allocation Port Number COM1 COM2 COM3 COM4 COM5 COM6 COM7 COM8 COM9 Assigned to RS232 Internal use (VSP) USB ActiveSync Bluetooth Serial Service Free USB Serial Free Free Free 75 - Magellan MobileMapper CX | Getting Started Guide - Page 84
18 A AC adapter 7 , ActiveSync 10 70 Almanac data 72 Authentication 53 Automatic tuning 33 Autonomous GPS 15 Azmth/Elvn 16 B Backlight 8 , Battery door 3 6 , , Beacon 29 31 32 , , , Bluetooth Manager 21 23 50 74 C Calibrating the screen 8 Carrier 26 CD 10 Charging 6 Cold Reset 46 , COM2 17 46 Custom - Magellan MobileMapper CX | Getting Started Guide - Page 85
Removable SD Card memory 44 Reset 5 RMC 64 RRE 64 Select Mode 31 45 Serial port (COM1) 4 , Serial Port Service 53 54 , Shortcut 24 57 Sig/Nav 16 Sky plot 47 GPS firmware 70 Update OS firmware 69 Upload files 57 Urban Canyon 14 , USB 10 70 USB flash drive 4 USB host port 4 User Idle mode 42 User - Magellan MobileMapper CX | Getting Started Guide - Page 86
MobileMapper™ CX Getting Started Guide Magellan Mobile Mapping Solutions Contact Information: In USA +1 408 615 3970 I Fax +1 408 615 5200 Toll Free (Sales in USA/Canada) 1 800 922 2401 In South America +56 2 273 3214 I Fax +56 2 273 3187 Email [email protected] In Singapore +65 9838
-
 1
1 -
 2
2 -
 3
3 -
 4
4 -
 5
5 -
 6
6 -
 7
7 -
8
-
9
-
10
-
11
-
12
-
13
-
14
-
15
-
16
-
17
-
18
-
19
-
20
-
21
-
22
-
23
-
24
-
25
-
26
-
27
-
28
-
29
-
30
-
31
-
32
-
33
-
34
-
35
-
36
-
37
-
38
-
39
-
40
-
41
-
42
-
43
-
44
-
45
-
46
-
47
-
48
-
49
-
50
-
51
-
52
-
53
-
54
-
55
-
56
-
57
-
58
-
59
-
60
-
61
-
62
-
63
-
64
-
65
-
66
-
67
-
68
-
69
-
70
-
71
-
72
-
73
-
74
-
75
-
76
-
77
-
78
-
79
-
80
-
81
-
82
-
83
-
84
-
85
-
86
 |
 |
MobileMapper
™
CX
Getting Started Guide