Magellan MobileMapper CX Getting Started Guide - Page 44
Direct IP Configuration, Delete, Direct IP, Configuration, Connect, Please
 |
UPC - 009905860047
View all Magellan MobileMapper CX manuals
Add to My Manuals
Save this manual to your list of manuals |
Page 44 highlights
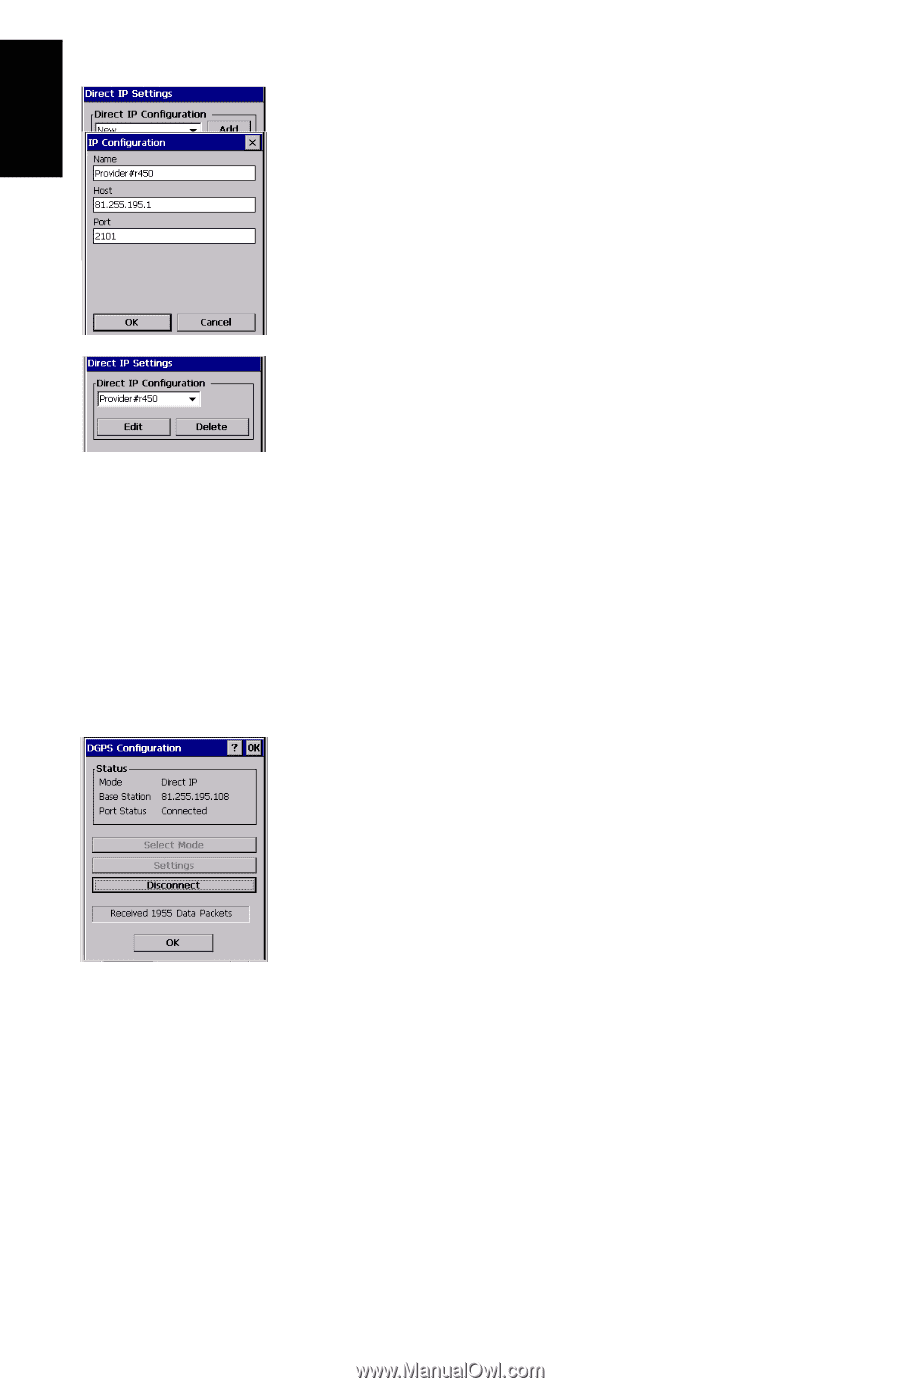
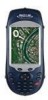
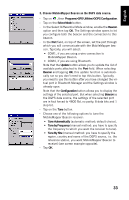
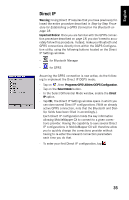
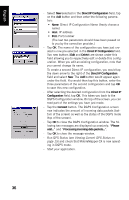
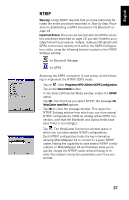
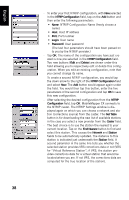
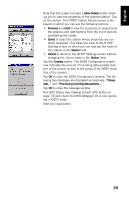
English - Select New selected in the Direct IP Configuration field, tap on the Add button and then enter the following parameters: • Name: Direct IP Configuration Name (freely choose a name) • Host: IP address • Port: Port number (The last two parameters should have been passed on to you by the correction provider.) - Tap OK. The name of the configuration you have just created is now pre-selected in the Direct IP Configuration field. Two new buttons (Edit and Delete) are shown under this field allowing you to respectively edit or delete this configuration. When you edit an existing configuration, note that you cannot change its name. To create a second Direct IP configuration, you would tap the down arrow to the right of the Direct IP Configuration field and select New. The Add button would appear again under the field. You would then tap this button, enter the three parameters of the second configuration and tap OK to save this new configuration. - After selecting the desired configuration from the Direct IP Configuration field, tap OK. This takes you back to the DGPS Configuration window. On top of the screen, you can read part of the settings you have just made. - Tap the Connect button. The DGPS Configuration screen now indicates the amount of incoming data packets (bottom of the screen) as well as the status of the DGPS mode (top of the screen). - Tap OK to close the DGPS Configuration window. The following two messages are displayed successively: "Please wait..." and "Processing incoming data packets...". - Tap OK to close the message window. - Run GPS Status (see Viewing Current GPS Status on page 15) and check that MobileMapper CX is now operating in DGPS mode. - Start your application. 36
-
 1
1 -
2
-
3
-
4
-
5
-
6
-
7
-
8
-
9
-
10
-
11
-
12
-
13
-
14
-
15
-
16
-
17
-
18
-
19
-
20
-
21
-
22
-
23
-
24
-
25
-
26
-
27
-
28
-
29
-
30
-
31
-
32
-
33
-
34
-
35
-
36
-
37
-
38
-
 39
39 -
 40
40 -
 41
41 -
 42
42 -
 43
43 -
 44
44 -
 45
45 -
 46
46 -
 47
47 -
 48
48 -
 49
49 -
50
-
51
-
52
-
53
-
54
-
55
-
56
-
57
-
58
-
59
-
60
-
61
-
62
-
63
-
64
-
65
-
66
-
67
-
68
-
69
-
70
-
71
-
72
-
73
-
74
-
75
-
76
-
77
-
78
-
79
-
80
-
81
-
82
-
83
-
84
-
85
-
86
 |
 |