Magellan MobileMapper CX Getting Started Guide - Page 15
Turning the Receiver - battery
 |
UPC - 009905860047
View all Magellan MobileMapper CX manuals
Add to My Manuals
Save this manual to your list of manuals |
Page 15 highlights
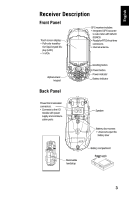
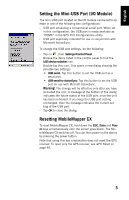
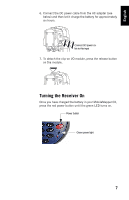
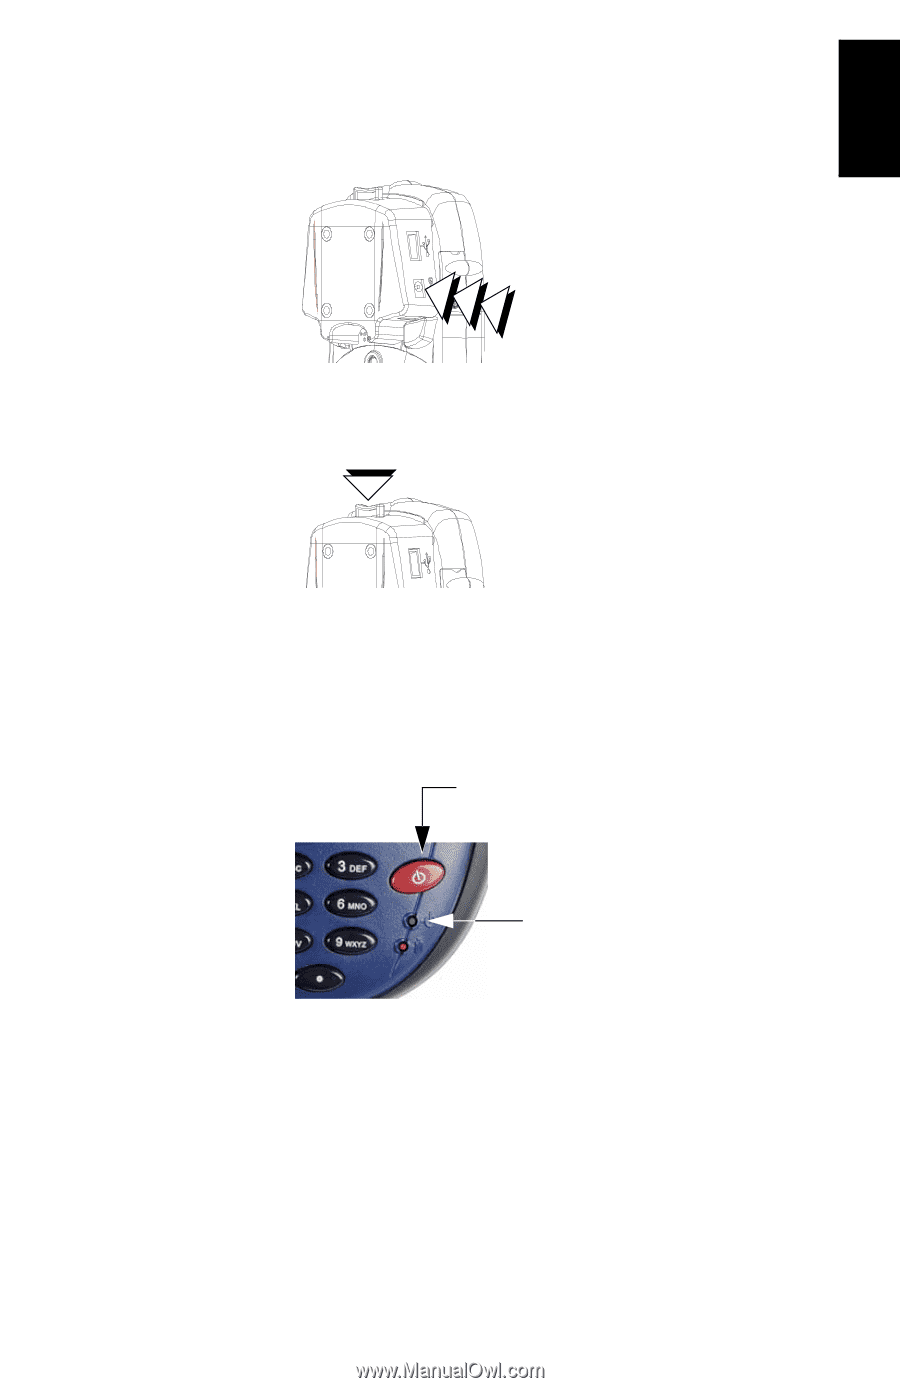
English 6. Connect the DC power cable from the AC adapter (see below) and then let it charge the battery for approximately six hours. Connect DC power cable to this input 7. To detach the clip-on I/O module, press the release button on the module. Turning the Receiver On Once you have charged the battery in your MobileMapper CX, press the red power button until the green LED turns on. Power button Green power light 7
-
 1
1 -
2
-
3
-
4
-
5
-
6
-
7
-
8
-
9
-
 10
10 -
 11
11 -
 12
12 -
 13
13 -
 14
14 -
 15
15 -
 16
16 -
 17
17 -
 18
18 -
 19
19 -
 20
20 -
21
-
22
-
23
-
24
-
25
-
26
-
27
-
28
-
29
-
30
-
31
-
32
-
33
-
34
-
35
-
36
-
37
-
38
-
39
-
40
-
41
-
42
-
43
-
44
-
45
-
46
-
47
-
48
-
49
-
50
-
51
-
52
-
53
-
54
-
55
-
56
-
57
-
58
-
59
-
60
-
61
-
62
-
63
-
64
-
65
-
66
-
67
-
68
-
69
-
70
-
71
-
72
-
73
-
74
-
75
-
76
-
77
-
78
-
79
-
80
-
81
-
82
-
83
-
84
-
85
-
86
 |
 |
English
7
6. Connect the DC power cable from the AC adapter (see
below) and then let it charge the battery for approximately
six hours.
7. To detach the clip-on I/O module, press the release button
on the module.
Turning the Receiver On
Once you have charged the battery in your MobileMapper CX,
press the red power button until the green LED turns on.
Connect DC power ca-
ble to this input
Power button
Green power light