Magellan MobileMapper CX Getting Started Guide - Page 46
NTRIP Configuration, Login, Password, Delete, NTRIP, Configuration, Get Table, Caster, Find Nearest
 |
UPC - 009905860047
View all Magellan MobileMapper CX manuals
Add to My Manuals
Save this manual to your list of manuals |
Page 46 highlights
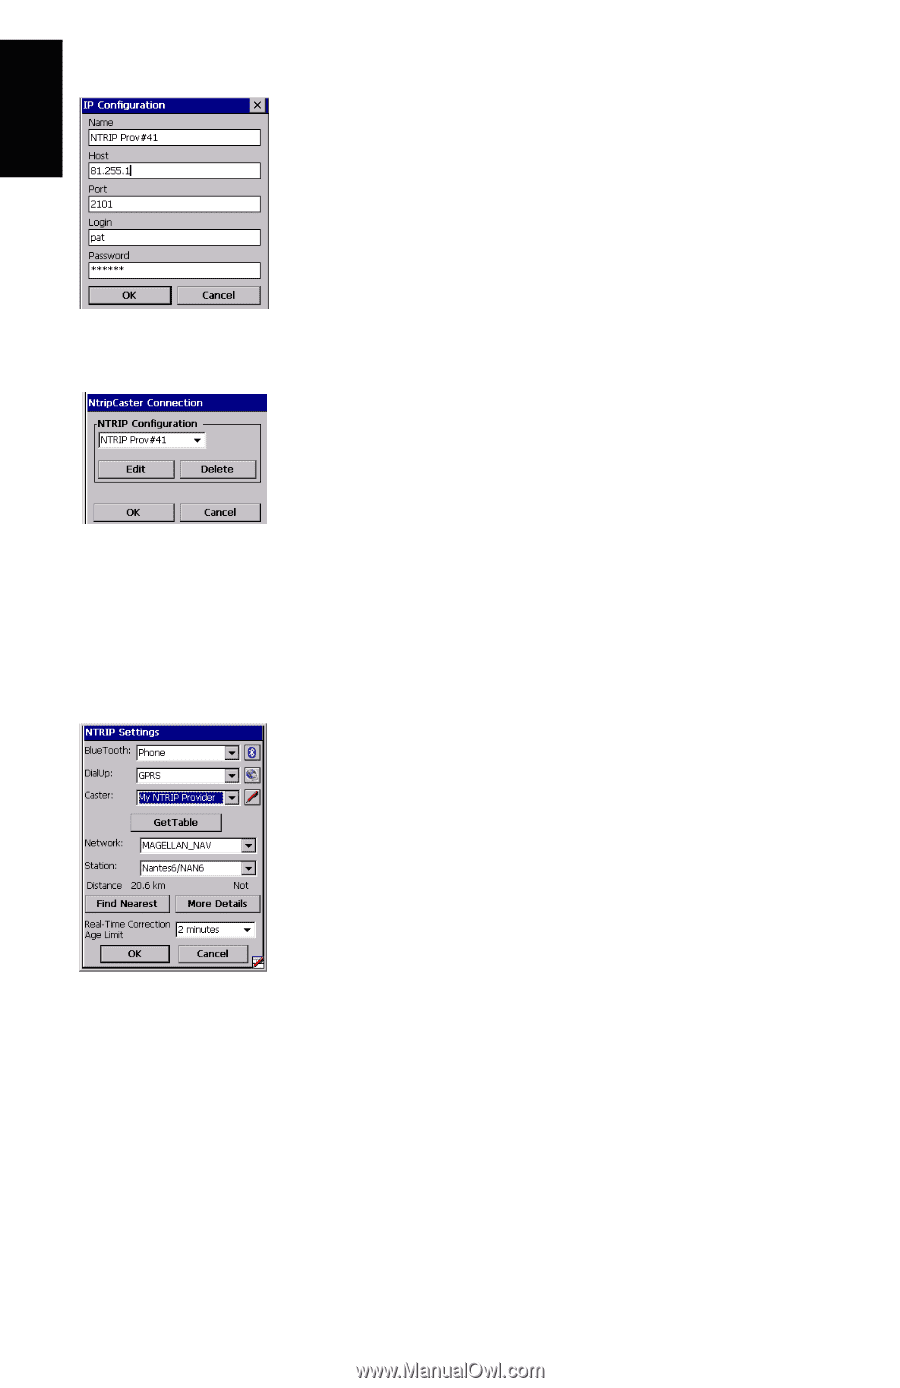
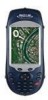
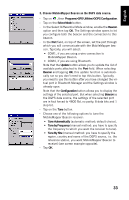
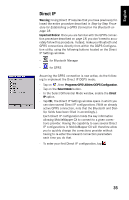
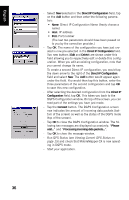
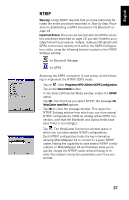
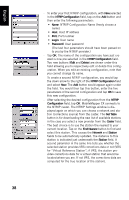
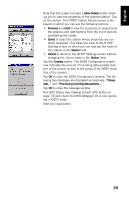
English - To enter your first NTRIP configuration, with New selected in the NTRIP Configuration field, tap on the Add button and then enter the following parameters: • Name: NTRIP Configuration Name (freely choose a name) • Host: Host IP address • Port: Port number • Login: User name • Password: User password (The last four parameters should have been passed on to you by the NTRIP provider.) - Tap OK. The name of the configuration you have just created is now pre-selected in the NTRIP Configuration field. Two new buttons (Edit and Delete) are shown under this field allowing you to respectively edit or delete this configuration. When you edit an existing configuration, note that you cannot change its name. To create a second NTRIP configuration, you would tap the down arrow to the right of the NTRIP Configuration field and select New. The Add button would appear again under the field. You would then tap this button, enter the five parameters of the second configuration and tap OK to save this new configuration. - After selecting the desired configuration from the NTRIP Configuration field, tap OK. MobileMapper CX connects to the NTRIP caster. The NTRIP Settings window is displayed again on which you can choose a network and station (corrections source) from the caster. The Get Table button is for downloading the new list of available stations in the case you select a new provider from the Caster field. - The best choice is to use the station the nearest to your current location. Tap on the Find Nearest button to find and select this station. This causes the Network and Station fields to be automatically updated. The distance to this station is indicated just underneath the Station field. A second parameter in the same line tells you whether the selected station provides VRS corrections data or not (VRS for "Virtual Reference Station"; if VRS, the station provides corrections data for a virtual station that would be located where you are. If not VRS, the corrections data are computed for the true location of the station). 38
-
 1
1 -
2
-
3
-
4
-
5
-
6
-
7
-
8
-
9
-
10
-
11
-
12
-
13
-
14
-
15
-
16
-
17
-
18
-
19
-
20
-
21
-
22
-
23
-
24
-
25
-
26
-
27
-
28
-
29
-
30
-
31
-
32
-
33
-
34
-
35
-
36
-
37
-
38
-
39
-
40
-
 41
41 -
 42
42 -
 43
43 -
 44
44 -
 45
45 -
 46
46 -
 47
47 -
 48
48 -
 49
49 -
 50
50 -
 51
51 -
52
-
53
-
54
-
55
-
56
-
57
-
58
-
59
-
60
-
61
-
62
-
63
-
64
-
65
-
66
-
67
-
68
-
69
-
70
-
71
-
72
-
73
-
74
-
75
-
76
-
77
-
78
-
79
-
80
-
81
-
82
-
83
-
84
-
85
-
86
 |
 |