Ricoh SP4100N Software User Guide - Page 317
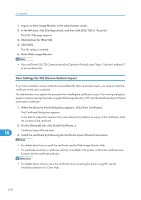
SSL (Secure Sockets Layer) Encryption, Enable the SSL/TLS setting using Web Image Monitor.
 |
UPC - 026649027994
View all Ricoh SP4100N manuals
Add to My Manuals
Save this manual to your list of manuals |
Page 317 highlights
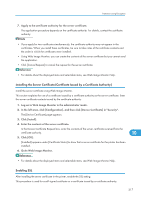
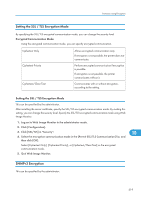
Protection Using Encryption 3. Create shared key from the user's computer, and then encrypt it using public key. 4. The encrypted shared key is sent to the printer. 5. The encrypted shared key is decrypted in the machine using private key. 6. Transmit the encrypted data using the shared key, and then decrypt the data at the machine to attain secure transmission. SSL (Secure Sockets Layer) Encryption This can be specified by the administrator. To protect the communication path and establish encrypted communication, create and install the server certificate. There are two ways of installing a server certificate: create and install a self-certificate using the printer, or request a certificate from a certificate authority and install it. Configuration flow (self-signed certificate) 1. Creating and installing the server certificate Install the server certificate using Web Image Monitor. 2. Enabling SSL Enable the SSL/TLS setting using Web Image Monitor. Configuration flow (certificate issued by a certificate authority) 1. Creating the server certificate Create the server certificate using Web Image Monitor. The application procedure after creating the certificate depends on the certificate authority. Follow the procedure specified by the certificate authority. 2. Installing the server certificate Install the server certificate using Web Image Monitor. 3. Enabling SSL 10 Enable the SSL/TLS setting using Web Image Monitor. Creating and Installing the Server Certificate (Self-Signed Certificate) Create and install the server certificate using Web Image Monitor. • To confirm whether SSL configuration is enabled, enter https://(printer's-address) in your Web Image Monitor's address bar to access this printer. If the "The page cannot be displayed" message appears, check the configuration as the SSL configuration is invalid. 315
-
 1
1 -
2
-
3
-
4
-
5
-
6
-
7
-
8
-
9
-
10
-
11
-
12
-
13
-
14
-
15
-
16
-
17
-
18
-
19
-
20
-
21
-
22
-
23
-
24
-
25
-
26
-
27
-
28
-
29
-
30
-
31
-
32
-
33
-
34
-
35
-
36
-
37
-
38
-
39
-
40
-
41
-
42
-
43
-
44
-
45
-
46
-
47
-
48
-
49
-
50
-
51
-
52
-
53
-
54
-
55
-
56
-
57
-
58
-
59
-
60
-
61
-
62
-
63
-
64
-
65
-
66
-
67
-
68
-
69
-
70
-
71
-
72
-
73
-
74
-
75
-
76
-
77
-
78
-
79
-
80
-
81
-
82
-
83
-
84
-
85
-
86
-
87
-
88
-
89
-
90
-
91
-
92
-
93
-
94
-
95
-
96
-
97
-
98
-
99
-
100
-
101
-
102
-
103
-
104
-
105
-
106
-
107
-
108
-
109
-
110
-
111
-
112
-
113
-
114
-
115
-
116
-
117
-
118
-
119
-
120
-
121
-
122
-
123
-
124
-
125
-
126
-
127
-
128
-
129
-
130
-
131
-
132
-
133
-
134
-
135
-
136
-
137
-
138
-
139
-
140
-
141
-
142
-
143
-
144
-
145
-
146
-
147
-
148
-
149
-
150
-
151
-
152
-
153
-
154
-
155
-
156
-
157
-
158
-
159
-
160
-
161
-
162
-
163
-
164
-
165
-
166
-
167
-
168
-
169
-
170
-
171
-
172
-
173
-
174
-
175
-
176
-
177
-
178
-
179
-
180
-
181
-
182
-
183
-
184
-
185
-
186
-
187
-
188
-
189
-
190
-
191
-
192
-
193
-
194
-
195
-
196
-
197
-
198
-
199
-
200
-
201
-
202
-
203
-
204
-
205
-
206
-
207
-
208
-
209
-
210
-
211
-
212
-
213
-
214
-
215
-
216
-
217
-
218
-
219
-
220
-
221
-
222
-
223
-
224
-
225
-
226
-
227
-
228
-
229
-
230
-
231
-
232
-
233
-
234
-
235
-
236
-
237
-
238
-
239
-
240
-
241
-
242
-
243
-
244
-
245
-
246
-
247
-
248
-
249
-
250
-
251
-
252
-
253
-
254
-
255
-
256
-
257
-
258
-
259
-
260
-
261
-
262
-
263
-
264
-
265
-
266
-
267
-
268
-
269
-
270
-
271
-
272
-
273
-
274
-
275
-
276
-
277
-
278
-
279
-
280
-
281
-
282
-
283
-
284
-
285
-
286
-
287
-
288
-
289
-
290
-
291
-
292
-
293
-
294
-
295
-
296
-
297
-
298
-
299
-
300
-
301
-
302
-
303
-
304
-
305
-
306
-
307
-
308
-
309
-
310
-
311
-
 312
312 -
 313
313 -
 314
314 -
 315
315 -
 316
316 -
 317
317 -
 318
318 -
 319
319 -
 320
320 -
 321
321 -
 322
322 -
323
-
324
-
325
-
326
-
327
-
328
-
329
-
330
-
331
-
332
-
333
-
334
-
335
-
336
-
337
-
338
-
339
-
340
-
341
-
342
-
343
-
344
 |
 |