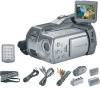
Samsung SCD5000 User Manual (ENGLISH) - Page 91
Adjusting the Focus, Réglage de la mise au point
 |
UPC - 036725301085
View all Samsung SCD5000 manuals
Add to My Manuals
Save this manual to your list of manuals |
Page 91 highlights
ENGLISH Basic Picture-Taking Prise de photo simple FRANÇAIS Adjusting the Focus ✤ In CAMERA Mode, the automatic focus will not engage unless the Photo Button is pressed. ✤ To get a good image, please verify the focus is set properly before pressing the Photo Button firmly. ✤ While the camera is focusing (by pressing the Photo Button halfway down), a flashing icon ( ) will appear on the OSD (On Screen Display). A beep will be heard once the focus is set. Réglage de la mise au point ✤ En mode CAMERA , la mise au point automatique démarre lorsque vous appuyez sur la touche Photo. ✤ Pour obtenir une bonne image, vérifiez que la mise au point a été effectuée correctement avant d'appuyer fermement sur la touche Photo. ✤ Lorsque le caméscope est en cours de mise au point (en appuyant sur la touche Photo jusqu'à mi-course), une icône ( ) clignote sur l'affichage à l'écran. Un son est émis une fois la mise au point effectuée. 1. Adjust your frame so that the subject is within the AF frame on the LCD screen. 2. Pressing the Photo Button halfway down will set the focus. s When the focus is set, a sound effect will play. 3. Press the Photo Button firmly to take the picture. SF 1 0 0 0 / 1 0 0 0 L 2 2 7 2 1. Ajustez votre cadre afin que le sujet se trouve dans le cadre de mise au point automatique sur l'écran LCD. 2. Appuyez sur la touche Photo jusqu'à mi-course pour faire la mise au point. s A ce moment-là, un son est émis. 3. Appuyez fermement sur la touche Photo pour prendre la photo. Notes s If the focus is not set properly, release the Photo Button and then press the button halfway down again. s Use MACRO Mode for recording images at close range (under 30cm), or the proper focus will not occur. s If the image still seems blurry, use the MF(Manual Focus) feature. Remarques s Si la mise au point n'a pas été effectuée correctement, relâchez la touche Photo puis réappuyez jusqu'à mi-course. s Utilisez le mode MACRO pour enregistrer des images rapprochées (à moins de 30cm), sinon la mise au point ne sera pas exécutée correctement. s Si l'image semble toujours floue, utilisez la fonction de mise au point manuelle. 91
-
 1
1 -
2
-
3
-
4
-
5
-
6
-
7
-
8
-
9
-
10
-
11
-
12
-
13
-
14
-
15
-
16
-
17
-
18
-
19
-
20
-
21
-
22
-
23
-
24
-
25
-
26
-
27
-
28
-
29
-
30
-
31
-
32
-
33
-
34
-
35
-
36
-
37
-
38
-
39
-
40
-
41
-
42
-
43
-
44
-
45
-
46
-
47
-
48
-
49
-
50
-
51
-
52
-
53
-
54
-
55
-
56
-
57
-
58
-
59
-
60
-
61
-
62
-
63
-
64
-
65
-
66
-
67
-
68
-
69
-
70
-
71
-
72
-
73
-
74
-
75
-
76
-
77
-
78
-
79
-
80
-
81
-
82
-
83
-
84
-
85
-
 86
86 -
 87
87 -
 88
88 -
 89
89 -
 90
90 -
 91
91 -
 92
92 -
 93
93 -
 94
94 -
 95
95 -
 96
96 -
97
-
98
-
99
-
100
-
101
-
102
-
103
-
104
-
105
-
106
-
107
-
108
-
109
-
110
-
111
-
112
-
113
-
114
-
115
-
116
-
117
-
118
-
119
-
120
-
121
-
122
-
123
-
124
-
125
-
126
-
127
-
128
-
129
 |
 |
