Samsung SGH-A827 User Manual - Page 105
Understanding Your Address Book, Address Book
 |
View all Samsung SGH-A827 manuals
Add to My Manuals
Save this manual to your list of manuals |
Page 105 highlights
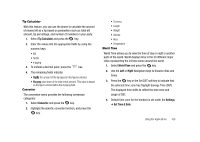
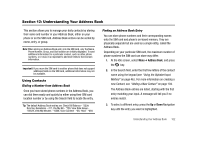
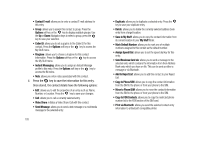
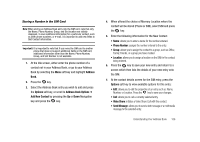
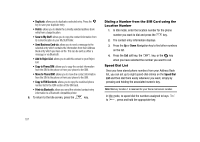
Section 12: Understanding Your Address Book This section allows you to manage your daily contacts by storing their name and number in your Address Book, either on your phone or on the SIM card. Address Book entries can be sorted by name, entry, or group. Note: When storing an Address Book entry into the SIM card, only the Name, Phone Number, Group, and Slot location are initially displayed. To save additional information for a particular contact, such as other phone numbers, or e-mail, it is important to add new fields to that Contact information. Important!: If you move the SIM card to another phone that does not support additional fields on the SIM card, additional information may not be available. Using Contacts Dialing a Number from Address Book Once you have stored phone numbers in the Address Book, you can dial them easily and quickly by either using their SIM card location number or by using the Search field to locate the entry. Tip: The default Address Book entries are: Check Bill Balance - *225#, Directory Assistance - 411, Pay My Bill - *729, View Data Usage *3282#, View My Minutes - *646#, Voice Connect - *08, *Now - *669. Finding an Address Book Entry You can store phone numbers and their corresponding names onto the SIM card and phone's on-board memory. They are physically separate but are used as a single entity, called the Address Book. Depending on your particular SIM card, the maximum number of phone numbers the SIM card can store may differ. 1. At the Idle screen, select Menu ➔ Address Book, and press the key. 2. In the Search field, enter the first few letters of the contact name using the keypad (see "Using the Alphabet Input Method" on page 46.). For more information on creating a new Contact, see "Adding a New Contact" on page 104. The Address Book entries are listed, starting with the first entry matching your input. A message will tell you if no entries match. 3. To select a different entry, press the Up or Down Navigation key until the entry you want is highlighted. Understanding Your Address Book 102
-
 1
1 -
2
-
3
-
4
-
5
-
6
-
7
-
8
-
9
-
10
-
11
-
12
-
13
-
14
-
15
-
16
-
17
-
18
-
19
-
20
-
21
-
22
-
23
-
24
-
25
-
26
-
27
-
28
-
29
-
30
-
31
-
32
-
33
-
34
-
35
-
36
-
37
-
38
-
39
-
40
-
41
-
42
-
43
-
44
-
45
-
46
-
47
-
48
-
49
-
50
-
51
-
52
-
53
-
54
-
55
-
56
-
57
-
58
-
59
-
60
-
61
-
62
-
63
-
64
-
65
-
66
-
67
-
68
-
69
-
70
-
71
-
72
-
73
-
74
-
75
-
76
-
77
-
78
-
79
-
80
-
81
-
82
-
83
-
84
-
85
-
86
-
87
-
88
-
89
-
90
-
91
-
92
-
93
-
94
-
95
-
96
-
97
-
98
-
99
-
 100
100 -
 101
101 -
 102
102 -
 103
103 -
 104
104 -
 105
105 -
 106
106 -
 107
107 -
 108
108 -
 109
109 -
 110
110 -
111
-
112
-
113
-
114
-
115
-
116
-
117
-
118
-
119
-
120
-
121
-
122
-
123
-
124
-
125
-
126
-
127
-
128
-
129
-
130
-
131
-
132
-
133
-
134
-
135
-
136
-
137
-
138
-
139
-
140
-
141
-
142
-
143
-
144
-
145
-
146
-
147
-
148
-
149
-
150
-
151
-
152
-
153
-
154
-
155
-
156
-
157
-
158
-
159
-
160
-
161
-
162
-
163
-
164
 |
 |