Samsung SGH-A827 User Manual - Page 94
Timer, White Balance, Effects, Audio Recording, Settings, Options, Record Video, Send via, My Stuff
 |
View all Samsung SGH-A827 manuals
Add to My Manuals
Save this manual to your list of manuals |
Page 94 highlights
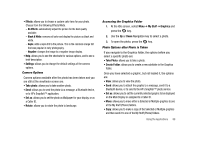
selected Multimedia Message, you may only shoot in 176x144 resolution, which is sendable via a multimedia message. If you select 320x240, the resulting video clip may be too large to send via a multimedia message. • Timer: allows you to set a time delay before the camcorder begins to shoot video. - Off - 3 seconds - 5 seconds - 10 seconds • White Balance: allows you to set the white balance for the camcorder. Choose Auto, Daylight, Incandescent, Fluorescent, or Cloudy. • Effects: allows you to choose a custom color tone for your video. Choose from the following Effects Mode. - No Effects: automatically adjust the picture for the best quality available. - Black & White: removes all color and display the picture as black and white. - Sepia: adds a sepia tint to the picture. This is the common orange tint that was popular in early photography. - Negative: changes the image to a negative image display. • Audio Recording: turn audio recording with your video On or Off. • Help: allows you to see the shortcuts for various options, and to see a brief description. 91 • Settings: allows you to change the default settings of the camera options. Camcorder Options Before leaving the camcorder viewfinder after recording the video, the following options are available by pressing the Options soft key: • Record Video: allows you to take another video. • Send via: allows you to attach the multimedia file to a message or send it to a Bluetooth device. Accessing the Video Folder 1. At the Idle screen, select Menu ➔ My Stuff ➔ Video and press Option ➔ Open or the key. 2. Use the Up or Down Navigation key to select a video file. 3. To play the video, press the key. The file is played in the Media Player application. 4. Press the Back soft key to return to the list of videos. Video Options Once you have navigated into your Video folder, but have not highlighted a video, the following options display: • Record Video: allows you to take another video.
-
 1
1 -
2
-
3
-
4
-
5
-
6
-
7
-
8
-
9
-
10
-
11
-
12
-
13
-
14
-
15
-
16
-
17
-
18
-
19
-
20
-
21
-
22
-
23
-
24
-
25
-
26
-
27
-
28
-
29
-
30
-
31
-
32
-
33
-
34
-
35
-
36
-
37
-
38
-
39
-
40
-
41
-
42
-
43
-
44
-
45
-
46
-
47
-
48
-
49
-
50
-
51
-
52
-
53
-
54
-
55
-
56
-
57
-
58
-
59
-
60
-
61
-
62
-
63
-
64
-
65
-
66
-
67
-
68
-
69
-
70
-
71
-
72
-
73
-
74
-
75
-
76
-
77
-
78
-
79
-
80
-
81
-
82
-
83
-
84
-
85
-
86
-
87
-
88
-
 89
89 -
 90
90 -
 91
91 -
 92
92 -
 93
93 -
 94
94 -
 95
95 -
 96
96 -
 97
97 -
 98
98 -
 99
99 -
100
-
101
-
102
-
103
-
104
-
105
-
106
-
107
-
108
-
109
-
110
-
111
-
112
-
113
-
114
-
115
-
116
-
117
-
118
-
119
-
120
-
121
-
122
-
123
-
124
-
125
-
126
-
127
-
128
-
129
-
130
-
131
-
132
-
133
-
134
-
135
-
136
-
137
-
138
-
139
-
140
-
141
-
142
-
143
-
144
-
145
-
146
-
147
-
148
-
149
-
150
-
151
-
152
-
153
-
154
-
155
-
156
-
157
-
158
-
159
-
160
-
161
-
162
-
163
-
164
 |
 |