TP-Link TL-WA5110G User Guide - Page 15
Quick Installation Guide - manual
 |
UPC - 845973051327
View all TP-Link TL-WA5110G manuals
Add to My Manuals
Save this manual to your list of manuals |
Page 15 highlights
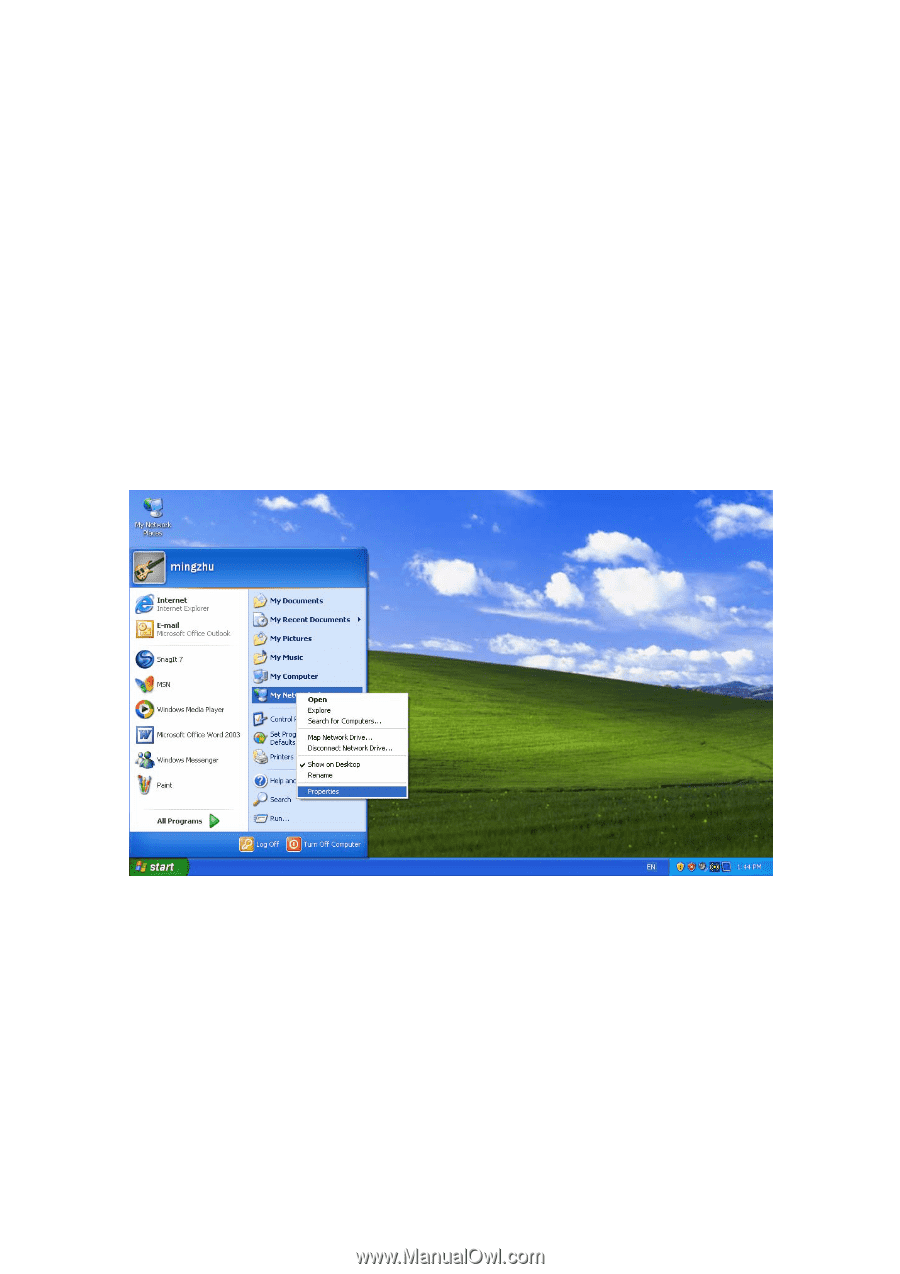
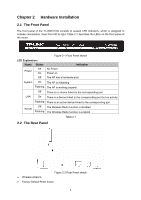
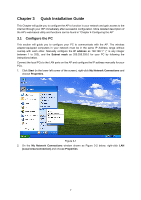
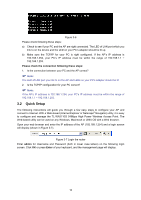
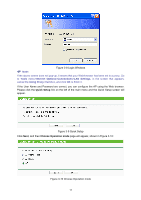
Chapter 3 Quick Installation Guide This Chapter will guide you to configure the AP to function in your network and gain access to the internet through your ISP immediately after successful configuration. More detailed description of the AP's web-based utility and functions can be found in "Chapter 4 Configuring the AP" 3.1 Configure the PC This section will guide you to configure your PC to communicate with the AP. The wireless adapter-equipped computers in your network must be in the same IP Address range without overlap with each other. Manually configure the IP address as 192.168.1.* (* is any integer between 1 to 253), and the Subnet mask as 255.255.255.0 for your PC by following the instructions below. Connect the local PCs to the LAN ports on the AP and configure the IP address manually for your PCs. 1. Click Start (in the lower left corner of the screen), right-click My Network Connections and choose Properties. Figure 3-1 2. On the My Network Connections window shown as Figure 3-2 below, right-click LAN (Local Area Connection) and choose Properties. 7
-
 1
1 -
2
-
3
-
4
-
5
-
6
-
7
-
8
-
9
-
 10
10 -
 11
11 -
 12
12 -
 13
13 -
 14
14 -
 15
15 -
 16
16 -
 17
17 -
 18
18 -
 19
19 -
 20
20 -
21
-
22
-
23
-
24
-
25
-
26
-
27
-
28
-
29
-
30
-
31
-
32
-
33
-
34
-
35
-
36
-
37
-
38
-
39
-
40
-
41
-
42
-
43
-
44
-
45
-
46
-
47
-
48
-
49
-
50
-
51
-
52
-
53
-
54
-
55
-
56
-
57
-
58
-
59
-
60
-
61
-
62
-
63
-
64
-
65
-
66
-
67
-
68
-
69
-
70
-
71
-
72
-
73
-
74
-
75
-
76
-
77
-
78
-
79
-
80
-
81
-
82
-
83
-
84
-
85
-
86
-
87
-
88
-
89
-
90
-
91
-
92
-
93
-
94
-
95
-
96
-
97
-
98
-
99
-
100
-
101
-
102
-
103
-
104
-
105
-
106
-
107
-
108
-
109
 |
 |