Western Digital WDBVHT0080JCH User Manual - Page 45
Creating Drive Settings, Setting the Preferences Auto Update Option.
 |
View all Western Digital WDBVHT0080JCH manuals
Add to My Manuals
Save this manual to your list of manuals |
Page 45 highlights
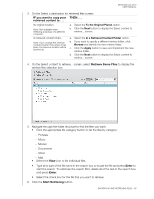
MY BOOK LIVE DUO USER MANUAL Specifying a Different Retrieve Folder. When you start a retrieve, you can choose whether you want to store the retrieved files in either: • Their original locations on your computer • A Retrieved Content folder By default, the WD SmartWare software creates and uses a Retrieved Content subfolder in your My Documents folder. To specify a different folder: 1. Either create a new folder or determine which existing folder you want to use. 2. On the Software Settings screen, click the Retrieve Folder button to display the Set Retrieve Folder screen: 3. Click the Browse button and use the browse function to identify the new retrieve folder. Note: If you don't want your previous retrieve contents folder to be backed up, delete the folder before you apply changes. 4. Click the Apply button to save and implement the new retrieve folder. Setting the Preferences (Auto Update) Option. When enabled, each time you reconnect your My Book Live drive to your network, the Preferences option checks for software updates. This ensures that you are always using the most recent software version. To enable or disable the Preferences option: 1. On the Software Settings screen, click the Preferences button to display the Set Preferences screen: 2. Select or clear the Automatically check for WD SmartWare software updates check box to enable or disable the Preferences option. If selected, the WD SmartWare software links you to the WD Web page where the download is available. Creating Drive Settings Click the Set Up Drive button to open WD Quick View for details on how to manage your My Book Live Duo drive settings. (See "Using the My Book Live Duo Dashboard" on page 55.) BACKING UP AND RETRIEVING FILES - 39
-
 1
1 -
2
-
3
-
4
-
5
-
6
-
7
-
8
-
9
-
10
-
11
-
12
-
13
-
14
-
15
-
16
-
17
-
18
-
19
-
20
-
21
-
22
-
23
-
24
-
25
-
26
-
27
-
28
-
29
-
30
-
31
-
32
-
33
-
34
-
35
-
36
-
37
-
38
-
39
-
 40
40 -
 41
41 -
 42
42 -
 43
43 -
 44
44 -
 45
45 -
 46
46 -
 47
47 -
 48
48 -
 49
49 -
 50
50 -
51
-
52
-
53
-
54
-
55
-
56
-
57
-
58
-
59
-
60
-
61
-
62
-
63
-
64
-
65
-
66
-
67
-
68
-
69
-
70
-
71
-
72
-
73
-
74
-
75
-
76
-
77
-
78
-
79
-
80
-
81
-
82
-
83
-
84
-
85
-
86
-
87
-
88
-
89
-
90
-
91
-
92
-
93
-
94
-
95
-
96
-
97
-
98
-
99
-
100
-
101
-
102
-
103
-
104
-
105
-
106
-
107
-
108
-
109
-
110
-
111
-
112
-
113
-
114
-
115
-
116
-
117
-
118
-
119
-
120
-
121
-
122
-
123
-
124
-
125
-
126
-
127
-
128
-
129
-
130
-
131
-
132
-
133
-
134
-
135
-
136
-
137
-
138
-
139
-
140
-
141
-
142
-
143
-
144
-
145
-
146
-
147
-
148
-
149
-
150
-
151
-
152
-
153
-
154
-
155
 |
 |
