Western Digital WDBVHT0080JCH User Manual - Page 51
Keep Original, Keep Both, Replace, Does not restore the item from the backup drive.
 |
View all Western Digital WDBVHT0080JCH manuals
Add to My Manuals
Save this manual to your list of manuals |
Page 51 highlights
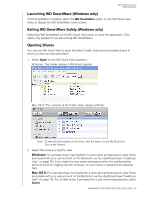
MY BOOK LIVE DUO USER MANUAL 3. Click the arrows or the time line on the right of the screen to browse through all the backups Time Machine has created: Backups s Arrows Time Line Restore button 4. Select the item you want to restore, and click the Restore button at the bottom right to display the Copy message: 5. Click the button for the desired option: • Keep Original-Does not restore the item from the backup drive. • Keep Both-The original item remains and the backed-up item is added to the selected location on your computer. • Replace-The backed-up item replaces the original item. Note: In Finder, you will see a folder that corresponds to your backup drive that includes the word "backup." This is a protected folder that is automatically created and where all of your backups reside. It serves no purpose for users other than to store Time Machine backups. In fact, if you try to connect to it, you will get a "Connection Failed" message. BACKING UP AND RETRIEVING FILES - 45
-
 1
1 -
2
-
3
-
4
-
5
-
6
-
7
-
8
-
9
-
10
-
11
-
12
-
13
-
14
-
15
-
16
-
17
-
18
-
19
-
20
-
21
-
22
-
23
-
24
-
25
-
26
-
27
-
28
-
29
-
30
-
31
-
32
-
33
-
34
-
35
-
36
-
37
-
38
-
39
-
40
-
41
-
42
-
43
-
44
-
45
-
 46
46 -
 47
47 -
 48
48 -
 49
49 -
 50
50 -
 51
51 -
 52
52 -
 53
53 -
 54
54 -
 55
55 -
 56
56 -
57
-
58
-
59
-
60
-
61
-
62
-
63
-
64
-
65
-
66
-
67
-
68
-
69
-
70
-
71
-
72
-
73
-
74
-
75
-
76
-
77
-
78
-
79
-
80
-
81
-
82
-
83
-
84
-
85
-
86
-
87
-
88
-
89
-
90
-
91
-
92
-
93
-
94
-
95
-
96
-
97
-
98
-
99
-
100
-
101
-
102
-
103
-
104
-
105
-
106
-
107
-
108
-
109
-
110
-
111
-
112
-
113
-
114
-
115
-
116
-
117
-
118
-
119
-
120
-
121
-
122
-
123
-
124
-
125
-
126
-
127
-
128
-
129
-
130
-
131
-
132
-
133
-
134
-
135
-
136
-
137
-
138
-
139
-
140
-
141
-
142
-
143
-
144
-
145
-
146
-
147
-
148
-
149
-
150
-
151
-
152
-
153
-
154
-
155
 |
 |
