Xerox 7500DX Phaser 7500 User Guide - Page 45
UNIX (Linux), Quick Install Steps - hp drivers
 |
UPC - 095205706048
View all Xerox 7500DX manuals
Add to My Manuals
Save this manual to your list of manuals |
Page 45 highlights
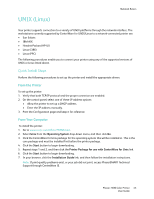
UNIX (Linux) Network Basics Your printer supports connection to a variety of UNIX platforms through the network interface. The workstations currently supported by CentreWare for UNIX/Linux to a network-connected printer are: • Sun Solaris • IBM AIX • Hewlett-Packard HP-UX • Linux (i386) • Linux (PPC) The following procedures enable you to connect your printer using any of the supported versions of UNIX or Linux listed above. Quick Install Steps Perform the following procedures to set up the printer and install the appropriate drivers. From the Printer To set up the printer: 1. Verify that both TCP/IP protocol and the proper connector are enabled. 2. On the control panel, select one of these IP address options: • Allow the printer to set up a DHCP address. • Enter the IP address manually. 3. Print the Configuration page and keep it for reference. From Your Computer To install the printer: 1. Go to www.xerox.com/office/7500drivers. 2. Select Unix from the Operating System drop-down menu, and then click Go. 3. Click the CentreWare for Unix package for the operating system this will be installed in. This is the core package and must be installed first before the printer package. 4. Click the Start button to begin downloading. 5. Repeat steps 1 and 2, and then click the Printer Package for use with CentreWare for Unix link. 6. Click the Start button to begin downloading. 7. In your browser, click the Installation Guide link, and then follow the installation instructions. Note: If print-quality problems exist, or your job did not print, access PhaserSMART Technical Support through CentreWare IS. Phaser 7500 Color Printer 45 User Guide
-
 1
1 -
2
-
3
-
4
-
5
-
6
-
7
-
8
-
9
-
10
-
11
-
12
-
13
-
14
-
15
-
16
-
17
-
18
-
19
-
20
-
21
-
22
-
23
-
24
-
25
-
26
-
27
-
28
-
29
-
30
-
31
-
32
-
33
-
34
-
35
-
36
-
37
-
38
-
39
-
 40
40 -
 41
41 -
 42
42 -
 43
43 -
 44
44 -
 45
45 -
 46
46 -
 47
47 -
 48
48 -
 49
49 -
 50
50 -
51
-
52
-
53
-
54
-
55
-
56
-
57
-
58
-
59
-
60
-
61
-
62
-
63
-
64
-
65
-
66
-
67
-
68
-
69
-
70
-
71
-
72
-
73
-
74
-
75
-
76
-
77
-
78
-
79
-
80
-
81
-
82
-
83
-
84
-
85
-
86
-
87
-
88
-
89
-
90
-
91
-
92
-
93
-
94
-
95
-
96
-
97
-
98
-
99
-
100
-
101
-
102
-
103
-
104
-
105
-
106
-
107
-
108
-
109
-
110
-
111
-
112
-
113
-
114
-
115
-
116
-
117
-
118
-
119
-
120
-
121
-
122
-
123
-
124
-
125
-
126
-
127
-
128
-
129
-
130
-
131
-
132
-
133
-
134
-
135
-
136
-
137
-
138
-
139
-
140
-
141
-
142
-
143
-
144
-
145
-
146
-
147
-
148
-
149
-
150
-
151
-
152
-
153
-
154
-
155
-
156
-
157
-
158
-
159
-
160
-
161
-
162
-
163
-
164
 |
 |
