Xerox 7500DX Phaser 7500 User Guide - Page 72
Using Custom Paper Types, Address, Properties, General, Save Changes, Change setup
 |
UPC - 095205706048
View all Xerox 7500DX manuals
Add to My Manuals
Save this manual to your list of manuals |
Page 72 highlights
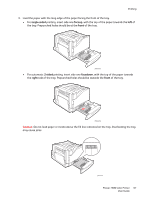
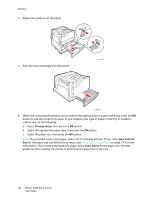
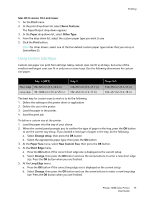
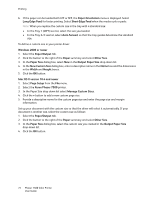
Printing Using Custom Paper Types Use this feature to create your own custom paper type with specific settings that you can reuse for routine print jobs, for example, monthly reports. Custom paper types are created in CentreWare IS and appear in the printer driver, control panel, and CentreWare IS. You can define up to 5 custom names and assign base paper types to them. The control panel always lists all five types, but the driver only lists the ones that are not hidden. Note: Only Windows or Macintosh drivers connected over a network can show the redefined names and hide the types. Other drivers show all five default names. To modify custom paper types: 1. Launch your Web browser. 2. Enter the printer's IP address in the browser's Address field. 3. Click Properties. 4. Select the General folder on the left navigation panel. 5. Select Custom Paper Types. 6. Enter or modify the settings, then click Save Changes at the bottom of the page. Notes: • Uncheck the Hide checkbox in order for the custom paper type to appear in the network connected Windows or Macintosh printer driver. • For more information about creating custom paper types, click the Help button on the Properties tab to view the online help. To load custom paper types in your printer: 1. Load the paper into the tray of your choice. 2. When the control panel prompts you to confirm the type of paper in the tray, select Change setup, then press the OK button. 3. Select the appropriate paper type, then press the OK button. 4. Select the appropriate paper size, then press the OK button. To select custom paper types in your printer driver: Windows 2000 or newer 1. Select the Paper/Output tab. 2. Click the button to the right of the Paper summary and select Other Type. 3. From the drop-down list, select the custom paper type you want to use. 4. Click the OK button. 72 Phaser 7500 Color Printer User Guide
-
 1
1 -
2
-
3
-
4
-
5
-
6
-
7
-
8
-
9
-
10
-
11
-
12
-
13
-
14
-
15
-
16
-
17
-
18
-
19
-
20
-
21
-
22
-
23
-
24
-
25
-
26
-
27
-
28
-
29
-
30
-
31
-
32
-
33
-
34
-
35
-
36
-
37
-
38
-
39
-
40
-
41
-
42
-
43
-
44
-
45
-
46
-
47
-
48
-
49
-
50
-
51
-
52
-
53
-
54
-
55
-
56
-
57
-
58
-
59
-
60
-
61
-
62
-
63
-
64
-
65
-
66
-
 67
67 -
 68
68 -
 69
69 -
 70
70 -
 71
71 -
 72
72 -
 73
73 -
 74
74 -
 75
75 -
 76
76 -
 77
77 -
78
-
79
-
80
-
81
-
82
-
83
-
84
-
85
-
86
-
87
-
88
-
89
-
90
-
91
-
92
-
93
-
94
-
95
-
96
-
97
-
98
-
99
-
100
-
101
-
102
-
103
-
104
-
105
-
106
-
107
-
108
-
109
-
110
-
111
-
112
-
113
-
114
-
115
-
116
-
117
-
118
-
119
-
120
-
121
-
122
-
123
-
124
-
125
-
126
-
127
-
128
-
129
-
130
-
131
-
132
-
133
-
134
-
135
-
136
-
137
-
138
-
139
-
140
-
141
-
142
-
143
-
144
-
145
-
146
-
147
-
148
-
149
-
150
-
151
-
152
-
153
-
154
-
155
-
156
-
157
-
158
-
159
-
160
-
161
-
162
-
163
-
164
 |
 |