Xerox 7500DX Phaser 7500 User Guide - Page 62
Using Manual Feed in Tray 1 (MPT), Loading Paper in Trays 2-5, Selecting Manual Feed Using Windows
 |
UPC - 095205706048
View all Xerox 7500DX manuals
Add to My Manuals
Save this manual to your list of manuals |
Page 62 highlights
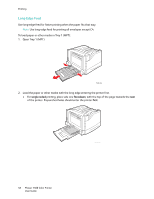
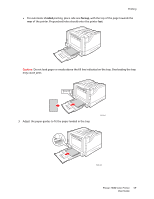
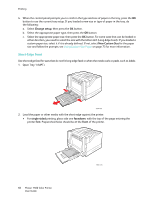
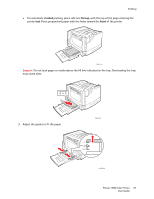
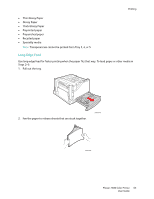
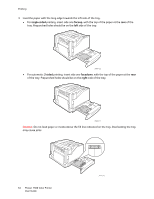
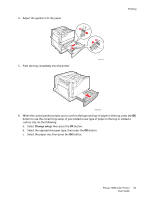
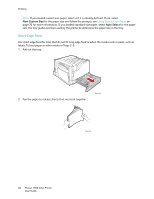
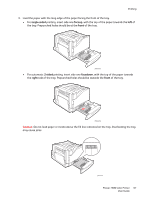
Printing 4. When the control panel prompts you to confirm the type and size of paper in the tray, press the OK button to use the current tray setup. If you loaded a new size or type of paper in the tray, do the following: a. Select Change setup, then press the OK button. b. Select the appropriate paper type, then press the OK button. c. Select the appropriate paper size, then press the OK button. For some sizes that can be loaded in either direction, you need to select the size with the letters SEF (Short-Edge Feed). If you loaded a custom paper size, select it if it is already defined. If not, select New Custom Size for the paper size and follow the prompts; see Using Custom Size Paper on page 73 for more information. Using Manual Feed in Tray 1 (MPT) If you are using paper that you do not want others to use, you can have the printer prompt you when it is time to load the paper for your print job. Selecting Manual Feed Using Windows To select manual feed using Windows 2000, Windows XP, or Windows Server 2003: 1. In the Windows printer driver, click the Paper/Output tab. 2. Select the arrow next to the Paper section and select Select By Tray > Manual Feed (Tray 1). 3. When prompted by the control panel, remove the paper from Tray 1 (MPT) (if any). 4. Load the appropriate paper for your job into the tray. Selecting Manual Feed Using Macintosh To select manual feed using Macintosh: 1. In the Print dialog box, select Paper Feed from the drop-down list. 2. Select Manual Feed Tray 1 (MPT) in the All pages from drop-down list. 3. Submit your print job. 4. When prompted by the control panel, remove the paper from Tray 1 (MPT) (if any). 5. Load the appropriate paper for your job into the tray. Loading Paper in Trays 2-5 Use Trays 2-5 for the following paper types: • Plain paper • Heavy plain paper • Transparencies • Thin Card Stock • Card Stock • Thick Card Stock • Letterhead 62 Phaser 7500 Color Printer User Guide
-
 1
1 -
2
-
3
-
4
-
5
-
6
-
7
-
8
-
9
-
10
-
11
-
12
-
13
-
14
-
15
-
16
-
17
-
18
-
19
-
20
-
21
-
22
-
23
-
24
-
25
-
26
-
27
-
28
-
29
-
30
-
31
-
32
-
33
-
34
-
35
-
36
-
37
-
38
-
39
-
40
-
41
-
42
-
43
-
44
-
45
-
46
-
47
-
48
-
49
-
50
-
51
-
52
-
53
-
54
-
55
-
56
-
 57
57 -
 58
58 -
 59
59 -
 60
60 -
 61
61 -
 62
62 -
 63
63 -
 64
64 -
 65
65 -
 66
66 -
 67
67 -
68
-
69
-
70
-
71
-
72
-
73
-
74
-
75
-
76
-
77
-
78
-
79
-
80
-
81
-
82
-
83
-
84
-
85
-
86
-
87
-
88
-
89
-
90
-
91
-
92
-
93
-
94
-
95
-
96
-
97
-
98
-
99
-
100
-
101
-
102
-
103
-
104
-
105
-
106
-
107
-
108
-
109
-
110
-
111
-
112
-
113
-
114
-
115
-
116
-
117
-
118
-
119
-
120
-
121
-
122
-
123
-
124
-
125
-
126
-
127
-
128
-
129
-
130
-
131
-
132
-
133
-
134
-
135
-
136
-
137
-
138
-
139
-
140
-
141
-
142
-
143
-
144
-
145
-
146
-
147
-
148
-
149
-
150
-
151
-
152
-
153
-
154
-
155
-
156
-
157
-
158
-
159
-
160
-
161
-
162
-
163
-
164
 |
 |