Xerox M118i User Guide
Xerox M118i - WorkCentre B/W Laser Manual
 |
UPC - 095205219265
View all Xerox M118i manuals
Add to My Manuals
Save this manual to your list of manuals |
Xerox M118i manual content summary:
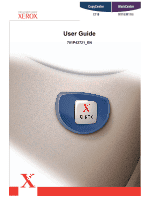
- Xerox M118i | User Guide - Page 1
CopyCentre C118 WorkCentre M118/M118i User Guide 701P42721_EN - Xerox M118i | User Guide - Page 2
. See the About License section for detailed information on licensed products. The information in this document is correct at the time of publication. Xerox reserves the right at any time to change the information without notice. Changes and technical updates will be added in subsequent editions of - Xerox M118i | User Guide - Page 3
Contents Table of Contents Table of Contents 3 1 Before Using the Machine 11 Xerox Welcome Center 11 Conventions 12 Related Information Sources 14 Safety Notes 14 WARNING - System Controls 33 Power On/Off 34 Powering On 34 Powering Off 35 Xerox CopyCentre/WorkCentre 118 User Guide 3 - Xerox M118i | User Guide - Page 4
Features 62 3. Specify the Destination 63 4. Start the Fax Job 64 5. Confirm the Fax Job in the Job Status 64 Stop the Fax Job 64 4 Xerox CopyCentre/WorkCentre 118 User Guide - Xerox M118i | User Guide - Page 5
the Job Status 86 Stop the E-mail Job 86 Specifying Destinations 87 E-mail Address 87 Address Enter/Next 87 Address Book 88 Speed Dial 89 Xerox CopyCentre/WorkCentre 118 User Guide 5 - Xerox M118i | User Guide - Page 6
Support 115 8 Paper and Other Media 117 Loading Paper 117 Preparing Paper for Loading 117 Loading Paper into the Paper Trays 117 Tray 5 (Bypass Tray 119 Auto Tray Switching 120 Storing and Handling Paper 120 Supported Paper Sizes and Types 120 6 Xerox CopyCentre/WorkCentre 118 User Guide - Xerox M118i | User Guide - Page 7
Table of Contents Supported Paper Sizes 121 Supported Paper Types 123 9 Setups 125 Setups Procedure 125 Customize Screens 136 Print Settings 137 Network/Port 137 System Settings 142 Printer Settings 143 Allocate Memory 145 Initialize/Delete Data 145 Software Option 146 Fax Settings 146 - Xerox M118i | User Guide - Page 8
167 Inserting the New Drum Cartridge 167 Replacing the Toner Cartridge 169 Removing the Old Toner Cartridge 169 Inserting the New Toner Cartridge 170 11 Problem Solving 171 Fault Clearance Procedure 171 8 Xerox CopyCentre/WorkCentre 118 User Guide - Xerox M118i | User Guide - Page 9
Feeder Cover 177 Paper Jams in the Document Exit 179 Troubleshooting Tables 179 Fault Codes 185 Output Quality 194 Xerox Welcome Center 194 12 Specifications 197 Machine Specifications 197 216 14 Glossary 217 Terms Defined 217 15 Index ...225 Xerox CopyCentre/WorkCentre 118 User Guide 9 - Xerox M118i | User Guide - Page 10
10 Xerox CopyCentre/WorkCentre 118 User Guide - Xerox M118i | User Guide - Page 11
. This User Guide provides detailed information, technical specifications and procedures for using the integral features of the machine. Xerox Welcome Center If you need assistance during or after product installation, visit the Xerox web site for on-line solutions and support. www.xerox.com If - Xerox M118i | User Guide - Page 12
Conventions This section describes the conventions used throughout this User Guide. In this guide, you will find that some terms are used interchangeably: • Paper is synonymous with media. • Document is synonymous with original. • Xerox CopyCentre/WorkCentre 118 is synonymous with the machine. Key - Xerox M118i | User Guide - Page 13
Notes are statements that provide additional information. For example: NOTE: If the document feeder is not fitted to the machine, this feature is not available. Xerox CopyCentre/WorkCentre 118 User Guide 13 - Xerox M118i | User Guide - Page 14
additional sources of information are available for the machine. • Xerox CopyCentre/WorkCentre 118 Quick Reference Guide • Xerox CopyCentre/WorkCentre 118 System Administration Guide • The On-line Help system (Print Drivers and CentreWare Utilities) • The CentreWare Utilities Documentation (HTML - Xerox M118i | User Guide - Page 15
to be moved to a different location, contact a Xerox Service Representative or your authorized local representative or service support organization. Z Improper connection of the equipment-grounding any kind into slots or openings on the equipment. Xerox CopyCentre/WorkCentre 118 User Guide 15 - Xerox M118i | User Guide - Page 16
outlet. • Always follow all warnings and instructions that are marked on or supplied with the equipment. • Always exercise care when moving or relocating equipment. Please contact your local Xerox/Fuji Xerox Service Department, or your local support organization to arrange relocation of the product - Xerox M118i | User Guide - Page 17
servicing. See installation instructions for minimum dimensions. • Always use materials and supplies specifically designed for your Xerox/Fuji Xerox that are fastened with screws. There are no parts behind these covers that you can maintain or service. • Do not perform any maintenance procedures - Xerox M118i | User Guide - Page 18
markets please contact your Service Provider. For Consumables Store all consumables in accordance with the instructions given on the package limits for a class A digital device, pursuant to Part 15 of the FCC Rules. These limits are designed system. 18 Xerox CopyCentre/WorkCentre 118 User Guide - Xerox M118i | User Guide - Page 19
Information Regulatory Information CE Mark The CE mark applied to this product symbolizes Xerox's declaration of conformity with the following applicable Directives of the European Union , refer to customer documentation and follow the steps provided. Xerox CopyCentre/WorkCentre 118 User Guide 19 - Xerox M118i | User Guide - Page 20
instructions is part of the Guide. If the equipment is causing harm to the telephone network, the Telephone Company may request that you disconnect the equipment until the problem is resolved. Repairs to the machine should be made only by a Xerox Service Representative or an authorized Xerox Service - Xerox M118i | User Guide - Page 21
Xerox for pan-European single terminal connection to the analogue public switched telephone network (PSTN) in accordance with Directive 1999/5/EC. The product has been designed to work with the national PSTNs and compatible PBXs of the following countries: Xerox CopyCentre/WorkCentre 118 User Guide - Xerox M118i | User Guide - Page 22
In the event of a problem you should contact your authorized external control apparatus not authorized by Xerox, will invalidate its certification. an ENERGY STAR® partner, Xerox Corporation/Fuji Xerox has determined that the promote energy-efficient copiers, printers, fax, multifunction machine, - Xerox M118i | User Guide - Page 23
responsible products and services. Copier, printer, digital press and fax products must meet energy efficiency and emissions criteria, and exhibit compatibility with recycled supplies. Currently, Environmental ChoiceM has more than 1600 approved products and 140 licensees. Xerox has been a leader - Xerox M118i | User Guide - Page 24
, EXEMPLARY, OR CONSEQUENTIAL DAMAGES (INCLUDING, BUT NOT LIMITED TO, PROCUREMENT OF SUBSTITUTE GOODS OR SERVICES; LOSS OF USE, DATA, OR PROFITS; OR BUSINESS INTERRUPTION) HOWEVER CAUSED AND ON ANY use in the OpenSSL Toolkit (http://www.openssl.org/)" 24 Xerox CopyCentre/WorkCentre 118 User Guide - Xerox M118i | User Guide - Page 25
, BUT NOT LIMITED TO, PROCUREMENT OF SUBSTITUTE GOODS OR SERVICES; LOSS OF USE, DATA, OR PROFITS; OR BUSINESS product, Eric Young should be given attribution as the author of the parts of the library used. This can be in the form of a textual Xerox CopyCentre/WorkCentre 118 User Guide 25 - Xerox M118i | User Guide - Page 26
, EXEMPLARY, OR CONSEQUENTIAL DAMAGES (INCLUDING, BUT NOT LIMITED TO, PROCUREMENT OF SUBSTITUTE GOODS OR SERVICES; LOSS OF USE, DATA, OR PROFITS; OR BUSINESS INTERRUPTION) HOWEVER CAUSED AND ON ANY than 150% of the linear dimensions of the original. 26 Xerox CopyCentre/WorkCentre 118 User Guide - Xerox M118i | User Guide - Page 27
Dependency Status Court Record Previous military service Physical or mental condition Exception: is also prohibited in certain states: Automobile Licenses - Drivers' Licenses - Automobile Certificates of Title. The above list court of law. Xerox CopyCentre/WorkCentre 118 User Guide 27 - Xerox M118i | User Guide - Page 28
(with intent to falsely cause same to purport to have been printed by the Queen's Printer for Canada, or the equivalent printer for a province). 6. Marks, brands, seals, wrappers or designs used by or on . In case of doubt, contact your legal counsel. 28 Xerox CopyCentre/WorkCentre 118 User Guide - Xerox M118i | User Guide - Page 29
Xerox Sales Representative (1-800-ASK-XEROX) to determine whether this Xerox product is part of the program. For more information about Xerox environmental programs, visit www.xerox.com/environment.html. If your product is not part of the Xerox .org. Xerox CopyCentre/WorkCentre 118 User Guide 29 - Xerox M118i | User Guide - Page 30
1 Before Using the Machine 30 Xerox CopyCentre/WorkCentre 118 User Guide - Xerox M118i | User Guide - Page 31
information about available options not described here, visit the Xerox web site or contact your Xerox Sales Representative. Identifying the Machine Components The following diagram Feeder. A maximum of three optional paper trays can be attached. Xerox CopyCentre/WorkCentre 118 User Guide 31 - Xerox M118i | User Guide - Page 32
standard paper. Also load other types of sheets in this tray, such as transparencies and labels that cannot be loaded in Tray 1. To load paper manually, open Tray 5 (bypass tray). 32 Xerox CopyCentre/WorkCentre 118 User Guide - Xerox M118i | User Guide - Page 33
5 6 7 8 Allows you to send and receive documents manually. This button works only for faxing with the document feeder; When the document is loaded into the feeder, you mode. Also allows you to cancel this mode. Xerox CopyCentre/WorkCentre 118 User Guide 33 - Xerox M118i | User Guide - Page 34
Specifications in the Specifications chapter on page 210. The machine is ready to make copies about 25 seconds after the power is switched on. 34 Xerox CopyCentre/WorkCentre 118 User Guide - Xerox M118i | User Guide - Page 35
. If the GFI has been triggered, the button will be in the tripped position. To restore power to the machine, press the button. Xerox CopyCentre/WorkCentre 118 User Guide 35 - Xerox M118i | User Guide - Page 36
up when you press it, or if power is not restored by this procedure, contact the Xerox Welcome Center. Power Saver Modes The machine has energy saving features that significantly reduce the power consumption Saver in the Setups chapter on page 128. 36 Xerox CopyCentre/WorkCentre 118 User Guide - Xerox M118i | User Guide - Page 37
] screen using the button. 6. Press the button. 7. Select [Timer Settings] on the [Common Settings] screen using the button. 8. Press the button. Xerox CopyCentre/WorkCentre 118 User Guide 37 - Xerox M118i | User Guide - Page 38
contains three screens which provide access to the many Copy features. Features such as Reduce/Enlarge, Multiple-Up and Mixed Size Originals are available to support all of your copying requirements. 38 Xerox CopyCentre/WorkCentre 118 User Guide - Xerox M118i | User Guide - Page 39
the E-mail features. Features such as Lighten/Darken, Scan Size and 2 Sided Originals are available to support all of your e-mail requirements. 1. Press the button on the control panel. 2. Press screen after you press the button. Xerox CopyCentre/WorkCentre 118 User Guide 39 - Xerox M118i | User Guide - Page 40
suspended, and all finished jobs in the system. The contents of each screen may differ depending on the type or status of the job. 40 Xerox CopyCentre/WorkCentre 118 User Guide - Xerox M118i | User Guide - Page 41
42 Consumables - page 42 Report/List (Non-print Jobs) - page 42 Report/List (Print Jobs) - page 43 Billing Meter - page 45 Print Mode - page 45 Xerox CopyCentre/WorkCentre 118 User Guide 41 - Xerox M118i | User Guide - Page 42
the button. 3. Select the required option. 4. To print the selected report or list, press the button, and then press the button. 42 Xerox CopyCentre/WorkCentre 118 User Guide - Xerox M118i | User Guide - Page 43
or password, or information about the forwarding destination. Report/List (Print Jobs) This screen allows you to print various reports and lists for print jobs. Xerox CopyCentre/WorkCentre 118 User Guide 43 - Xerox M118i | User Guide - Page 44
[Job Status] column. For details on the error description, refer to Fault Codes in the Problem Solving chapter on page 185. Error History Report Prints information of up to the latest 50 errors • PCL Form List - Prints a list of the registered PCL form. 44 Xerox CopyCentre/WorkCentre 118 User Guide - Xerox M118i | User Guide - Page 45
[Print Mode] on the [Machine Status] screen using the button. 2. Press the button. On-line Sets the printer mode to online. Off-line Sets the printer mode to offline. When offline, the machine cannot receive data or process printing. Xerox CopyCentre/WorkCentre 118 User Guide 45 - Xerox M118i | User Guide - Page 46
image enhancement. Image enhancement is a feature that makes the boundary line between black and white smoother to decrease jags and enhance the visual appearance. 46 Xerox CopyCentre/WorkCentre 118 User Guide - Xerox M118i | User Guide - Page 47
the settings as required. 10. Press the button. If the Auditron feature is enabled, enter a registered password for each account before using the machine. Xerox CopyCentre/WorkCentre 118 User Guide 47 - Xerox M118i | User Guide - Page 48
. Xerox recommends recycled paper with 20% post consumer content which can be obtained both through Xerox and other office suppliers. Contact your Xerox representative or go to www.xerox.com for more information on other types of recycled paper. 48 Xerox CopyCentre/WorkCentre 118 User Guide - Xerox M118i | User Guide - Page 49
Document Feeder (DADF) and can scan both sides of a document automatically. The document feeder can hold up to 50 sheets of 81.4 g/m2 (20lb) paper. Xerox CopyCentre/WorkCentre 118 User Guide 49 - Xerox M118i | User Guide - Page 50
of the machine. 3. Place the stack in the middle of the guides aligning the left edge with the document feeder tray, and position the guides to just touch the edge of the documents. When [Paper Supply] you can change the copy settings for each page. 50 Xerox CopyCentre/WorkCentre 118 User Guide - Xerox M118i | User Guide - Page 51
time (determined by the Key Operator), the settings will be reset. For more information, refer to Auto Clear in the Setups chapter on page 128. Xerox CopyCentre/WorkCentre 118 User Guide 51 - Xerox M118i | User Guide - Page 52
. Each document is scanned only once. The number of copies remaining is displayed in the upper right-hand corner of the screen. button 52 Xerox CopyCentre/WorkCentre 118 User Guide - Xerox M118i | User Guide - Page 53
NOTE: If a problem, such as a document is displayed: "No Active Jobs". Stop the Copy Job Follow the steps below to manually cancel an activated copy job. 1. Press the button on the control panel to to clear the suspended job. button Xerox CopyCentre/WorkCentre 118 User Guide 53 - Xerox M118i | User Guide - Page 54
Setups chapter on page 136. For information on the sizes and types of media supported for the machine, refer to Supported Paper Sizes and Types in the Paper and Other Media chapter on page 120. control panel provides a quick way of using this feature. 54 Xerox CopyCentre/WorkCentre 118 User Guide - Xerox M118i | User Guide - Page 55
paper size on the [Variable Size] screen between millimeters and inches. For more information, refer to Millimeters/Inches in the Setups chapter on page 131. Xerox CopyCentre/WorkCentre 118 User Guide 55 - Xerox M118i | User Guide - Page 56
> button. The one preset ratio can be set up by the Key Operator. Manual Entry There are two methods of manual entry for the reduction/enlargement ratio. • Select [100%] , and then pressing the ratio directly using numeric keypad on the control panel. 56 Xerox CopyCentre/WorkCentre 118 User Guide - Xerox M118i | User Guide - Page 57
. Text & Photo Use this option to copy documents with a mixture of text and photographs. Photo Use this option to copy documents that contain photographs only. Xerox CopyCentre/WorkCentre 118 User Guide 57 - Xerox M118i | User Guide - Page 58
] using the button. 3. Select the required option. 4. Press the button. 1J1 Sided Produces single-sided copies from single-sided documents. 1J2 Sided 58 Xerox CopyCentre/WorkCentre 118 User Guide - Xerox M118i | User Guide - Page 59
[Uncollated] for sorting copy output. The [Collated] option is applied when you use the document feeder. When you use the document glass, [Uncollated] is applied. Xerox CopyCentre/WorkCentre 118 User Guide 59 - Xerox M118i | User Guide - Page 60
disable this feature and make copies of the mixed size originals, the size of the first page will be the size for all copies. 60 Xerox CopyCentre/WorkCentre 118 User Guide - Xerox M118i | User Guide - Page 61
, the Direct Fax feature is available when the optional Printer Kit is installed. Direct Fax allows you to transmit client. For more information about Direct Fax, refer to PCL driver On-Line Help. Fax Procedure This section describes the basic procedure Xerox CopyCentre/WorkCentre 118 User Guide 61 - Xerox M118i | User Guide - Page 62
in the Setups chapter on page 128. 1. Press the button on the control panel. Ensure that the Fax screen is displayed. button 62 Xerox CopyCentre/WorkCentre 118 User Guide - Xerox M118i | User Guide - Page 63
, a pause is required after this character. Press the button on the control panel before continuing to enter the fax number. When you dial manually, Dial Pause is not required; instead wait for the external dial tone before proceeding. Xerox CopyCentre/WorkCentre 118 User Guide 63 - Xerox M118i | User Guide - Page 64
on the control panel to scan and send the documents. button NOTE: If a problem, such as a document jam or memory full error, occurrs while scanning multiple documents, the job Job Follow step 1 to manually cancel a fax job during document scanning. After scanning the document, follow steps 2 through - Xerox M118i | User Guide - Page 65
NOTE: You can also specify multiple destinations at once (serial broadcast transmission) without pressing the button, using Speed Dial, One Touch Dial. Xerox CopyCentre/WorkCentre 118 User Guide 65 - Xerox M118i | User Guide - Page 66
has been entered using Speed Dial or One Touch Dial by pressing the button once. When dialing manually, you can delete the number one digit at a time using the button. Address Book Use from the list of destinations registered in Speed Dial. 66 Xerox CopyCentre/WorkCentre 118 User Guide - Xerox M118i | User Guide - Page 67
page using the flip cards. • Page 1 displays Speed Dial codes 001-018. • Page 2 displays Speed Dial codes 019-036. • Page 3 displays Fax Programs p01-p18. Xerox CopyCentre/WorkCentre 118 User Guide 67 - Xerox M118i | User Guide - Page 68
the relay station. Use F Code to specify a relay station and destinations if they also support relay broadcasting using F Code. For more information about relay broadcasting using F Code, refer - page 70 Reduce/Enlarge - page 71 Send Header - page 71 68 Xerox CopyCentre/WorkCentre 118 User Guide - Xerox M118i | User Guide - Page 69
the Fax screen. 2. Select [Resolution] using the button. 3. Select the required option. 4. Press the button. Text Select this option when sending a text document. Xerox CopyCentre/WorkCentre 118 User Guide 69 - Xerox M118i | User Guide - Page 70
button to display [Scan Size] on the Fax screen. 2. Select [Scan Size] using the button. 3. Select the required option. 4. Press the button. 70 Xerox CopyCentre/WorkCentre 118 User Guide - Xerox M118i | User Guide - Page 71
Speed Dial. 1. Press the or button to display [Send Header] on the Fax screen. 2. Select [Send Header] using the button. 3. Select the required option. Xerox CopyCentre/WorkCentre 118 User Guide 71 - Xerox M118i | User Guide - Page 72
the button. Undelivered Prints a report only when transmission fails. Off Never prints a report. On Always prints a report no matter how the transmission ends. 72 Xerox CopyCentre/WorkCentre 118 User Guide - Xerox M118i | User Guide - Page 73
by ITU Telecommunication Standardization Sector (ITU-T), and allows communication with remote machines that support the same standard, regardless of their manufacturers. You must know the F the Fax screen. 2. Select [F Code] using the button. Xerox CopyCentre/WorkCentre 118 User Guide 73 - Xerox M118i | User Guide - Page 74
button to clear the entered value, and then enter the hour of the delayed start time using the numeric keypad on the control panel. 74 Xerox CopyCentre/WorkCentre 118 User Guide - Xerox M118i | User Guide - Page 75
print. Press the button to clear the entered value, and then enter the required number of copies using the numeric keypad on the control panel. Xerox CopyCentre/WorkCentre 118 User Guide 75 - Xerox M118i | User Guide - Page 76
. • Rotate Side 2 Off - Select to scan double-sided documents opened side by side. • Rotate Side 2 On - Select to scan double-sided documents opened vertically. 76 Xerox CopyCentre/WorkCentre 118 User Guide - Xerox M118i | User Guide - Page 77
], and [Trans. Report]. For more information, refer to each option. NOTE: You can return to the [Polling] screen by selecting [Cancel] using the button. Xerox CopyCentre/WorkCentre 118 User Guide 77 - Xerox M118i | User Guide - Page 78
the remote machine. You can specify only one destination for retrieving a document (Polling). When you select this option, the [Browse (Fax In)] screen displays. 78 Xerox CopyCentre/WorkCentre 118 User Guide - Xerox M118i | User Guide - Page 79
you to post a document if the bulletin board is empty. If a document is already posted on the bulletin board, the new document will overwrite it. Xerox CopyCentre/WorkCentre 118 User Guide 79 - Xerox M118i | User Guide - Page 80
the or button to display [Chain Dialing] on the Fax screen. 2. Select [Chain Dialing] using the button. 3. Select [On] to enable the feature. 80 Xerox CopyCentre/WorkCentre 118 User Guide - Xerox M118i | User Guide - Page 81
. For more information, refer to Line Monitor in the Setups chapter on page 129. 1. Press the button on the control panel. Press the button again or the button to exit the On-Hook mode. button Xerox CopyCentre/WorkCentre 118 User Guide 81 - Xerox M118i | User Guide - Page 82
4 Fax 82 Xerox CopyCentre/WorkCentre 118 User Guide - Xerox M118i | User Guide - Page 83
are dependent on your machine configuration. To use these features, additional Memory (for Printer), Fax Kit, Printer Kit, and Scan to Email Kit must be installed. With this feature, documents . Also, you can change the scan settings for each page. Xerox CopyCentre/WorkCentre 118 User Guide 83 - Xerox M118i | User Guide - Page 84
in the Setups chapter on page 128. 1. Press the button on the control panel. Ensure that the E-mail screen is displayed. button 84 Xerox CopyCentre/WorkCentre 118 User Guide - Xerox M118i | User Guide - Page 85
button on the control panel to scan and send the documents. button NOTE: If the trouble, such as document jam or memory full, is occurred while scanning multiple documents, the job is memory full error occurs, delete unnecessary files. Xerox CopyCentre/WorkCentre 118 User Guide 85 - Xerox M118i | User Guide - Page 86
the Product Overview chapter on page 40. Stop the E-mail Job Follow the steps below to manually cancel an activated e-mail job. 1. Press the button on the control panel to cancel Select> button. 9. Select [Stop (Delete)] using the button. 86 Xerox CopyCentre/WorkCentre 118 User Guide - Xerox M118i | User Guide - Page 87
one time using Speed Dial, One Touch Dial, and the numeric keypad dialing. Up to 12 destinations can be specified using the numeric keypad dialing. Xerox CopyCentre/WorkCentre 118 User Guide 87 - Xerox M118i | User Guide - Page 88
Speed Dial or One Touch Dial by pressing the button once. When entering the e-mail address manually, you can delete the character one digit at a time using the button. Address Book . The list of addresses that match the entered index displays. 88 Xerox CopyCentre/WorkCentre 118 User Guide - Xerox M118i | User Guide - Page 89
the E-mail feature). 1. If necessary, flip the One Touch panels to access the required One Touch button. 2. Press the One Touch button. One Touch buttons Xerox CopyCentre/WorkCentre 118 User Guide 89 - Xerox M118i | User Guide - Page 90
Text Specifies a 600 dpi resolution for documents that contain text only. 200 dpi Photo Specifies a 200 dpi resolution for documents that contain photographs only. 90 Xerox CopyCentre/WorkCentre 118 User Guide - Xerox M118i | User Guide - Page 91
size. For more information about sizes that can be automatically detected, refer to When Using the E-mail Feature in the Specifications chapter on page 205. Xerox CopyCentre/WorkCentre 118 User Guide 91 - Xerox M118i | User Guide - Page 92
(Portable Document Format). Transmission Report With this feature enabled, the machine prints a report at the end of the transmission that shows the transmission result. 92 Xerox CopyCentre/WorkCentre 118 User Guide - Xerox M118i | User Guide - Page 93
options. • Rotate Side 2 Off - Select to scan double-sided documents opened side by side. • Rotate Side 2 On - Select to scan double-sided documents opened vertically. Xerox CopyCentre/WorkCentre 118 User Guide 93 - Xerox M118i | User Guide - Page 94
the alphanumeric keypad. 3. Select [Confirm] using the button or press the button. The list of addresses that match the entered index displays. 94 Xerox CopyCentre/WorkCentre 118 User Guide - Xerox M118i | User Guide - Page 95
without using the print driver. This is called driver must be installed on the PC. If you have installed an earlier version of the printer driver, uninstall it first before installing the new version. For instructions on installing the print driver and prints each divided part onto multiple sheets - Xerox M118i | User Guide - Page 96
about print features for UNIX and Macintosh computers is provided separately. Refer to the following documentation for procedures on sending print jobs. • UNIX - System Administration Guide • Macintosh - PostScript User Guide 96 Xerox CopyCentre/WorkCentre 118 User - Xerox M118i | User Guide - Page 97
Services feature, refer to the System Administration Guide. Some of the CentreWare Internet Services CentreWare Internet Services are as follows. OS Windows 98SE Windows Me Windows NT 4.0 Windows 2000 Windows XP Windows Server 2003 5.2 Netscape 7.02 Xerox CopyCentre/WorkCentre 118 User Guide 97 - Xerox M118i | User Guide - Page 98
all pages. The header includes the CentreWare Internet Services logo and the model of the machine. Just under buttons. These are [Jobs], [Status], [Properties], [Maintenance], and [Support]. You can navigate through the pages when you click the text on Xerox CopyCentre/WorkCentre 118 User Guide - Xerox M118i | User Guide - Page 99
Status - page 101 Properties - page 102 Maintenance - page 115 Support - page 115 This page displays a list of active and . Delete You can delete the selected job. NOTE: In some instructions, the deletion of jobs might be ignored. Follow the steps below Xerox CopyCentre/WorkCentre 118 User Guide 99 - Xerox M118i | User Guide - Page 100
7 CentreWare Internet Services Status Displays the status of the job. Job Type Displays the type of job. Quantity Displays the number of interface is unknown or not specified. Date/Time Completed Displays the date and time that the job was completed. 100 Xerox CopyCentre/WorkCentre 118 User Guide - Xerox M118i | User Guide - Page 101
in 25% increments. Paper Size Displays the size of paper loaded in each tray. Paper Type Displays the type of paper loaded in each tray. Xerox CopyCentre/WorkCentre 118 User Guide 101 - Xerox M118i | User Guide - Page 102
the machine properties. These include the machine details and configuration, the CentreWare Internet Services settings, the port settings, protocol settings, emulation settings as well as the changes have been entered, click [Apply New Settings]. 102 Xerox CopyCentre/WorkCentre 118 User Guide - Xerox M118i | User Guide - Page 103
only available after you reboot the machine from CentreWare Internet Services or after the machine is switched off and on. as well as the emulation in use. Available Printer Language Displays the printer language used by the machine and its version Xerox CopyCentre/WorkCentre 118 User Guide 103 - Xerox M118i | User Guide - Page 104
you can enter for text searches of the Address Book is different between CentreWare Internet Services and the control panel. Communication Mode - Allows you to select the communication mode. - Enter a password of not more than 20 digits for the F Code. 104 Xerox CopyCentre/WorkCentre 118 User Guide - Xerox M118i | User Guide - Page 105
- Enter a 4 to 12 digit number for the password. Black Account Limit - Allows you to configure the limitation of black and white prints for each account. Xerox CopyCentre/WorkCentre 118 User Guide 105 - Xerox M118i | User Guide - Page 106
different ports used in the printer. For more information about these ports, refer to the System Administration Guide. Parallel Select the check box Notice Services Select the check box to enable. Internet Services Select the check box to enable. 106 Xerox CopyCentre/WorkCentre 118 User Guide - Xerox M118i | User Guide - Page 107
the time when the paper will be automatically ejected if no data is sent to the printer. Adobe Communication Protocol - This is only displayed when PostScript is enabled. Select one of communication protocols involve both ASCII and binary formats. Xerox CopyCentre/WorkCentre 118 User Guide 107 - Xerox M118i | User Guide - Page 108
This is only displayed when PostScript is enabled. Unicode Support - Allows you to configure whether to notify the host the printer server mode in directory service. • Bindery: PServer Mode: Select this when using the printer server mode in bindery service. Xerox CopyCentre/WorkCentre 118 User Guide - Xerox M118i | User Guide - Page 109
method for obtaining the IP address by selecting the drop down menu to access the following options. • Manual: The user will specify all the addresses. • DHCP: The address will automatically be set via DHCP. setting of the DNS server address via DHCP. Xerox CopyCentre/WorkCentre 118 User Guide 109 - Xerox M118i | User Guide - Page 110
7 CentreWare Internet Services Feature name Protocol Settings Setting Specifies the time-out period when transmission fails. SNMP When accessing the printer via SNMP, configure the following options on this page: Community Name the Key Operator. 110 Xerox CopyCentre/WorkCentre 118 User Guide - Xerox M118i | User Guide - Page 111
user password. Up to 64 characters can be entered. Re-enter Password - Allows you to verify the configured password by re-entering the same password. Xerox CopyCentre/WorkCentre 118 User Guide 111 - Xerox M118i | User Guide - Page 112
7 CentreWare Internet Services Feature name Protocol -out period when transmission fails. Print Mode This page allows you to specify the printer language to use when a print job is sent using Parallel, USB, EtherTalk, enable/disable image enhancement. 112 Xerox CopyCentre/WorkCentre 118 User Guide - Xerox M118i | User Guide - Page 113
, for the PCL mode. HexDump - Allows you to enable/disable hexadecimal dump for the PCL mode. Image Enhancement - Allows you to enable/disable image enhancement. Xerox CopyCentre/WorkCentre 118 User Guide 113 - Xerox M118i | User Guide - Page 114
7 CentreWare Internet Services Feature name Memory Settings Setting items This page allows you to change the settings for the free space available increments. PCL Memory Enter the PCL working memory within the range of 0-24576 KB in 256 KB increments. 114 Xerox CopyCentre/WorkCentre 118 User Guide - Xerox M118i | User Guide - Page 115
the error code. Information is displayed in the form of xxx-yyy. Support This page displays the link to the customer support web site. The Left and Right Panel on this page contain the following name is "admin" and default password is "x-admin". Xerox CopyCentre/WorkCentre 118 User Guide 115 - Xerox M118i | User Guide - Page 116
7 CentreWare Internet Services 116 Xerox CopyCentre/WorkCentre 118 User Guide - Xerox M118i | User Guide - Page 117
on configurable paper sizes and media types for each tray, refer to Supported Paper Sizes on page 121 and Supported Paper Types on page 123. For information on the acceptable range of paper active paper tray. 1. Pull out the paper tray towards you. Xerox CopyCentre/WorkCentre 118 User Guide 117 - Xerox M118i | User Guide - Page 118
to their new position. To secure the guides in position, release the levers. NOTE: Tray 1 can only be loaded with plain paper. Tray 2,3, and 4 can be loaded with a variety of different media stock. When changing the type of stock in the tray, refer to Supported Paper Types on page 123. For more - Xerox M118i | User Guide - Page 119
will enter the machine first. However, when loading C5-size envelopes, set the LEF so that the edge with the flaps is facing toward you. Xerox CopyCentre/WorkCentre 118 User Guide 119 - Xerox M118i | User Guide - Page 120
the side guides towards the Damaged, curled, or damp paper can cause jams and image quality problems. Follow these simple rules to store paper: • Store paper in used. • Re-wrap partly used packages of paper. NOTE: Paper should not be stored in the paper trays. Supported Paper Sizes and Types This - Xerox M118i | User Guide - Page 121
following table lists the paper sizes supported for each paper tray and duplex O O O SEF A3 SEF 297 420 O O O O O O O O O 3.5 × 5.5" 88.9 139.7 X O X X O X X O X SEF Post Card 152.4 101.6 X O X X O X X O X LEF Xerox CopyCentre/WorkCentre 118 User Guide 121 - Xerox M118i | User Guide - Page 122
Width Length Tray 1-4 Not available Tray 5 (Bypass Tray) 89 to 297 mm 3.5 to 11.7" 98 to 432 mm 3.9 to 17.0" Duplex Kit Not available 122 Xerox CopyCentre/WorkCentre 118 User Guide - Xerox M118i | User Guide - Page 123
The following table lists the paper types supported for each paper tray and duplex kit. Paper Type Tray 1 Tray 2, 3, 4 Tray 5 ( Select this option when paper curls or other printing problems occur due to high temperature in the fuser unit when Xerox CopyCentre/WorkCentre 118 User Guide 123 - Xerox M118i | User Guide - Page 124
8 Paper and Other Media 124 Xerox CopyCentre/WorkCentre 118 User Guide - Xerox M118i | User Guide - Page 125
press the button. NOTE: The default password is "11111". To change the password, refer to Change Password on page 126. 4. Perform the necessary operations. Xerox CopyCentre/WorkCentre 118 User Guide 125 - Xerox M118i | User Guide - Page 126
the control panel. 4. Press the button. 5. Confirm the password by entering the same password as you entered in step 3. 6. Press the button. 126 Xerox CopyCentre/WorkCentre 118 User Guide - Xerox M118i | User Guide - Page 127
such as placing the machine into the power saver mode or for clearing the programming selections on the machine when a specified period of time passes. Xerox CopyCentre/WorkCentre 118 User Guide 127 - Xerox M118i | User Guide - Page 128
when a toggle button is pressed and is set to the reference position. Job Complete Specify whether to activate the tone when a job finishes successfully. 128 Xerox CopyCentre/WorkCentre 118 User Guide - Xerox M118i | User Guide - Page 129
the machine nearly runs out of toner. Alert Specify whether to activate the tone when a problem occurs such as a paper jam, toner shortage, or fax transmission error. Line Monitor Specify is selected, specify [Repeat Start] or [Repeat Interval]. Xerox CopyCentre/WorkCentre 118 User Guide 129 - Xerox M118i | User Guide - Page 130
Table on page 198. The daylight saving, as well as the date and time format, for the printer feature must be specified separately. Refer to Machine Clock on page 143. NOTE: Before changing the country code list to confirm the appropriate country code. 130 Xerox CopyCentre/WorkCentre 118 User Guide - Xerox M118i | User Guide - Page 131
features is enabled, users need to enter password to display the [System Settings] screen, or use the copy, fax, and e-mail features on the machine. Xerox CopyCentre/WorkCentre 118 User Guide 131 - Xerox M118i | User Guide - Page 132
the printer, you need to change the setting of [Auditron (Print)] using CentreWare Internet Services. For how to change the setting, refer to Auditron (Print) in the CentreWare Internet Services chapter does not display. 6. Select the required option. 132 Xerox CopyCentre/WorkCentre 118 User Guide - Xerox M118i | User Guide - Page 133
] on the [System Settings] screen using the button. 2. Press the button. 3. Select the required option using the button. 4. Press the button. Xerox CopyCentre/WorkCentre 118 User Guide 133 - Xerox M118i | User Guide - Page 134
the image for copying when [Lighten/Darken] is set to [Auto] for copying documents. Manual Adjust Specify the default density for copying documents. Paper Supply Specify which tray is to be used the document size, amount of reduction or enlargement. 134 Xerox CopyCentre/WorkCentre 118 User Guide - Xerox M118i | User Guide - Page 135
-sided copies from double-sided documents. Use this feature to specify the default method of sorting copy outputs when you make multiple sets of copies. Xerox CopyCentre/WorkCentre 118 User Guide 135 - Xerox M118i | User Guide - Page 136
this feature to specify the priority order of trays when Auto Tray is enabled. This feature is available when the optional trays are installed. 136 Xerox CopyCentre/WorkCentre 118 User Guide - Xerox M118i | User Guide - Page 137
, refer to the following. Network/Port - page 137 System Settings - page 142 Printer Settings - page 143 Allocate Memory - page 145 Initialize/Delete Data - page 146 4. Press the button. The selected option is indicated by an asterisk (*). Xerox CopyCentre/WorkCentre 118 User Guide 137 - Xerox M118i | User Guide - Page 138
each of these respective data types. • PJL - PJL commands are required when printing using the print driver. Specify whether to [Enable] or [Disable] PJL commands that are sent from the PC. • Connection 8000 and 9999. NetWare Use to set up NetWare. 138 Xerox CopyCentre/WorkCentre 118 User Guide - Xerox M118i | User Guide - Page 139
data types. • PJL - PJL commands are required when printing using the print driver. Specify whether to [Enable] or [Disable] PJL commands that are sent from the driver. Specify whether to [Enable] or [Disable] PJL commands that are sent from the PC. Xerox CopyCentre/WorkCentre 118 User Guide 139 - Xerox M118i | User Guide - Page 140
each of these respective data types. • PJL - PJL commands are required when printing using the print driver. Specify whether to [Enable] or [Disable] PJL commands that are sent from the PC. • the machine automatically detects the print language of the 140 Xerox CopyCentre/WorkCentre 118 User Guide - Xerox M118i | User Guide - Page 141
print driver. Specify printers. manually Services Specify whether or not to use Internet Services. When [Enable] is selected, CentreWare Internet Services can be used to display the machine status or job status, or change machine settings via a Web browser. Xerox CopyCentre/WorkCentre 118 User Guide - Xerox M118i | User Guide - Page 142
• Primary IP, Secondary IP - These items are used to confirm the automatically acquired address or manually set address. Enter addresses in the format xxx.xxx.xxx.xxx. Each group of 3 numbers ( option is indicated by an asterisk (*). Offline Auto Clear 142 Xerox CopyCentre/WorkCentre 118 User Guide - Xerox M118i | User Guide - Page 143
(hours/minutes) of the machine clock for the printer feature. The date and time to be set here Specify the date for the printer feature. • Set Time - Specify the time for the printer feature. • Data Format - Specify a summer time period, if necessary. Printer Settings Use this feature to specify the - Xerox M118i | User Guide - Page 144
Specify whether to print the first page on single-sided or double-sided paper when the total number of pages is an odd number. 144 Xerox CopyCentre/WorkCentre 118 User Guide - Xerox M118i | User Guide - Page 145
on the paper in the tray specified by the printer driver. • Select from tray Some applications create the PostScript program directly without using a printer driver. In this case, the paper tray may not within 64 to 1024 KB in 32 KB increments. Xerox CopyCentre/WorkCentre 118 User Guide 145 - Xerox M118i | User Guide - Page 146
for the Scan to E-mail feature. The password is on the inside cover of the Scan to E-mail Instructions. For more information on activating this feature, refer to the Scan to E-mail Quick Setup Guide. Fax Settings This screen allows you to configure and change the default settings for using the fax - Xerox M118i | User Guide - Page 147
button to clear the previous value. The date and time settings for the printer feature must be specified separately. Refer to Machine Clock on page 143. time period begins and ends. The daylight savings setting for the printer feature must be specified separately. Refer to Machine Clock on page 143 - Xerox M118i | User Guide - Page 148
option when sending a text document. • Fine - Scans the document using 8 × 7.7 lines/mm resolution. This option is recommended for detailed line art or small letters. 148 Xerox CopyCentre/WorkCentre 118 User Guide - Xerox M118i | User Guide - Page 149
] to enter the minutes (00 to 59) for the delayed start time. Receive Settings Use this feature to configure the default settings for receiving faxes. Xerox CopyCentre/WorkCentre 118 User Guide 149 - Xerox M118i | User Guide - Page 150
ones of received documents. • Not available Tray - Specify whether the tray is automatically selected or not for each tray when receiving a fax. Multiple-Up 150 Xerox CopyCentre/WorkCentre 118 User Guide - Xerox M118i | User Guide - Page 151
chapter on page 73. After selecting from the displayed F Code list, press the button. Then select the following items to continue the necessary settings. Xerox CopyCentre/WorkCentre 118 User Guide 151 - Xerox M118i | User Guide - Page 152
fax number of the machine, using the alphanumeric keypad on the control panel. Press the button to clear the previous value. Ext./Outside Line 152 Xerox CopyCentre/WorkCentre 118 User Guide - Xerox M118i | User Guide - Page 153
alphanumeric keypad on the control panel. Manual Receive Receives a fax manually. When you have communicated with a caller and confirm that the call is a fax job, press the button to receive a fax. out when the memory is insufficient. Xerox CopyCentre/WorkCentre 118 User Guide 153 - Xerox M118i | User Guide - Page 154
following. Resolution - page 155 Lighten/Darken - page 156 Reduce/Enlarge - page 156 Scan Size - page 156 File Format - page 157 Transmission Report - page 157 154 Xerox CopyCentre/WorkCentre 118 User Guide - Xerox M118i | User Guide - Page 155
dpi resolution for documents that contain both text and photographs. 600dpi Text/Photo Specifies a 600 dpi resolution for documents that contain both text and photographs. Xerox CopyCentre/WorkCentre 118 User Guide 155 - Xerox M118i | User Guide - Page 156
detected, refer to When Using the E-mail Feature in the Specifications chapter on page 205. Presets Allows you to select from the preset size. 156 Xerox CopyCentre/WorkCentre 118 User Guide - Xerox M118i | User Guide - Page 157
. After selecting [Customize Screens], select the item you want to rearrange using the button, and then select the new locations pressing the or button. Xerox CopyCentre/WorkCentre 118 User Guide 157 - Xerox M118i | User Guide - Page 158
1. Select [Create/Delete] on the [System Settings] screen using the button. 2. Select the required option using the buttons. 3. Press the button. 158 Xerox CopyCentre/WorkCentre 118 User Guide - Xerox M118i | User Guide - Page 159
- Enter the e-mail address using the alphanumeric keypad on the control panel. Index - Enter the index used to search the recipient name in Address Book. Xerox CopyCentre/WorkCentre 118 User Guide 159 - Xerox M118i | User Guide - Page 160
delete the entered name, and then enter the new name. Index Enter the index used to search the program name in the Address Book. 160 Xerox CopyCentre/WorkCentre 118 User Guide - Xerox M118i | User Guide - Page 161
name entry field screen, then select [Entry mode] to switch the character type and enter the name using the alphanumeric keypad on the control panel. Xerox CopyCentre/WorkCentre 118 User Guide 161 - Xerox M118i | User Guide - Page 162
document on a bulletin board. Remote Browse Specify whether or not a password is required to download a document from a bulletin board. Delete Deletes the selected bulletin board. 1*:You can also alphanumeric keypad on the control panel. Remote Input 162 Xerox CopyCentre/WorkCentre 118 User Guide - Xerox M118i | User Guide - Page 163
well as text and numbers. Select [Alphabet] for Entry Mode, press the button to display a list of symbols, then select a symbol using the button. Xerox CopyCentre/WorkCentre 118 User Guide 163 - Xerox M118i | User Guide - Page 164
9 Setups 164 Xerox CopyCentre/WorkCentre 118 User Guide - Xerox M118i | User Guide - Page 165
are available for the machine. To obtain supplies, contact your Xerox Sales Representative, giving your company name, the product number and clean the glass areas, use a lint-free cloth, lightly dampened with water or Xerox Lens and Mirror Cleaner. 2. Clean the white tabs, located on the under side - Xerox M118i | User Guide - Page 166
machine will display a warning message before the drum reaches the end of life. Order a replacement cartridge now to insure continuous operation. Country Part Number All countries 13R589 Removing the Old Drum Cartridge 1. Pull the front cover towards you to open it. A D 2. Open Tray 5 (bypass - Xerox M118i | User Guide - Page 167
cartridge is designed to be re-manufactured. To recycle used drum cartridges, return them to Xerox in the original packaging. Return labels are included with each new cartridge. Inserting the New to remove the black protective sheet from the cartridge. Xerox CopyCentre/WorkCentre 118 User Guide 167 - Xerox M118i | User Guide - Page 168
it. C Handle 5. Push the cartridge again so that it is correctly placed. C Tape 6. Close Cover A until it latches and then close Tray 5 (bypass tray). C 168 Xerox CopyCentre/WorkCentre 118 User Guide - Xerox M118i | User Guide - Page 169
to be replaced. When ordering a new cartridge, use the following table to determine the correct reorder code for your machine. Country All countries Part Number 6R1179 Removing the Old Toner Cartridge 1. Pull the front cover towards you to open it. A D 2. Hold the toner cartridge and pull it - Xerox M118i | User Guide - Page 170
up the toner inside. 3. Place the cartridge in position as shown and slide it into the machine until it clicks. A D 4. Close the front cover. A D 170 Xerox CopyCentre/WorkCentre 118 User Guide - Xerox M118i | User Guide - Page 171
and manage error messages and problems. It also contains troubleshooting steps to help resolve problems. Refer to the information contained in this chapter to resolve any problem solving issues. In addition, the Online Support Assistant (used by Xerox Customer Support staff) offers solutions for - Xerox M118i | User Guide - Page 172
11 Problem stops, sounds an alarm, and displays a message on the screen. Follow the instructions on the display and remove the jammed paper. Gently remove the paper taking care C B Exit Tray 1 Tray 2 (Optional) Tray 3 (Optional) Tray 4 (Optional) 172 Xerox CopyCentre/WorkCentre 118 User Guide - Xerox M118i | User Guide - Page 173
to reduce the potential for jams in the machine. • Use only recommended media. Refer to Supported Paper Sizes and Types in the Paper and Other Media chapter on page 120 and Machine Specifications in direction of the arrow to open the fuser unit cover. Xerox CopyCentre/WorkCentre 118 User Guide 173 - Xerox M118i | User Guide - Page 174
11 Problem Solving 3. Rotate the green lever A1 in the direction of the arrow to feed the paper from the top of the fuser unit. not touch the fuser unit because it may be hot. 4. Close the Cover A until it latches, and then close Tray 5 (bypass tray). 174 Xerox CopyCentre/WorkCentre 118 User Guide - Xerox M118i | User Guide - Page 175
steps below to clear paper jams in Cover C. 1. Open Cover C while lifting up the release lever. 2. Remove the jammed paper. 3. Close Cover C until it latches. Xerox CopyCentre/WorkCentre 118 User Guide 175 - Xerox M118i | User Guide - Page 176
11 Problem Solving Paper Jams in Cover D Follow the steps below to clear paper jams in the duplex kit. 1. Open Tray 5 (bypass tray), the release lever. 2. Remove the jammed paper. 3. Close Cover A until it latches, and then close Tray 5 (bypass tray). 176 Xerox CopyCentre/WorkCentre 118 User Guide - Xerox M118i | User Guide - Page 177
a document jams in the document feeder, the machine stops, and an error message is displayed on the screen. Clear the document jam according to the instructions displayed, and then reload the document in the document feeder. Paper Jams in the Document Feeder Cover 1. Pull up the knob to open the - Xerox M118i | User Guide - Page 178
11 Problem Solving 2. Remove the jammed document slowly. When the document jams tightly in the document feeder roller and cannot be the document feeder cover. 6. If the jam is still not cleared, lift the entire document feeder to inspect underneath. 178 Xerox CopyCentre/WorkCentre 118 User Guide - Xerox M118i | User Guide - Page 179
the document feeder cover. Troubleshooting Tables If you are experiencing difficulties using the machine, check the suggestions in the following tables for advice. If this does not remedy the problem, refer to Fault Clearance Procedure on page 171. Xerox CopyCentre/WorkCentre 118 User Guide 179 - Xerox M118i | User Guide - Page 180
Problem If a message is displayed, follow the instructions. If not, select [Error Information] on Set the documents, and then check that the side guides are not too tight. The machine does not display each paper tray. If this does not rectify the problem, then power the machine off and then on. The - Xerox M118i | User Guide - Page 181
Troubleshooting Tables Symptom Recommendation The machine displays a memory full error • Follow the steps below 1. Open the paper tray. 2. Move the paper tray guides away from the paper. 3. Move the paper tray guides against the paper so that they are just touching the paper. 4. Close the paper - Xerox M118i | User Guide - Page 182
11 Problem Solving Symptom Deformed transparencies Blank output Streaks, solid or dotted lines, or spots Paper delivered to an the document. • Load fresh paper. • Run off more prints until the copy quality improves. • Replace the drum cartridge. 182 Xerox CopyCentre/WorkCentre 118 User Guide - Xerox M118i | User Guide - Page 183
Troubleshooting Tables Symptom Recommendation Output is too light. • Set the [Lighten/Darken] feature to a darker setting. • quality of the documents. • Set the [Lighten/Darken] feature to a lighter or darker setting. • Replace the drum cartridge. Xerox CopyCentre/WorkCentre 118 User Guide 183 - Xerox M118i | User Guide - Page 184
11 Problem Solving Image loss Symptom Misfeeds in the Tray 5 (bypass tray) Jams in the document feeder Paper jams Paper curls Paper Other Media chapter for procedures. • Flip over the paper stack in the paper tray, or rotate it head to toe. 184 Xerox CopyCentre/WorkCentre 118 User Guide - Xerox M118i | User Guide - Page 185
a polling request when it should have sent a document. Ask the other party to set the document on their machine and send it to your machine. Xerox CopyCentre/WorkCentre 118 User Guide 185 - Xerox M118i | User Guide - Page 186
Problem The characters you entered (* and #) are not supported for pulse dialing. Check that the line type If the error cannot be resolved, contact the Xerox Welcome Center. The machine's memory is full error cannot be resolved, contact the Xerox Welcome Center. 700008 7001xx 71xxxx 7101xx 7103xx - Xerox M118i | User Guide - Page 187
Xerox Welcome Center. Check Xerox Welcome Center. Check the remote machine or the telephone line. If the error cannot be resolved, contact the Xerox Welcome Center. Check the remote machine or the telephone line. If the error cannot be resolved, contact the Xerox contact the Xerox Welcome - Xerox M118i | User Guide - Page 188
9D08xx 9D09xx 9Fxxxx 9F09xx Check the remote machine or the telephone line. If the error cannot be resolved, contact the Xerox Welcome Center. B0xxxx Turn the power off and on. If the error cannot be resolved, contact the Xerox Welcome Center. 188 Xerox CopyCentre/WorkCentre 118 User Guide - Xerox M118i | User Guide - Page 189
the error cannot be resolved, contact the Xerox Welcome Center. EP0001 EP0002 EP0003 EP0004 EP0005 FFF0xx Job successful. FFFCxx Job failed. S10000 Turn the power off and on. If the error cannot be resolved, contact the Xerox Welcome Center. Xerox CopyCentre/WorkCentre 118 User Guide 189 - Xerox M118i | User Guide - Page 190
11 Problem Solving Code Description and Corrective Action S10001 During document scanning, feeder cover. Z-10 Turn the power off and on. If the error cannot be resolved, contact the Xerox Welcome Center. 003-747, 016-799 The print parameter combination was wrong. Check the print data. 016- - Xerox M118i | User Guide - Page 191
printer driver. • Increase the size of the print page buffer. • Add on memory. An error occurred while ART EX processing. Instruct could not print the PDF file because it contains features not supported in the machine. Open the file in Adobe Reader and Xerox CopyCentre/WorkCentre 118 User Guide 191 - Xerox M118i | User Guide - Page 192
processing. Set for optimized speed in the print driver and try again. If this does not fix the problem, set for highest compatibility to ensure printing server does not support delivery confirmation (DSN). Send e-mail without setting confirmation. 192 Xerox CopyCentre/WorkCentre 118 User Guide - Xerox M118i | User Guide - Page 193
memory to print. 081-702 A fax transmission parameter was wrong. Check the settings of the print driver. 081-703 There was insufficient memory while transmitting a fax. Split the document to send, lower duplex kit. Refer to Paper Jams on page 172. Xerox CopyCentre/WorkCentre 118 User Guide 193 - Xerox M118i | User Guide - Page 194
conditions to ensure optimum copy performance. If you still cannot resolve the problem, contact the Key Operator. • Do not locate the machine in copier/printer, you can: 1) Refer to this guide. 2) Contact the Key Operator. 3) Visit our Customer Web Site at www.xerox.com or contact the Xerox Welcome - Xerox M118i | User Guide - Page 195
Xerox Welcome Center The Welcome Center will want to know the following information: the nature of the problem, the serial number of the machine, the fault code (if of the machine behind Cover A. For more information, refer to Xerox Welcome Center in the Before Using the Machine chapter on page 11 - Xerox M118i | User Guide - Page 196
11 Problem Solving 196 Xerox CopyCentre/WorkCentre 118 User Guide - Xerox M118i | User Guide - Page 197
without prior notice. For more information about the specifications, contact your Xerox Sales Representative. Machine Specifications Hardware Configuration Processor rack with scanner, cabinet A3/11 × 17" SEF: 7 cpm (cycles per minute) (double-sided) Xerox CopyCentre/WorkCentre 118 User Guide 197 - Xerox M118i | User Guide - Page 198
feeder. NOTE: If the document is not a standard size, or the size cannot be detected, the machine prompts you to select the paper tray. 198 Xerox CopyCentre/WorkCentre 118 User Guide - Xerox M118i | User Guide - Page 199
.9 × 279.4 mm) *5:Replaced with 8.5 × 14" (Legal)SEF (215.9 × 355.6 mm) *6:Replaced with 8.5 × 13" (Legal)SEF (215.9 × 330.2 mm) *7:Replaced with A5 SEF (148 × 210 mm) Xerox CopyCentre/WorkCentre 118 User Guide 199 - Xerox M118i | User Guide - Page 200
.9 × 431.8 O 215.9 × 139.7 (5.5 × 8.5" LEF) X 215.9 × 431.8 X 215.9 × 139.7 (5.5 × 8.5" LEF) X 215.9 × 431.8 X 257 × 215.9 X 215.9 × 279.4 O 297 × 210 (A4 LEF) O 215.9 × 279.4 (8.5 × 11" SEF (Letter)) 200 Xerox CopyCentre/WorkCentre 118 User Guide - Xerox M118i | User Guide - Page 201
" SEF) 257 (B4 SEF) 279.4 (11 × 17" SEF) 297 (A3 SEF) *1:Image loss may occur because the size for sending is smaller than actual one. Xerox CopyCentre/WorkCentre 118 User Guide 201 - Xerox M118i | User Guide - Page 202
Countries Canada and the United States 215.9 × 139.7 215.9 × 279.4 215.9 × 330.2 215.9 × 139.7 215.9 × 279.4 215.9 × 330.2 215.9 × 139.7 215.9 × 279.4 215.9 × 355.6 202 Xerox CopyCentre/WorkCentre 118 User Guide - Xerox M118i | User Guide - Page 203
Near East Countries Canada andthe United States 279.4 × 215.9 279.4 × 279.4 279.4 × 431.8 279.4 × 215.9 279.4 × 279.4 279.4 × 431.8 279.4 × 215.9 279.4 × 279.4 279.4 × 431.8 Xerox CopyCentre/WorkCentre 118 User Guide 203 - Xerox M118i | User Guide - Page 204
East Countries Canada andthe United States 297 × 210 297 × 420 297 × 420 297 × 210 297 × 420 297 × 420 297 × 210 297 × 420 297 × 420 204 Xerox CopyCentre/WorkCentre 118 User Guide - Xerox M118i | User Guide - Page 205
) X 279.4 × 431.8 (11 × 17" SEF) O 215.9 × 139.7 (5.5 × 8.5" LEF) X 279.4 × 431.8 (11 × 17" SEF) X 215.9 × 139.7 (5.5 × 8.5" LEF) X 279.4 × 431.8 (11 × 17" SEF) X 257 × 364 (B4 SEF) Xerox CopyCentre/WorkCentre 118 User Guide 205 - Xerox M118i | User Guide - Page 206
(A3 SEF) X 279.4 × 431.8 (11 × 17" SEF) O: Detectable X: Not detectable *1:Image loss may occur because the size for sending is smaller than actual one. 206 Xerox CopyCentre/WorkCentre 118 User Guide - Xerox M118i | User Guide - Page 207
(Legal) (215.9 × 355.6mm) • B4 SEF (257 × 364 mm) • Executive LEF (266.7 × 184.2 mm) • 11 × 17" SEF (279.4 × 431.8 mm) • A3 SEF (297 × 420 mm) Xerox CopyCentre/WorkCentre 118 User Guide 207 - Xerox M118i | User Guide - Page 208
) (215.9 × 355.6mm) • B4 SEF (257 × 364 mm) • Executive LEF (266.7 × 184.2 mm) • 11 × 17" SEF (279.4 × 431.8 mm) • A3 SEF (297 × 420 mm) 208 Xerox CopyCentre/WorkCentre 118 User Guide - Xerox M118i | User Guide - Page 209
) SEF to A3 (297 × 420 mm, 11.7 × 16.5 inches) SEF Paper Weight: 60-105 g/m2 (16.0-27.9 lb) NOTE: Transparencies and labels are not available. Xerox CopyCentre/WorkCentre 118 User Guide 209 - Xerox M118i | User Guide - Page 210
Time - ITU No. 1 document 33.6 Kbps (standard): 4 seconds Telephone Line Requirements Standard public analogue switched telephone line or equivalent Compatibility Super G3, ECM, G3 210 Xerox CopyCentre/WorkCentre 118 User Guide - Xerox M118i | User Guide - Page 211
Approvals EU/EEA: certified to TBR21 USA: approved to FCC Pt 68 Canada: approved to DOC CS-03 Other countries: certified to national PTT standards Xerox CopyCentre/WorkCentre 118 User Guide 211 - Xerox M118i | User Guide - Page 212
12 Specifications 212 Xerox CopyCentre/WorkCentre 118 User Guide - Xerox M118i | User Guide - Page 213
. For the changing procedure, refer to Country Code (ISO) on page 130. NOTE: For a code other than the listed countries, contact your Xerox Sales Representative. North America Countries Country Date and Code Time Format Canada Mexico United States 124 MMDDYYYY 484 DDMMYYYY 840 MMDDYYYY Latin - Xerox M118i | User Guide - Page 214
13 Appendix Western Europe Countries Country Date and Code Time Format Austria 040 DDMMYYYY Belgium 056 DDMMYYYY Denmark 208 DDMMYYYY Finland 246 DDMMYYYY France 250 DDMMYYYY Germany 276 DDMMYYYY Greece 300 DDMMYYYY Ireland 372 DDMMYYYY Italy 380 DDMMYYYY Malta 470 DDMMYYYY - Xerox M118i | User Guide - Page 215
Africa Countries Country Date and Code Time Format Algeria 012 DDMMYYYY Angola 024 DDMMYYYY Botswana 072 DDMMYYYY Burkina Faso 854 DDMMYYYY Burundi 108 DDMMYYYY Cameroon 120 DDMMYYYY Cape Verde 132 DDMMYYYY Central African 140 DDMMYYYY Republic Chad 148 DDMMYYYY Congo 178 - Xerox M118i | User Guide - Page 216
13 Appendix Cautions and Limitations Document Jams, Paper Jams, and Paper Out during Copying Follow the steps below if document jams, paper jams, or paper out occur during copying when [Uncollated] is set for [Output]. Document Jams 1. Remove the jammed document according to the displayed message. - Xerox M118i | User Guide - Page 217
no activity for a specified time. 364 × 257 mm paper. 257 × 182 mm paper. Units for measuring data transmission speed. Units for measuring data transmission speed. Xerox CopyCentre/WorkCentre 118 User Guide 217 - Xerox M118i | User Guide - Page 218
picture data (videotext) and PC data (PC communication service) over the same channel. In this guide, referred to as transmitting and receiving images as well . The methods of dialing provided by the machine include: manual dialing using the numeric keypad, Speed Dialing, One Touch Dialing, and using - Xerox M118i | User Guide - Page 219
page of documents. In this guide, the image data generated when an of the printer to perform the features of other printers. The and bulletin communications between facsimiles that support F Code protocol. Settings which or a report when a problem occurs. A document that is transferred from one - Xerox M118i | User Guide - Page 220
LEF) Low Power Mode Mailbox Mailbox Polling Manual Receive Facsimile communication systems standardized by the This is a communication protocol of the network layer and is supported by a variety of computer platforms. IP controls the routing job. 220 Xerox CopyCentre/WorkCentre 118 User Guide - Xerox M118i | User Guide - Page 221
an address. Non-volatile memory which allows the settings of the printer to be retained even when power is off. Dialing after pressing the button. This feature enables the line monitor so you edge of the paper runs from top to bottom. Xerox CopyCentre/WorkCentre 118 User Guide 221 - Xerox M118i | User Guide - Page 222
the standard for desktop publishing because it is widely supported by both hardware and software vendors. Energy saver modes display on the control panel. It provides user information and instructions. Specifies whether the Copy screen or the Fax screen is Xerox CopyCentre/WorkCentre 118 User Guide - Xerox M118i | User Guide - Page 223
e-mail. A form of abbreviated dialing of a number by entering a 3-digit code. In this guide, used for storing a scanned document image in memory. To store a document in memory until it page1/copy2, page2/copy1, page2/copy2, page3/ copy1, page3/copy2. Xerox CopyCentre/WorkCentre 118 User Guide 223 - Xerox M118i | User Guide - Page 224
14 Glossary 224 Xerox CopyCentre/WorkCentre 118 User Guide - Xerox M118i | User Guide - Page 225
31, 210 CentreWare Internet Services 97 accessing 98 features 98 Jobs tab 99 Maintenance tab 115 Properties tab 102 Status tab 101 Support 115 target computers 97 Chain Cover D 172 Current 40 Customize Screens 136, 154, 157 Xerox CopyCentre/WorkCentre 118 Quick Reference Guide 225 - Xerox M118i | User Guide - Page 226
resolution capability 211 resolution conversion 211 telephone line requirements 210 transmission speed 210 Fax Transmitting indicator 33 File Format 92, 157 Front Cover 31 226 Xerox CopyCentre/WorkCentre 118 Quick Reference Guide - Xerox M118i | User Guide - Page 227
I Image Rotation 136 Initialize Data 145 Internet Services Settings - CWIS 106 J Job Complete tone 45 Report/List 42 Mailbox 80, 162 Maintenance 165 Manual Dial button 33 Media Available Settings 150 Memory Settings guides 118 Paper Type 136 Xerox CopyCentre/WorkCentre 118 Quick Reference - Xerox M118i | User Guide - Page 228
150 Print Driver Features 95 Print Limit 151 Print Mode 45 Print Settings 137 Printer Settings 143 Priority Send 75 Problem Solving 171 Saver 128 Print Date/Time 150 Print Limit 151 Print Settings 137 Printer Settings 143 procedures 125 Receive Settings 149 Redial 149 Reduce/Enlarge - Xerox M118i | User Guide - Page 229
, 157 Transmitting indicator 33 Tray 1 31, 32 Tray 1 to 4 32 Tray 2 31 Tray 3 31 Tray 4 31, 32 Tray 5 31 Tray Priority 136 Trays - CWIS 101 Troubleshooting Tables 179 U Uncollated output 60 X Xerox Welcome Center 11, 194 Xerox CopyCentre/WorkCentre 118 Quick Reference Guide 229 - Xerox M118i | User Guide - Page 230
15 Index 230 Xerox CopyCentre/WorkCentre 118 Quick Reference Guide
-
 1
1 -
 2
2 -
 3
3 -
 4
4 -
 5
5 -
 6
6 -
 7
7 -
8
-
9
-
10
-
11
-
12
-
13
-
14
-
15
-
16
-
17
-
18
-
19
-
20
-
21
-
22
-
23
-
24
-
25
-
26
-
27
-
28
-
29
-
30
-
31
-
32
-
33
-
34
-
35
-
36
-
37
-
38
-
39
-
40
-
41
-
42
-
43
-
44
-
45
-
46
-
47
-
48
-
49
-
50
-
51
-
52
-
53
-
54
-
55
-
56
-
57
-
58
-
59
-
60
-
61
-
62
-
63
-
64
-
65
-
66
-
67
-
68
-
69
-
70
-
71
-
72
-
73
-
74
-
75
-
76
-
77
-
78
-
79
-
80
-
81
-
82
-
83
-
84
-
85
-
86
-
87
-
88
-
89
-
90
-
91
-
92
-
93
-
94
-
95
-
96
-
97
-
98
-
99
-
100
-
101
-
102
-
103
-
104
-
105
-
106
-
107
-
108
-
109
-
110
-
111
-
112
-
113
-
114
-
115
-
116
-
117
-
118
-
119
-
120
-
121
-
122
-
123
-
124
-
125
-
126
-
127
-
128
-
129
-
130
-
131
-
132
-
133
-
134
-
135
-
136
-
137
-
138
-
139
-
140
-
141
-
142
-
143
-
144
-
145
-
146
-
147
-
148
-
149
-
150
-
151
-
152
-
153
-
154
-
155
-
156
-
157
-
158
-
159
-
160
-
161
-
162
-
163
-
164
-
165
-
166
-
167
-
168
-
169
-
170
-
171
-
172
-
173
-
174
-
175
-
176
-
177
-
178
-
179
-
180
-
181
-
182
-
183
-
184
-
185
-
186
-
187
-
188
-
189
-
190
-
191
-
192
-
193
-
194
-
195
-
196
-
197
-
198
-
199
-
200
-
201
-
202
-
203
-
204
-
205
-
206
-
207
-
208
-
209
-
210
-
211
-
212
-
213
-
214
-
215
-
216
-
217
-
218
-
219
-
220
-
221
-
222
-
223
-
224
-
225
-
226
-
227
-
228
-
229
-
230
 |
 |
C118
M118/M118i
WorkCentre
CopyCentre
User Guide
701P42721_EN