Canon PC720 Service Manual - Page 134
pick-up gear
 |
View all Canon PC720 manuals
Add to My Manuals
Save this manual to your list of manuals |
Page 134 highlights
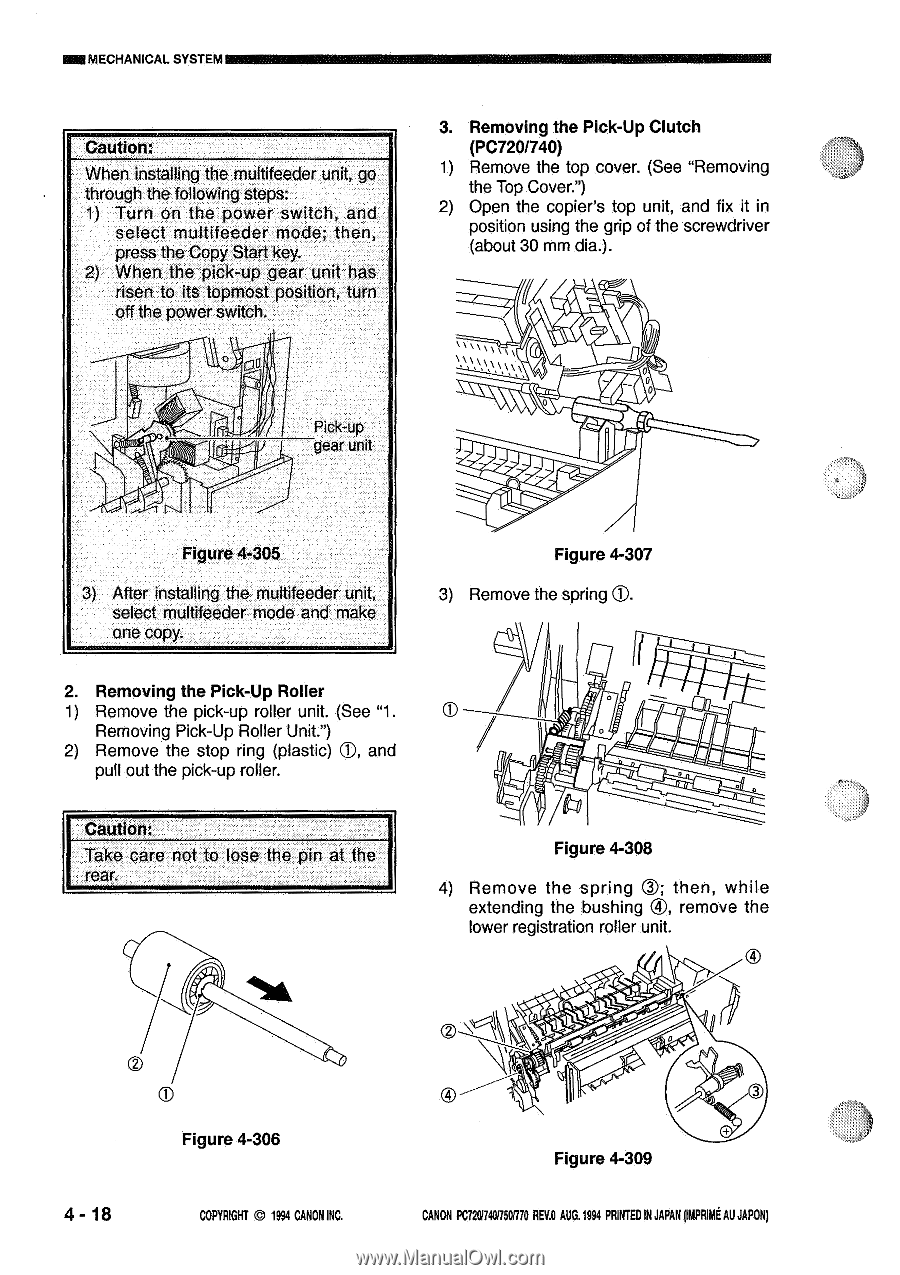
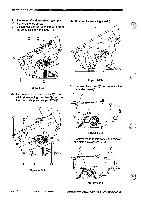
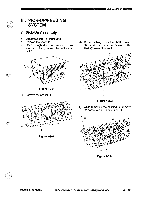
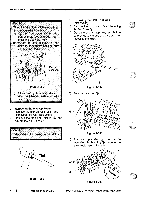
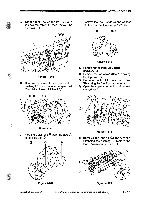
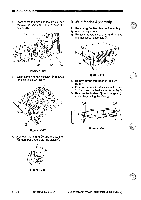
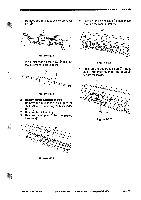
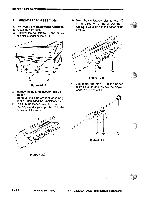
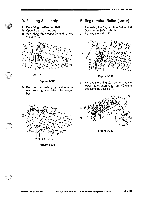
INSMECHANICAL SYSTEM Caution: When installing the multifeeder unit, go through the following steps: 1) Turn on the power switch, and select multifeeder mode; then, press the Copy Start key. 2) When the pick-up gear unit has risen to its topmost position, turn off the power switch. O pO Pick-up gear unit 3. Removing the Pick-Up Clutch (PC720/740) 1) Remove the top cover. (See "Removing the Top Cover.") 2) Open the copier's top unit, and fix it in position using the grip of the screwdriver (about 30 mm dia.). 000 0 Figure 4-305 3) After installing the multifeeder unit, select multifeeder mode and make one copy. Figure 4-307 3) Remove the spring C). 2. Removing the Pick-Up Roller 1) Remove the pick-up roller unit. (See "1. Removing Pick-Up Roller Unit.") 2) Remove the stop ring (plastic) C), and pull out the pick-up roller. Caution: Take care not to lose the pin at the rear. ill Figure 4-308 4) Remove the spring (D; then, while extending the bushing ®, remove the lower registration roller unit. C.) 4 - 18 Figure 4-306 COPYRIGHT © 1994 CANON INC. O 3 Figure 4-309 CANON PC7201740/7501770 REVD AUG.1994 PRINTED IN JAPAN DMPRIME AU JAPON)
-
 1
1 -
2
-
3
-
4
-
5
-
6
-
7
-
8
-
9
-
10
-
11
-
12
-
13
-
14
-
15
-
16
-
17
-
18
-
19
-
20
-
21
-
22
-
23
-
24
-
25
-
26
-
27
-
28
-
29
-
30
-
31
-
32
-
33
-
34
-
35
-
36
-
37
-
38
-
39
-
40
-
41
-
42
-
43
-
44
-
45
-
46
-
47
-
48
-
49
-
50
-
51
-
52
-
53
-
54
-
55
-
56
-
57
-
58
-
59
-
60
-
61
-
62
-
63
-
64
-
65
-
66
-
67
-
68
-
69
-
70
-
71
-
72
-
73
-
74
-
75
-
76
-
77
-
78
-
79
-
80
-
81
-
82
-
83
-
84
-
85
-
86
-
87
-
88
-
89
-
90
-
91
-
92
-
93
-
94
-
95
-
96
-
97
-
98
-
99
-
100
-
101
-
102
-
103
-
104
-
105
-
106
-
107
-
108
-
109
-
110
-
111
-
112
-
113
-
114
-
115
-
116
-
117
-
118
-
119
-
120
-
121
-
122
-
123
-
124
-
125
-
126
-
127
-
128
-
 129
129 -
 130
130 -
 131
131 -
 132
132 -
 133
133 -
 134
134 -
 135
135 -
 136
136 -
 137
137 -
 138
138 -
 139
139 -
140
-
141
-
142
-
143
-
144
-
145
-
146
-
147
-
148
-
149
-
150
-
151
-
152
-
153
-
154
-
155
-
156
-
157
-
158
-
159
-
160
-
161
-
162
-
163
-
164
-
165
-
166
-
167
-
168
-
169
-
170
-
171
-
172
-
173
-
174
-
175
-
176
-
177
-
178
-
179
-
180
-
181
-
182
-
183
-
184
-
185
-
186
-
187
-
188
-
189
-
190
-
191
-
192
-
193
-
194
-
195
-
196
-
197
-
198
-
199
-
200
 |
 |