Canon PC720 Service Manual - Page 145
thereafter
 |
View all Canon PC720 manuals
Add to My Manuals
Save this manual to your list of manuals |
Page 145 highlights
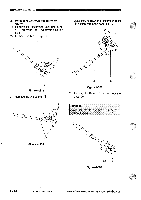
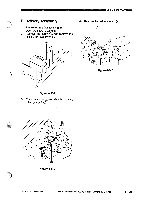
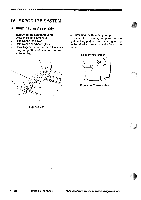
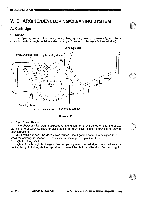
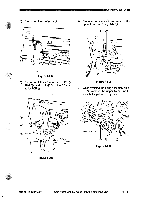
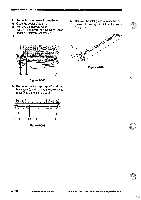
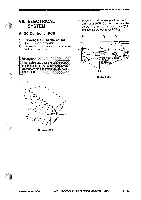
MECHANICAL SYSTEM! 2. Cleaning the Drum Caution: As a rule, do not clean or touch the photosensitive drum. B. Transfer corona Assembly 1. Removing the Transfer Charging Roller 1) Open the copier's top unit. 2) Remove the screw T. 1) Open the copier's top body, and remove the cartridge. 2) Put the cartridge upside down, and open the drum shutter. 3) Clean the surface of the drum using a cloth coated with toner. Caution: 1. The drum must always bp rotated in the direction it rotates when making copies. Rotating it in the opposite direction will displace the leaf spring used to apply a developing bias to the developing cylinder. 2. Do not use paper, lint-free or others, to avoid damage to the drum; use a flannel cloth. 3. Work quickly to limit the exposure of the drum to light. Reference: If the drum is exposed to light of 1500 lux (general lighting) for 5 min and left alone thereafter in a dark place for 5 min, it is likely to recover to a level that will not cause any practical problems; however, take all measures necessary to avoid exposure. (The direct rays of the sun, in passing, is as strong as 10,000 to 30,000 lux.) O Figure 4-502 3) While disengaging the claw ® of the bushing, remove the transfer charging roller ©. 3 LZt- Figure 4-503 Caution: Do not touch the roller surface; take care not to soil the roller surface. COPYRIGHT © 1994 CANON INC. CANON PC720f7401750/710 REV.O AUG.1994 PRINTEDIN JAPAN1IMPRIME AUJAPON) 4 - 29
-
 1
1 -
2
-
3
-
4
-
5
-
6
-
7
-
8
-
9
-
10
-
11
-
12
-
13
-
14
-
15
-
16
-
17
-
18
-
19
-
20
-
21
-
22
-
23
-
24
-
25
-
26
-
27
-
28
-
29
-
30
-
31
-
32
-
33
-
34
-
35
-
36
-
37
-
38
-
39
-
40
-
41
-
42
-
43
-
44
-
45
-
46
-
47
-
48
-
49
-
50
-
51
-
52
-
53
-
54
-
55
-
56
-
57
-
58
-
59
-
60
-
61
-
62
-
63
-
64
-
65
-
66
-
67
-
68
-
69
-
70
-
71
-
72
-
73
-
74
-
75
-
76
-
77
-
78
-
79
-
80
-
81
-
82
-
83
-
84
-
85
-
86
-
87
-
88
-
89
-
90
-
91
-
92
-
93
-
94
-
95
-
96
-
97
-
98
-
99
-
100
-
101
-
102
-
103
-
104
-
105
-
106
-
107
-
108
-
109
-
110
-
111
-
112
-
113
-
114
-
115
-
116
-
117
-
118
-
119
-
120
-
121
-
122
-
123
-
124
-
125
-
126
-
127
-
128
-
129
-
130
-
131
-
132
-
133
-
134
-
135
-
136
-
137
-
138
-
139
-
 140
140 -
 141
141 -
 142
142 -
 143
143 -
 144
144 -
 145
145 -
 146
146 -
 147
147 -
 148
148 -
 149
149 -
 150
150 -
151
-
152
-
153
-
154
-
155
-
156
-
157
-
158
-
159
-
160
-
161
-
162
-
163
-
164
-
165
-
166
-
167
-
168
-
169
-
170
-
171
-
172
-
173
-
174
-
175
-
176
-
177
-
178
-
179
-
180
-
181
-
182
-
183
-
184
-
185
-
186
-
187
-
188
-
189
-
190
-
191
-
192
-
193
-
194
-
195
-
196
-
197
-
198
-
199
-
200
 |
 |
