Canon PIXMA MP830 User's Guide - Page 47
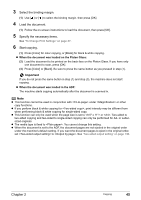
Select the binding margin., Load the document., Specify the necessary items., Start copying.
 |
View all Canon PIXMA MP830 manuals
Add to My Manuals
Save this manual to your list of manuals |
Page 47 highlights
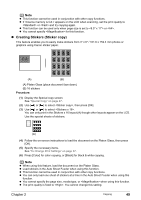
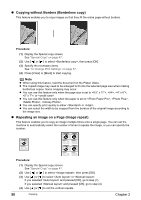
3 Select the binding margin. (1) Use [ ] or [ ] to select the binding margin, then press [OK]. 4 Load the document. (1) Follow the on-screen instructions to load the document, then press [OK]. 5 Specify the necessary items. See "To Change Print Settings" on page 37. 6 Start copying. (1) Press [Color] for color copying, or [Black] for black & white copying. z When the document was loaded on the Platen Glass: (2) Load the document to be printed on the back face on the Platen Glass. If you have only one document to scan, press [OK]. (3) Press [Color] or [Black]. Be sure to press the same button as you pressed in step (1). Important If you do not press the same button in step (1) and step (3), the machine does not start copying. z When the document was loaded in the ADF: The machine starts copying automatically after the document is scanned in. Note z This function cannot be used in conjunction with under or other copy functions. z If you perform black & white copying for , print intensity may be different from when performing black & white copying for single-sided copy. z This function can only be used when the page size is set to or . Two-sided to two-sided copying and two-sided to single-sided copying can only be performed for A4- or Lettersized originals. z The media type is fixed to . You cannot change this setting. z When the document is set to the ADF, the document pages are not ejected in the original order under the machine's default setting. If you want the document pages to eject in the original order, set to . See "Two-sided output setting" on page 136. Chapter 2 Copying 45
-
 1
1 -
2
-
3
-
4
-
5
-
6
-
7
-
8
-
9
-
10
-
11
-
12
-
13
-
14
-
15
-
16
-
17
-
18
-
19
-
20
-
21
-
22
-
23
-
24
-
25
-
26
-
27
-
28
-
29
-
30
-
31
-
32
-
33
-
34
-
35
-
36
-
37
-
38
-
39
-
40
-
41
-
 42
42 -
 43
43 -
 44
44 -
 45
45 -
 46
46 -
 47
47 -
 48
48 -
 49
49 -
 50
50 -
 51
51 -
 52
52 -
53
-
54
-
55
-
56
-
57
-
58
-
59
-
60
-
61
-
62
-
63
-
64
-
65
-
66
-
67
-
68
-
69
-
70
-
71
-
72
-
73
-
74
-
75
-
76
-
77
-
78
-
79
-
80
-
81
-
82
-
83
-
84
-
85
-
86
-
87
-
88
-
89
-
90
-
91
-
92
-
93
-
94
-
95
-
96
-
97
-
98
-
99
-
100
-
101
-
102
-
103
-
104
-
105
-
106
-
107
-
108
-
109
-
110
-
111
-
112
-
113
-
114
-
115
-
116
-
117
-
118
-
119
-
120
-
121
-
122
-
123
-
124
-
125
-
126
-
127
-
128
-
129
-
130
-
131
-
132
-
133
-
134
-
135
-
136
-
137
-
138
-
139
-
140
-
141
-
142
-
143
-
144
-
145
-
146
-
147
-
148
-
149
-
150
-
151
-
152
-
153
-
154
-
155
-
156
-
157
-
158
-
159
-
160
-
161
-
162
-
163
-
164
-
165
-
166
-
167
-
168
-
169
-
170
-
171
-
172
-
173
-
174
-
175
-
176
-
177
-
178
-
179
-
180
-
181
-
182
-
183
-
184
-
185
-
186
-
187
-
188
-
189
-
190
-
191
-
192
-
193
-
194
-
195
-
196
-
197
-
198
-
199
-
200
-
201
-
202
-
203
-
204
-
205
-
206
-
207
-
208
-
209
-
210
-
211
-
212
-
213
-
214
-
215
-
216
-
217
-
218
-
219
-
220
-
221
-
222
 |
 |