Canon VIXIA HG20 VIXIA HG20 / VIXIA HG21 Instruction Manual - Page 41
Changing the Number of Items in the Index Screen, Selecting Scenes by Recording Date
 |
View all Canon VIXIA HG20 manuals
Add to My Manuals
Save this manual to your list of manuals |
Page 41 highlights
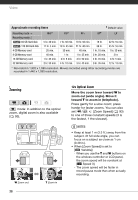
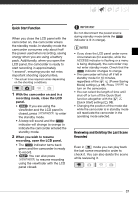
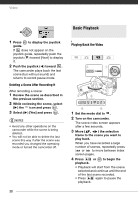
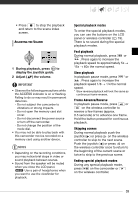
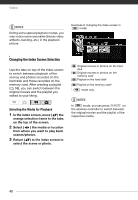
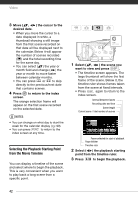
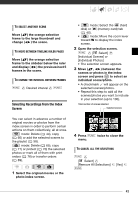
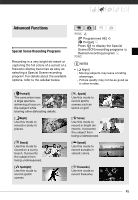
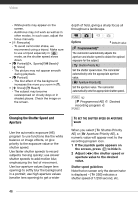
Changing the Number of Items in the Index Screen By default, the index screen will show up to 6 items (scenes or photos). Move the zoom lever toward W to show up to 15 items per screen. Move it toward T to return to the default index screen display. W 6 scenes/photos T 15 scenes/photos Selecting Scenes by Recording Date From the original movies index screen, you can search for recordings you made on a particular date (for example, to find all the movies you shot during a special event). Selecting from the List of Recordings 1 Select the original movies index screen. Select the (hard disk) or (memory card) tab ( 40). 2 Open the list of recordings. FUNC. [ Scene Search] [Date Selection] • The list of recordings displays all dates in which recordings were made. An orange selection frame appears on the day. • The thumbnail shows a still image from the first scene recorded on that day. Below it will appear the number of scenes recorded ( ) and the total recording time for the same day. 3 Select ( ) the date, month or year and move ( ) between recording dates. 4 After selecting the desired date, press . The index screen will appear with the selection frame on the first scene recorded on the selected date. NOTES You can press FUNC. to return to the index screen at any time. Selecting from the Calendar Screen 1 Select the original movies index screen. Select the (hard disk) or (memory card) tab ( 40). 2 Open the calendar screen. FUNC. [ Scene Search] [Calendar Screen] • The calendar screen appears. • Dates that contain scenes (that is, movies were recorded on that date) appear in white. Dates without recordings appear in black. 41
-
 1
1 -
2
-
3
-
4
-
5
-
6
-
7
-
8
-
9
-
10
-
11
-
12
-
13
-
14
-
15
-
16
-
17
-
18
-
19
-
20
-
21
-
22
-
23
-
24
-
25
-
26
-
27
-
28
-
29
-
30
-
31
-
32
-
33
-
34
-
35
-
 36
36 -
 37
37 -
 38
38 -
 39
39 -
 40
40 -
 41
41 -
 42
42 -
 43
43 -
 44
44 -
 45
45 -
 46
46 -
47
-
48
-
49
-
50
-
51
-
52
-
53
-
54
-
55
-
56
-
57
-
58
-
59
-
60
-
61
-
62
-
63
-
64
-
65
-
66
-
67
-
68
-
69
-
70
-
71
-
72
-
73
-
74
-
75
-
76
-
77
-
78
-
79
-
80
-
81
-
82
-
83
-
84
-
85
-
86
-
87
-
88
-
89
-
90
-
91
-
92
-
93
-
94
-
95
-
96
-
97
-
98
-
99
-
100
-
101
-
102
-
103
-
104
-
105
-
106
-
107
-
108
-
109
-
110
-
111
-
112
-
113
-
114
-
115
-
116
-
117
-
118
-
119
-
120
-
121
-
122
-
123
-
124
-
125
-
126
-
127
-
128
-
129
-
130
-
131
-
132
-
133
-
134
-
135
 |
 |
