Canon VIXIA HG20 VIXIA HG20 / VIXIA HG21 Instruction Manual - Page 58
Editing the Playlist: Adding, Moving and Deleting Playlist Scenes, Adding Scenes to the Playlist - editing software
 |
View all Canon VIXIA HG20 manuals
Add to My Manuals
Save this manual to your list of manuals |
Page 58 highlights
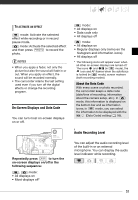
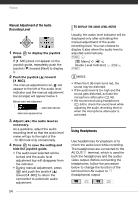
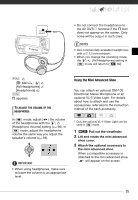
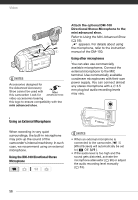
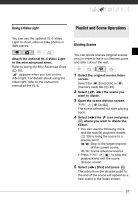
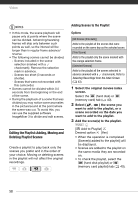
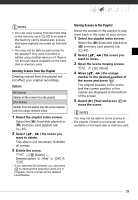
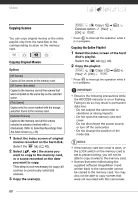
Video NOTES • In this mode, the scene playback will pause only at points where the scene can be divided. Advancing/reversing frames will skip only between such points as well, so the interval will be longer than in regular frame advance/ reverse. • The following scenes cannot be divided: - Scenes included in the scene selection (marked with a checkmark). Remove the selection mark in advance. - Scenes too short (3 seconds or shorter). - Scenes that were not recorded with this camcorder. • Scenes cannot be divided within 0.5 seconds from the beginning or the end of the scene. • During the playback of a scene that was divided you may notice some anomalies in the picture/sound at the point where the scene was cut. To avoid this, you can use the supplied software ImageMixer 3 to divide and edit scenes. Editing the Playlist: Adding, Moving and Deleting Playlist Scenes Create a playlist to play back only the scenes you prefer and in the order of your choice. Moving or deleting scenes in the playlist will not affect the original recordings. Adding Scenes to the Playlist Options [All Scenes (this date)] Adds to the playlist all the scenes that were recorded on the same day as the selected scene. [This Scene] Adds to the playlist only the scene marked with the orange selection frame. [Selected Scenes] Adds to the playlist all the scenes selected in advance (marked with a checkmark). Refer to Selecting Recordings from the Index Screen ( 43). 1 Select the original movies index screen. Select the (hard disk) or (memory card) tab ( 40). 2 Select ( , ) the scene you want to add to the playlist, or a scene recorded on the date you want to add to the playlist. 3 Add the scene(s) to the playlist. FUNC. [ Add to Playlist] Desired option [Yes] • When the operation is completed [Scene(s) added to the playlist] will be displayed. • Scenes are added to the playlist on the same media they are recorded on. • To check the playlist, select the (hard disk playlist) or (memory card playlist) tab ( 40). 58
-
 1
1 -
2
-
3
-
4
-
5
-
6
-
7
-
8
-
9
-
10
-
11
-
12
-
13
-
14
-
15
-
16
-
17
-
18
-
19
-
20
-
21
-
22
-
23
-
24
-
25
-
26
-
27
-
28
-
29
-
30
-
31
-
32
-
33
-
34
-
35
-
36
-
37
-
38
-
39
-
40
-
41
-
42
-
43
-
44
-
45
-
46
-
47
-
48
-
49
-
50
-
51
-
52
-
 53
53 -
 54
54 -
 55
55 -
 56
56 -
 57
57 -
 58
58 -
 59
59 -
 60
60 -
 61
61 -
 62
62 -
 63
63 -
64
-
65
-
66
-
67
-
68
-
69
-
70
-
71
-
72
-
73
-
74
-
75
-
76
-
77
-
78
-
79
-
80
-
81
-
82
-
83
-
84
-
85
-
86
-
87
-
88
-
89
-
90
-
91
-
92
-
93
-
94
-
95
-
96
-
97
-
98
-
99
-
100
-
101
-
102
-
103
-
104
-
105
-
106
-
107
-
108
-
109
-
110
-
111
-
112
-
113
-
114
-
115
-
116
-
117
-
118
-
119
-
120
-
121
-
122
-
123
-
124
-
125
-
126
-
127
-
128
-
129
-
130
-
131
-
132
-
133
-
134
-
135
 |
 |